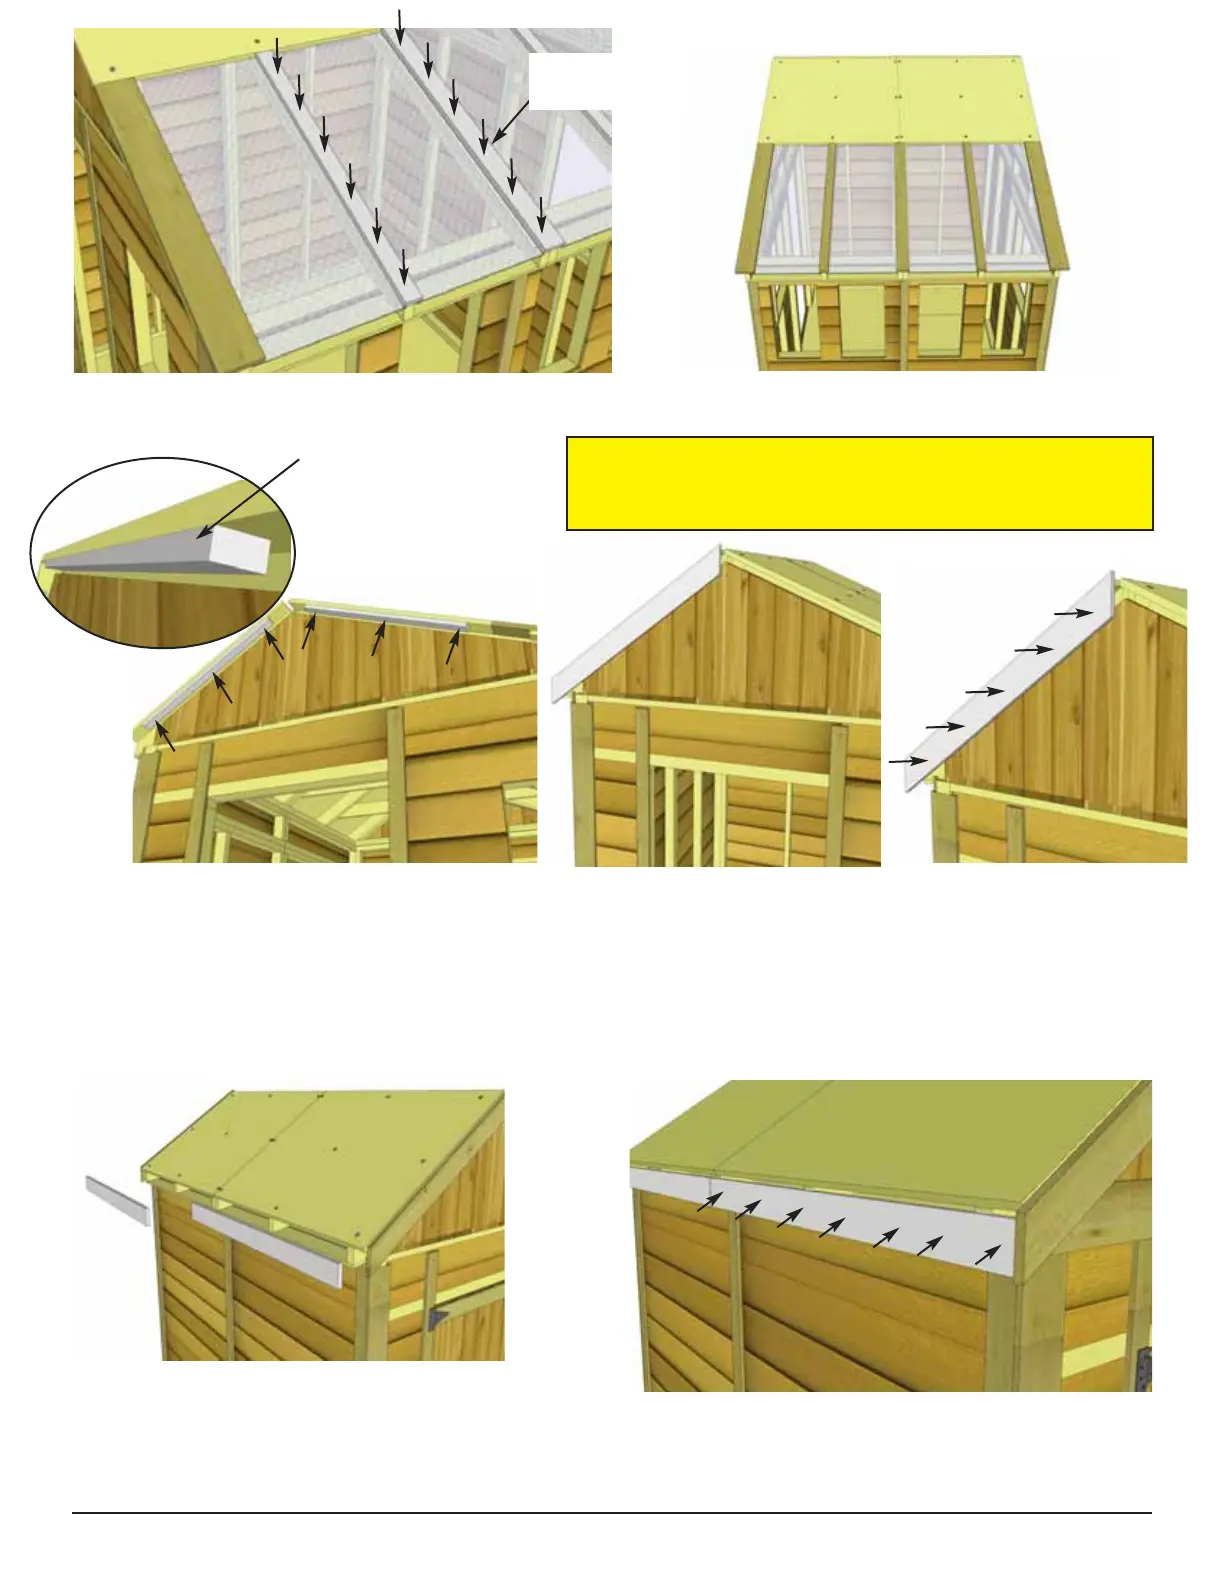
74. Align and attach remaining Ridge Caps as per Steps 72 & 73.
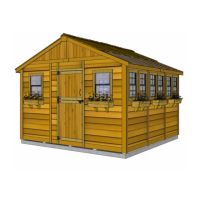
76. Attach Side Facia (4 @ 3/4” x 3 1/2” x 48 7/8”) to roof rafter ends. There are 2 Side Facia pieces
per side. Secure with 8 - 1 1/2” finishing nails per piece. Front and Rear Facia will overlap Side Facia.
Center Ridge
Cap (3 1/2” w)
Do a dry run with Front and Rear and Side Facia
(Steps 75-77) to confirm correct positioning prior to
attaching.
75. Attach Facia Nailing Strips (3/4” x 1 1/2” x 34”) to the outside of plywood roof sheathing using
3- 1 1/4” screws per piece. Do all outside roof panels.
Starting with the Short Roof side, attach Front and Rear Facia (3/4” x 3 1/2” x 38 3/4” angle cut on
ends) to end of roof plywood with 5 - 1 1/2” finishing nails per side. Facia end lines up with rafter
ends. Do a dry run with side facia in Step 76 before attaching.
Nailing strip
Edge of plywood roof.
Toll Free 1-888-658-1658 www.outdoorlivingtoday.com sales@outdoorlivingtoday.com
Page 30