EasyManua.ls Logo

Olympus D-340 R User Manual

Olympus D-340 R
4 pages
To Next Page IconTo Next Page
Page #1 background imageLoading...
Page #1 background image
Olympus
D - 340 R
Digital Camera
basics for getting started...
Batteries
Use 4 AA Alkaline or 4 NiMh (rechargeable) batteries
NOTE: Check what kind of batteries are in the camera when replacing
batteries. Do not accidentally dispose of rechargeable batteries and DO NOT
accidentally put AA Alkaline batteries in the recharger (They will explode).
Smart Media Card
Use a 16 MB Smart Media Card or less.
When Inserting a card into the camera
Do not touch the gold metalic part of the card.
Make sure the camera is turned off.
Open the Card compartment cover.
Insert the Card correctly. (The clipped corner should match the
illustration on the camers.
Close the cover tightly.
Turn On/Off
Turn camera on by opening the sliding lens cover.
Turn camera off by clossing the sliding lens cover.
K Martell Page 1 June 2004
Question and Answer IconNeed help?

Do you have a question about the Olympus D-340 R and is the answer not in the manual?

Olympus D-340 R Specifications

General IconGeneral
BrandOlympus
ModelD-340 R
CategoryDigital Camera
LanguageEnglish

Summary

Batteries

Battery Types and Precautions

Use AA Alkaline or NiMH batteries; avoid mixing or incorrect charging.

Smart Media Card

Card Compatibility and Insertion

Use a 16 MB or less Smart Media Card and follow correct insertion steps.

Camera Power Control

Power On/Off via Lens Cover

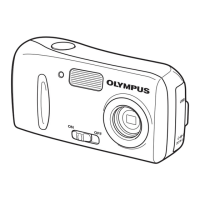
Turn the camera on or off by operating the sliding lens cover.

Camera Operation

Power On/Off via LCD Monitor

Use the ON/OFF green button on the LCD monitor to control power.

Taking Pictures Guide

Follow steps to open lens, focus, and shoot a picture.

Capacity and Photo Quality

Check remaining photo count and understand SQ, HQ, SHQ quality settings.

Reviewing Images

Navigate and view photos on the camera using the LCD monitor and buttons.

Erasing Photos

Erasing Photos from Smart Card

Erase photos using the camera to avoid formatting issues.

One Frame Erase Method

Select and erase a single photo using the +/- and OK buttons.

All Frame Erase Method

Erase all photos by pressing Erase and Flash buttons simultaneously.

Parts of the Camera

Front View Diagram

Identifies key buttons and components on the front of the camera.

Back View Diagram

Identifies key buttons and components on the back of the camera.
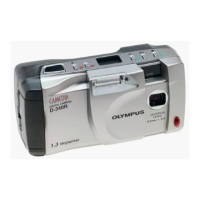
Related product manuals