Using OLYMPUS Master
42 EN
5 When the setup type selection screen is
displayed, click “Install”.
• To select the components to install, select
“Custom”.
• The installation begins. The screen confirming
that setup is completed is displayed. Click
“Close”.
• Next, the screen confirming whether to install
OLYMPUS muvee theaterPack Trial Version is
displayed. To install this software, click “Install”.
Macintosh
1 Insert the CD-ROM into the CD-ROM drive.
• The CD-ROM window is displayed.
• If the CD-ROM window is not displayed, double-click the
CD-ROM icon on the desktop.
2 Double-click the “Setup” icon on the desktop.
• The OLYMPUS Master installation screen is displayed.
• Follow the on-screen instructions.
• When the OLYMPUS Master licensing agreement is
displayed, read the agreement and click “Continue” and
then “Continue” to proceed with the installation.
• The screen confirming that installation is completed is displayed.
• You must restart your computer before using OLYMPUS Master.
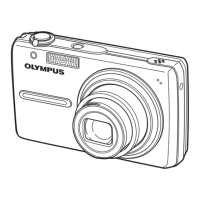
1 Make sure the camera is turned off.
• The monitor is off.
• The lens is retracted.
Connecting the camera to a computer
Monitor