27
EN
4 Repeat Step 3 to take a third frame.
● After the third frame is taken, the camera
automatically processes the frames and the
combined panorama image is displayed.
To exit the panorama function without saving an
image, press the button.
If the shutter does not automatically release, try
[Manual] or [PC].
Taking pictures with [Manual]
Taking pictures with [Manual]
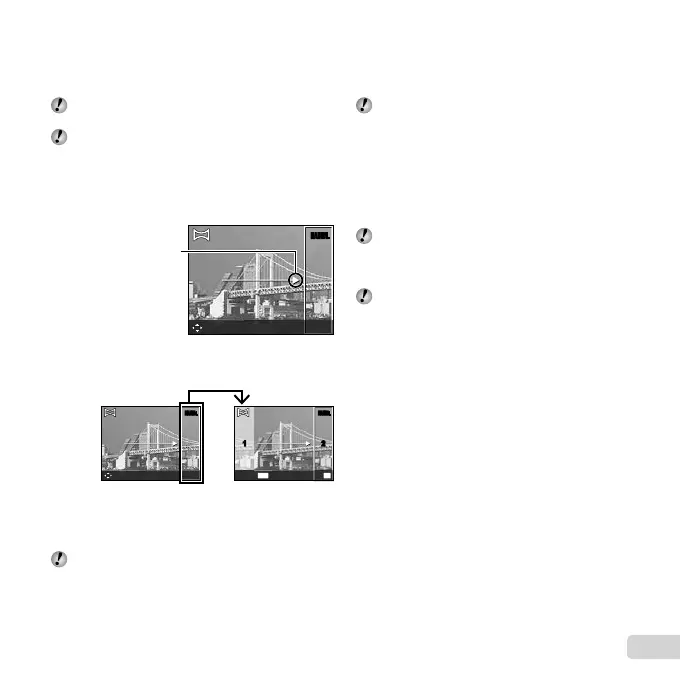
1 Use FGHI to specify at which edge the next
picture is to be connected.
Direction for combining
the next frame
MANUAL
MANUAL
2 Press the shutter button to take the fi rst frame. The
white-boxed part of the fi rst frame is displayed on joint
area 1.
1st frame
MANUALMANUAL
1 212
MANUALMANUAL
MENU
OK
SaveCancel
3 Compose the next shot so that joint area 1 overlaps
joint area 2.
4 Press the shutter button to take the next shot.
Press the A button to combine just 2 frames.
5 Repeat steps 3 and 4 to take a third frame.
● After the third frame is taken, the camera
automatically processes the frames and the
combined panorama image is displayed.
To exit the panorama function without saving an
image, press the button.
Taking pictures with [PC]
Taking pictures with [PC]
1 Use FGHI to select the direction that the frames
are combined.
2 Press the shutter button to take the fi rst frame, and
then point the camera for the second frame. The
shooting procedure is same as that of [Manual].
Panorama shooting is possible for up to 10 frames.
3 Repeat Step 2 until the number of desired frames is
taken, and then press the A button or button
when fi nished.
Refer to the PC software help guide for details on
how to make panorama images.