EasyManua.ls Logo

Olympus XA1 User Manual

Olympus XA1
7 pages
To Next Page IconTo Next Page
Page #1 background imageLoading...
Page #1 background image
ProSeal Instructions for All Olympus XA style Cameras
Please read these instructions completely before you start. Knowledge will increase your
confidence, and like most jobs, this is better done right the first time. I’ve tried to keep things
as easy and logical as possible while still providing a great amount of detail for you. Sealing your
camera is one of the best ways to restore it to like-new performance, and these are excellent
cameras. You have been given this set of instructions for any of several reasons. You should
have already read and understood the general directions which accompany my light seal kits.
You may need: (1) a safe surface to work on—cardboard, fiberboard, newspaper or anything else
handy—it is important to protect the surface beneath you. (2) Solvent. Naphtha (cigarette
lighter fluid) or denatured alcohol are my two favorites. (3) 2 or 3 paper towels. (4) some
toothpicks or your bamboo tool—a wooden cuticle stick is also handy. (5) a safety razor blade,
hobby knife, or small scissors and a metal straightedge. (6) a small screwdriver (7) a pair of
tweezers. Now, let's discuss the differences between the different XA styles. Please
understand it is not uncommon to find variations of light seal design or application within the
same style. The images below represent what I’ve observed as the most commonly occurring
light seal architecture within each XA model style or group:
~~XA Model~~
~~XA1 and XA2 Models~~
Question and Answer IconNeed help?

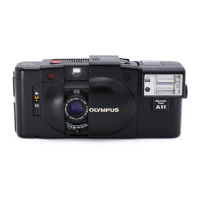
Do you have a question about the Olympus XA1 and is the answer not in the manual?

Olympus XA1 Specifications

General IconGeneral
BrandOlympus
ModelXA1
CategoryCamera Accessories
LanguageEnglish

Summary

Olympus XA Model Light Seal Configuration

XA Model Foam Placement

Details foam installation in both upper and lower film door slots for the XA model.

XA1 and XA2 Model Foam Placement

Explains foam in top slot and optional foam in bottom slot for XA1/XA2.

XA3 and XA4 Model Differences

XA3/XA4 Seal Configuration Details

Describes foam in top/bottom slots & hinge end, door seal only at latch for XA3/XA4.

Seal Material Choice

Recommended Seal Thickness

Specifies 1mm for XA/XA1/XA2 and 1.5mm for XA3/XA4 hinge end seals.

XA, XA1, XA2 Specific Procedures

Removing the Pressure Plate

Step-by-step guide on safely removing the pressure plate from specific XA camera models.

Removing the Film Door

Detailed instructions for detaching the film door on XA, XA1, and XA2 cameras.

Camera Cleaning and Preparation

Removing Old Seal Material

Techniques for cleaning old foam and adhesive from camera body and door using solvent.

Cleaning Rail Slots

Procedure for cleaning seal slots on the camera body using solvent-wet paper towel.

Applying New Light Seals

Installing Rail Slot Seals

Instructions for pressing new seal strips into camera body rail slots, including corners and trim points.

Replacing Film Door Seals (XA/XA1/XA2)

Guide for applying new seals to the film door hinge and edge for XA, XA1, XA2 models.

Installing Hinge/Latch Seals (XA3/XA4)

Method for fitting hinge end seal on XA3/XA4 and latch end seal on all models.

Finishing Touches and Measurement

Installing Top Seal Pieces

Method for cutting and placing two 1mm fabric pieces for the top seal on the film door.

Repainting Film Door & Seal Dimensions

Recommendations for repainting and provides specific seal measurements for different XA models.

Adhesive Activation & Gap Measurement

Explains adhesive licking and demonstrates gap measurement for seal selection.

Related product manuals