EasyManua.ls Logo

OMC Sterling 5020-54 - User Manual

OMC Sterling 5020-54
15 pages
Print Icon
To Next Page IconTo Next Page
Loading...
R E DI-B IL T B A R B E C UE S
1-800-265-2150 info@ omc bbq.com
5020-54/57
5120-54/57
6020-54/57
7020-54/57
7120-54/57
5130-54/57
6130-54/57
7130-54/57
5020-64/67
5120-64/67
6020-64/67
6120-64/67
7020-64/67
7120-64/67
5130-64/57
6130-64/57
7130-64/57
50084-E30 REVH 05/12
585 Kumpf Drive
Since 1906
RETAIN FOR FUTURE REFERENCE VEUILLEZ CONSERVER POUR REFERENCE ULTERIEURE
ASSEMBLY MANUAL & PARTS LIST MANUEL DE MONTAGE & LISTE DE PIECES
Question and Answer IconNeed help?

Do you have a question about the OMC Sterling 5020-54 and is the answer not in the manual?

Summary

OMC Barbecue Product Overview

Sterling Series Models

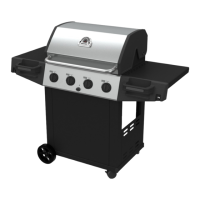
Identification of Sterling series barbecue models with corresponding part numbers.

Huntington Series Models

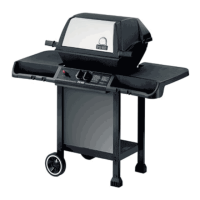
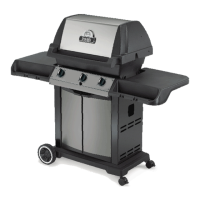
Identification of Huntington series barbecue models with corresponding part numbers.

Broil-Mate Series Models

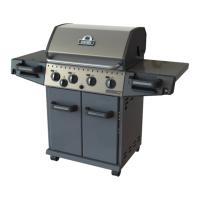
Identification of Broil-Mate series barbecue models with corresponding part numbers.

Initial Assembly Steps

Step 1: Base Frame Assembly

Assemble the base frame using bolts and nuts as illustrated in Step 1.

Step 2: Component Attachment to Base

Secure initial components to the base using screws and washers as shown in Step 2.

Mid-Assembly Components

Step 3: Side Panel Support Assembly

Attach side panel supports using screws as depicted in Step 3.

Step 4: Main Body Structure Assembly

Continue assembling the main body structure with screws as shown in Step 4.

Body and Internal Structure Assembly

Step 5: Attaching Side Panels

Fasten side panels to the main structure using screws as per Step 5.

Step 6: Securing Internal Components

Install internal components using bolts, screws, and nuts as shown in Step 6.

Wheel and Final Assembly Views

Step 7: Wheel Installation

Attach the wheels to the barbecue base as illustrated in Step 7.

Step 8: Overall Assembly Progress

View of the barbecue assembly progress after initial structural steps.

Detail Assembly Operations

Step 9: Chain and Fastener Installation

Install chain and other fasteners as shown in Step 9.

Step 10: Knob and Panel Attachment

Attach control knobs and side panels to the barbecue as per Step 10.

Panel and Bracket Assembly

Step 11: Securing Front Panels

Fasten front panels to the barbecue structure using screws as shown in Step 11.

Step 12: Bracket and Support Fixings

Install brackets and supports using screws as illustrated in Step 12.

Gas Line and Grate Installation

Step 13: Gas Line Connection

Connect the gas line and regulator assembly as detailed in Step 13.

Final Component Installation

Step 14: Grate and Panel Assembly

Install cooking grates and side panels using appropriate fasteners as shown in Step 14.

Accessory and Fuel Assembly

Step 15: Side Shelf Attachment

Attach the side shelves to the barbecue structure as illustrated in Step 15.

Step 16: Propane Tank Connection

Connect the propane tank to the barbecue system as shown in Step 16.

Exploded Parts Views

Main Body Exploded View

Diagram showing the exploded view of the main barbecue body and its components.

Component Identification Diagram

Illustration identifying various parts with corresponding key numbers for assembly.

Detailed Component Breakdown

Lower Assembly Exploded View

Exploded view detailing the lower section of the barbecue and its parts.

Wheel and Caster Assembly Detail

Close-up illustration of wheel and caster assembly components.

OMC Sterling 5020-54 Specifications

General IconGeneral
BrandOMC
ModelSterling 5020-54
CategoryGrill
LanguageEnglish

Related product manuals