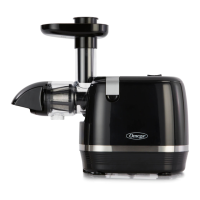
NG
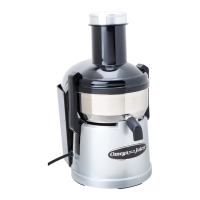
TO ASSEMBLE
NOTE: For best results, go through the assembly procedures, carefully
noting all cautionary points and hints, which are included for your
understanding and benefit.
STEP 1 Place bowl on motor base housing with spout facing you and
in the middle of the two raised projections.
STEP 2 Place strainer basket inside bowl, making certain that it rests
flat on platform center hex nut.
STEP 3 Insert cutter blade inside strainer basket with teeth up
centering it over hex nut.
STEP 4 Tighten clutch nut finger tight.
STEP 5 Insert optional filter liner into strainer basket.
STEP 6 Place cover on bowl with feeder chute opening to rear.
STEP 7 Place tabs of both latch arms over cover and secure.
STEP 8 Insert plunger in cover opening.
TO DISASSEMBLE
STEP 1 Remove plunger from cover opening.
STEP 2 Release both side latch arms by inserting finger into side
opening at bottom of the motor base and pulling upward.
STEP 3 Remove cover.
STEP 4 Unscrew clutch nut by turning counter-clockwise.
STEP 5 Lift out cutter blade from inside strainer basket.
STEP 6 Remove strainer basket.
STEP 7 Remove bowl.

 Loading...