293 Wright St. • Delavan, WI 53115
Phone: 800.937.6664
www.omnifilter.com
Tools and Fittings Required
Pencil
2 Adjustable wrenches or pipe wrenches
File
Safety glasses
Pipe cutter or hacksaw
Pipe threader
Appropriate fittings and pipe to
install filter
3/4-inch compression fittings for
copper pipe
Teflon
®
tape
NOTES:
Galvanized fittings must be used with
galvanized pipe.
Use Teflon
®
Tape for threaded connections
•
•
•
•
•
•
•
•
•
•
•
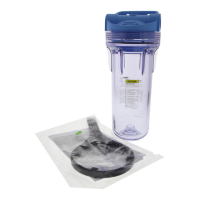
Models OB1 Series A,
OB5 Series A & R12 Series A
Complete Household
Water Filter
INSTALLATION INSTRUCTIONS
English . . . . . . . . . . . . . . . . . . . . . . . . . . . . . . . . . . . . . Pages 2-5
Replacement Parts . . . . . . . . . . . . . . . . . . . . . . . . . . . . . Page 5
Modelos OB1 serie A,
OB5 serie A y R12 serie A
Filtro de agua completo
para uso doméstico
INSTRUCCIONES DE INSTALACIÓN
Español . . . . . . . . . . . . . . . . . . . . . . . . . . . . . . . . . Paginas 7-10
Piezas de Repuesto . . . . . . . . . . . . . . . . . . . . . . . . . . . Pagina 10
Modèles OB1 série A,
OB5 série A & R12 série A
Filtre à eau domestique complet
INSTRUCTIONS D’INSTALLATION
Français . . . . . . . . . . . . . . . . . . . . . . . . . . . . . . . . . Pages 11-14
Piéces de Rechange . . . . . . . . . . . . . . . . . . . . . . . . . . . . Page 14
For further operating, installation, parts or
maintenance assistance:
Call OMNIFILTER Customer Service at:
800.937.6664
Para mayor información sobre la operación,
instalación o el mantenimiento:
Llame al Servicio al Cliente de OMNIFILTER:
800.937.6664
Pour de tout autre renseignement concernant le
fonctionnement, l’installation ou l’entretien :
Appelez le service à la clientèle en
composant le : 800.937.6664
Outils et raccords nécessaires
Crayon de bois
2 clés à molettes ou clés à tube
Lime
Lunettes de sécurité
Coupe-tube ou scie à métaux
Filière à tuyaux
Raccords et tuyaux appropriés pour
l’installation du filtre
Raccord à compression de 3/4 po pour
tuyau de cuivre
Ruban Téflon
®
REMARQUES :
Les raccords galvanisés doivent être utilisés
sur des tuyaux galvanisés.
Mettez du ruban Téflon
®
sur les
raccords filetés.
•
•
•
•
•
•
•
•
•
•
•
Herramientas y conexiones necesarias
Lápiz
2 llaves ajustables o llaves para tubos
Lima
Gafas de seguridad
Cortador de tubos o sierra para
cortar metales
Roscadora de tubos
Conexiones y tubos adecuados para
instalar el filtro
Conexiones a compresión de 3/4 de
pulgada para tuberías de cobre
Cinta de Teflon
®
NOTAS:
Las tuberías galvanizadas deben usar
conexiones galvanizadas.
Use cinta de Teflon
®
en las conexiones
roscadas.
•
•
•
•
•
•
•
•
•
•
•
©2006 OMNIFILTER • Printed in U.S.A.