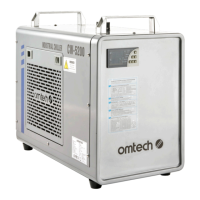
The Omtech CW-5200 Industrial Chiller is a robust and essential piece of equipment designed to provide efficient cooling for various industrial applications, particularly laser engravers. Its primary function is to maintain a stable and appropriate temperature for the connected machinery, thereby preventing overheating and ensuring optimal performance and longevity of the equipment. The chiller achieves this through a refrigeration system that circulates a cooling medium, typically distilled water or a specialized laser-safe antifreeze, through the connected device.
Usage Features:
The CW-5200 chiller is designed for straightforward operation, with several features that enhance user experience and safety. Before initial use, it is crucial to fill the water tank with an adequate amount of distilled water or laser-safe antifreeze. Deionized water is a suitable alternative, but tap water should be avoided due to its potential for scaling and microbial growth, which can shorten the lifespan of the chiller and the cooled device. The chiller should be placed in a dry, well-ventilated area, away from direct heat sources, but warm enough to prevent the cooling medium from freezing. Adequate clearance around the chiller is necessary for proper airflow: at least 1 foot (30 cm) of open space next to its side air inlets and 1 foot 8 inches (50 cm) above its top air outlet. When used with a laser engraver, it's important to ensure that the chiller's operation does not cause the room's humidity to exceed safe levels, potentially requiring additional ventilation in smaller spaces.
Connecting the chiller to the device to be cooled is a simple process: the chiller's water outlet port connects to the inlet of the product, and the chiller's water inlet port connects to the product's water outlet. After connecting, plugging in the power cable and turning on the chiller initiates the pump's operation. Initially, some bubbles may be observed, which should dissipate within a minute or two. The chiller's fans and other components are automatically controlled and will only activate when needed to maintain the set temperature. A water level gauge is provided to monitor the cooling medium level, which should be maintained between the middle and top of the green area. It's important to note that "FULL" on the gauge indicates an overfilled state. The water level may drop after initial setup as the cooling path in the connected device fills; users should add more water carefully if needed. A sharp or continuous drop in water level during normal use indicates a potential leak in the water pipes or cooling path, requiring immediate shutdown and inspection.
The chiller features a control panel that allows users to monitor and adjust various parameters. The panel displays the actual temperature and the set temperature. Indicator lights provide status updates for the compressor (Comp), solenoid valve (SV), heating rod (Heating), intelligent control mode (INT Ctrl), constant temperature mode (CT Ctrl), parameter setting mode (PARAM Set), alarm status (ALM OUT), room temperature (Room Temp), and startup delay (ST DLA). The "ALM OUT" light illuminates when an alarm is sounding, and the alarm noise can be muted by pressing any button on the control panel.
Temperature adjustment is intuitive: pressing the "SET" button enters settings mode, allowing users to modify the desired water temperature using the up and down arrows. The "RST" button saves and exits the settings, while pressing "SET" again exits without saving. If no activity is detected for 20 seconds, the settings mode will automatically exit. The set temperature is displayed on the lower readout, and the chiller will gradually adjust the actual water temperature to match.
For advanced settings, a password protection feature is included. Users can access advanced parameters by entering a password. Once in the advanced settings mode, users can cycle through parameters using the up and down arrows and modify the current parameter. "RST" saves and exits, while "SET" or inactivity exits without saving. The chiller also offers a feature to restore factory settings by pressing and holding the up and down arrows simultaneously until "rE" is displayed while the chiller is in standby mode.
Maintenance Features:
Regular maintenance is crucial for the longevity and efficient operation of the CW-5200 chiller. The air filter should be cleaned regularly with a soft cloth or vacuum to remove dust and debris, ensuring optimal airflow and cooling performance. Periodically, the inside of the inlet and outlet hoses should be cleaned to prevent clogs. This can be done by soaking the hoses in a mild detergent solution with a low concentration of biocide (e.g., bleach) for 8-24 hours, followed by thorough rinsing with tap water before reinstallation.
The water tank also requires periodic cleaning with a mild detergent solution and a low concentration of biocide to prevent and remove scaling, which can impede cooling efficiency. Before transporting the chiller or placing it in storage, it is essential to disconnect it from its power supply and drain all water from the tank and cooling system. This prevents potential damage from freezing or water stagnation during periods of inactivity.
The chiller includes a troubleshooting section that addresses common issues and error messages. For instance, if the chiller does not turn on, users are advised to check electrical connections, the fuse box, and the circuit breaker. Condensation on the chiller suggests the chilling temperature may be too low or the ambient room temperature too high. Slow water drainage can often be resolved by opening the water tank inlet to allow air to flow more freely. Scaling in the water tank requires cleaning with a mixture of water, mild detergent, and bleach.
Error messages, displayed as codes (E1-E6), provide specific diagnostic information. E1 indicates high ambient room temperature. E2 signifies high water temperature, potentially due to insufficient refrigerant, obstructed airflow, a clogged filter, inadequate space around vents, an unstable power supply, excessive heat load from the cooled machine, or poor parameter configuration. E3 indicates low water temperature. E4 and E5 point to malfunctions in the room temperature sensor and water temperature sensor, respectively. E6 signals a water flow problem, which could be caused by low water levels, obstructions, or a pump malfunction. These error codes guide users in identifying and resolving issues promptly, ensuring continuous and safe operation of the chiller.