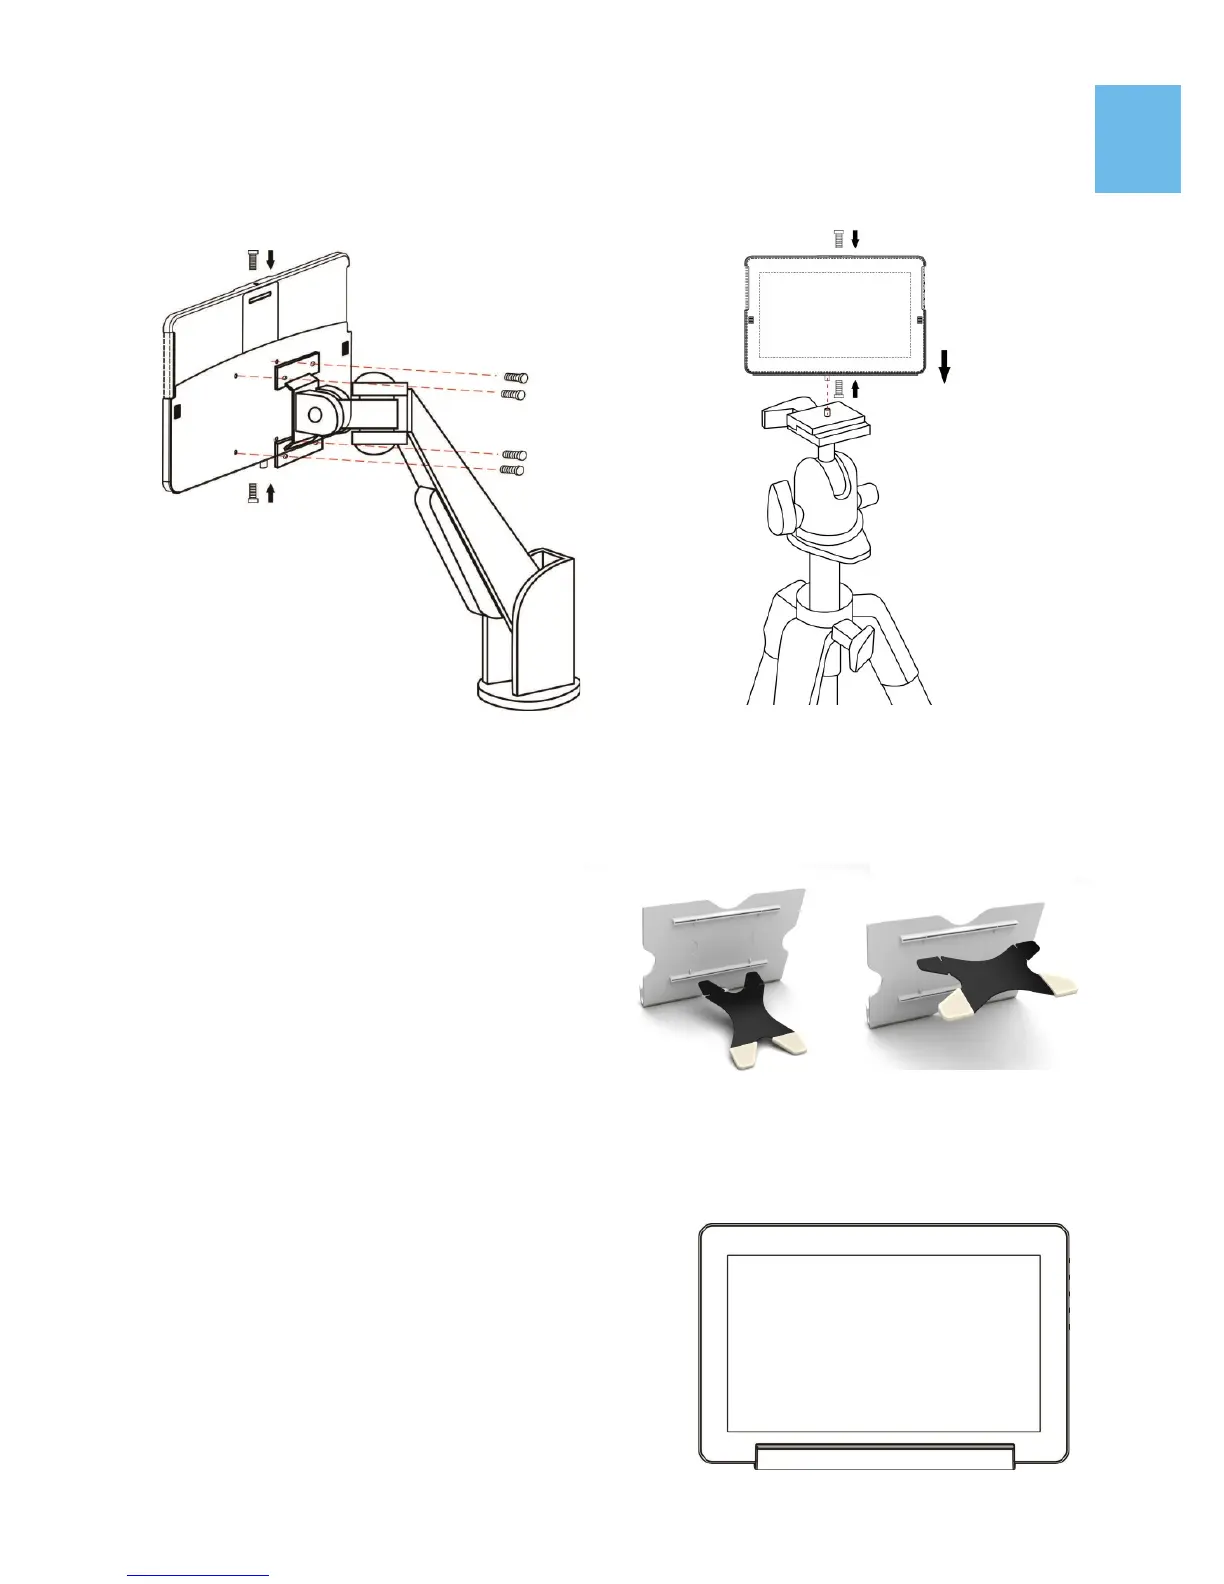
2 VESA 100 Kit Installation (Optional)
First Screw the VESA100 Kit in VESA100 arm or camera cradle head/ tripod.
Place the Monitor into VESA 100 Kit, as shown in Fig, and secure the Monitor
by screwing in.
3 Install Stand 4 (optional)
Step 1 Assemble Stand 4
Select the desired angle placement
to assemble Stand 4. During as-
sembly, check if X plate is properly
inserted onto slot.
Step 2 Place On-Lap monitor onto Stand 4.
Stand 4 is positioned at the bottom center of
monitor.
6
Fig : Screw the VESA100 kit in VESA
arm. Put the Monitor in and secure it
by screws.
Fig : Screw the VESA100 kit in camera
cradle head. Put the Monitor in and
secure it by screws.
Fig : Install Stand 4
Fig : Place 1303 in Stand 4