© 2003 TMP, Inc.
www.musicpeopleinc.com
www.onstagestands.com
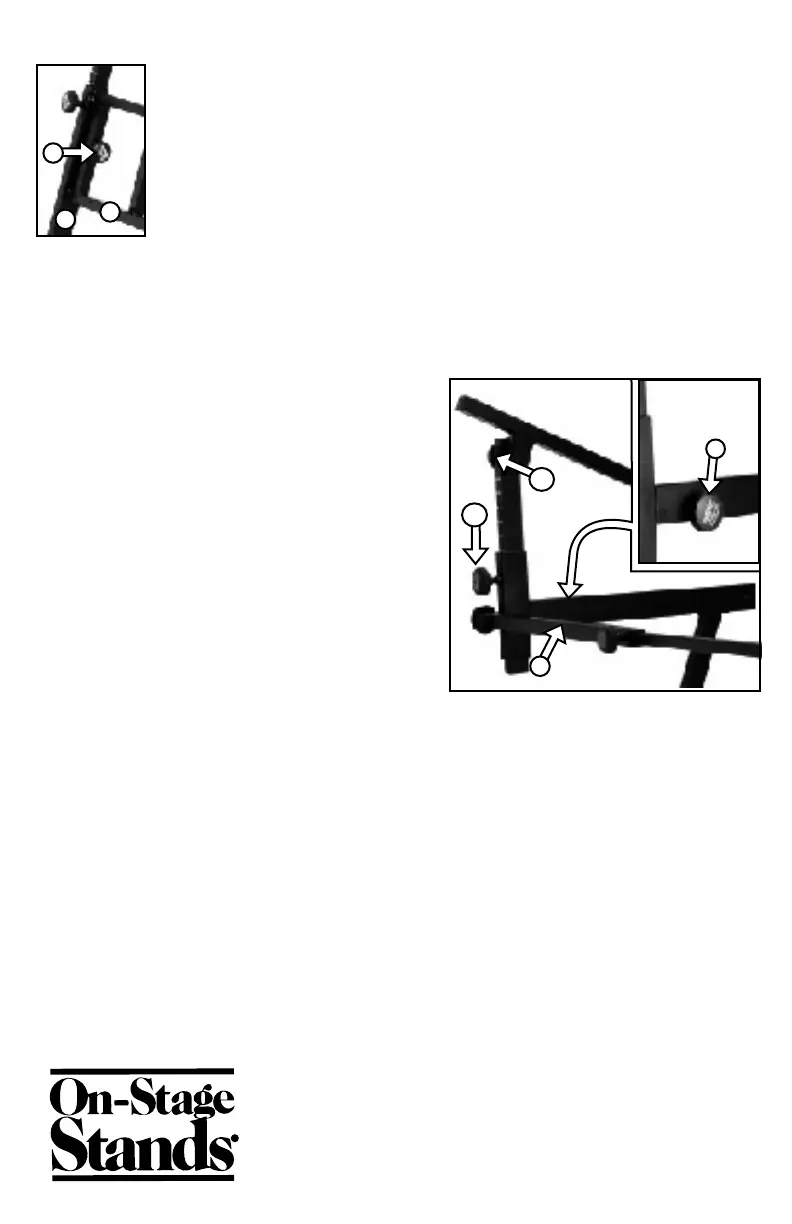
Assemble the Box Beam to the Folding-Z Legs
Be sure the round welded nut on the lower Folding-Z leg faces the
inside of the stand. Take the box beam (B) and thread knobs (E) into
the 2 Folding-Z legs (A) until secured in place.
[Tip: The knobs on the box beam should face the same direction
as the knobs on the Folding-Z legs for ease of set-up and
tear-down.]
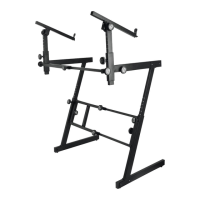
Adding the Second Tier to the Folding-Z Base
1.
Loosen the 2" knob (F2). Pull out the telescoping upper arm until any of the line-it-
up markers lines up with the top edge of the lower arm opening. Tighten knob (F2).
Loosen the rotation adjustment knob (F1) and rotate the arm to a 45-90° angle.
Tighten Knob (F1).
2.
Insert the second tier U-shaped channel
into the opening in front end of the main
support arm. Make sure the rotation
adjustment knob (F1) is facing the outside of
the stand, and that the welded nut on the
inside of the U-shaped channel is facing
the inside of the stand. Once the U-shaped
channel is fully inserted, use knob (H) to
secure the second tier to the base unit.
3.
Repeat this same procedure on the other
second tier support arm
4.
Place the support bar (G) so the telescoping adjustment knob is facing away from
the second tier support arms. Remove the knobs from the ends of the support bar,
position the support bar on the second tier support arms and reinstall the knobs.
Apply the Foam Padding
1. Open the box beam to the desired width to hold your main keyboard and tighten
the adjustment knobs.
2. Place the keyboard on the stand and mark the front and back of the support arms
where the pads should be placed. Remove the keyboard. Peel off the backing of the
foam pad strips (D) and press the pads into position.
3. Repeat this procedure on the second tier.
E
F1
F2
G
Opposite
angle
H
B
A
 Loading...