EasyManua.ls Logo

Onn ONB14AV204 - User Manual

Onn ONB14AV204
2 pages
Print Icon
To Next Page IconTo Next Page
Loading...
PRODUCT GUIDE
Model: ONB14AV204
Clock Radio
with Bluetooth
®
Technology
SAFETY PRECAUTIONS
The lightning flash with an arrowhead symbol, within the equilateral triangle, is intended to alert the
user to the presence of uninsulated “dangerous voltage” within the product’s enclosure that may be of
sucient magnitude to cause an electric shock.
The exclamation point within the equilateral triangle is intended to alert the user to the presence of
important operating and maintenance (servicing) instructions in this owner’s guide.
* SEE GRAPHIC SYMBOLS ON THE BOTTOM OF UNIT *
Rating plate was located at bottom of enclosure of the apparatus.
FCC Information
This device complies with Part 15 of the FCC rules. Operation is subject to the following two conditions:
(1) This device may not cause harmful interference, and (2) This device must accept any interference received, including
interference that may cause undesired operation.
WARNING: Changes or modifications to this unit not expressly approved by the party responsible for compliance
could void the user’s authority to operate the equipment.
NOTE: This equipment has been tested and found to comply with the limits for a Class B digital device, pursuant to
part 15 of the FCC Rules. These limits are designed to provide reasonable protection against harmful interference in a
residential installation. This equipment generates, uses, and can radiate radio frequency energy and, if not installed and
used in accordance with the instructions, may cause harmful interference to radio communications.
However, there is no guarantee that interference will not occur in a particular installation. If this equipment does cause
harmful interference to radio or television reception, which can be determined by turning the equipment o and on,
the user is encouraged to try to correct the interference by one or more of the following measures:
• Reorientorrelocatethereceivingantenna.
• Increasetheseparationbetweentheequipmentandreceiver.
• Connecttheequipmentintoanoutletonacircuit
dierent from that to which the receiver is connected.
• Consultthedealeroranexperiencedradio/TVtechnicianforhelp.
Warnings:
• Toreducetheriskofreorelectricshock,donotexposethisapparatustorainormoisture.
• TheAC/DCadapterisusedasdisconnectdevice.TheAC/DCadapterofapparatusshouldnotbeobstructedOR
shouldbeeasilyaccessedduringintendedused.Tobecompletelydisconnectthepowerinput,theAC/DCadapter
of apparatus should be disconnected from the mains.
• Minimum10cm(4inches)distancesaroundtheapparatusforsucientventilation.
• Battery-shallnotbeexposedtoexcessiveheatsuchassunshine,reorthelike.
• Theventilationshouldnotbeimpededbycoveringtheventilationopeningswithitemssuchasnewspaper,table-
cloths, curtains etc.
• Nonakedamesourcessuchaslightedcandlesshouldbeplacedontheapparatus.
• TheAC/DCadapterandapparatusshallnotbeexposedtodrippingorsplashingandthatnoobjectslledwith
liquids,suchasvases,shallbeplacedonAC/DCadapterandapparatus.
On Use
Never use the unit where it would be subject to:
- Heatsourcessuchasradiatorsorairducts.
- Directsunlight.
- Excessivedust.
- Moistureorrain.
- Mechanicalvibrationorshock.
- Unevensurface.
This symbol indicates that this product
incorporates double insulation between the
hazardous mains voltage and user accessible parts.
IMPORTANT SAFETY
INSTRUCTIONS
1. Read these instructions.
2. Keep these instructions.
3. Heed all warnings.
4. Follow all instructions.
5. Do not use this apparatus near water.
6. Clean only with dry cloth.
7. Do not block any ventilation openings. Install in accordance with the manufacturer’s instructions.
8. Do not install near any heat sources such as radiators, heat registers, stoves, or other apparatus
(including amplifiers) that produce heat.
9. Donotdefeatthesafetypurposeofthepolarizedorgrounding-typeplug.Apolarizedplughastwo
blades with one wider than the other. A grounding type plug has two blades and a third grounding
prong. The wide blade or the third prong are provided for your safety. If the provided plug does not
fit into your outlet, consult an electrician for replacement of the obsolete outlet.
10. Protect the power cord from being walked on or pinched particularly at plugs, convenience receptacles,
and the point where they exit from the apparatus.
11. Onlyuseattachments/accessoriesspeciedbythemanufacturer.
12. Use only with a cart, stand, tripod, bracket, or table specified by the manufacturer,
orsoldwiththeapparatus.Whenacartisused,usecautionwhenmovingthecart/
apparatuscombinationtoavoidinjuryfromtip-over.
13.
Unplug this apparatus during lightening storms or when unused for a long period of time.
14. Refer all servicing to qualified service personnel. Servicing is required when the
apparatushasbeendamagedinanyway,suchasthepower-supplycordorplugisdamaged,liquidhas
spilled or objects have fallen into the apparatus, the apparatus has been exposed to rain or moisture,
does not operate normally, or has been dropped.
Portable Cart Warning
LOCATION OF CONTROLS
Top View
1. HOUR/TUNINGButton
2. 1 (Alarm 1) Button
3.
(Clock)/FUNCTION Button
(FM/AM/Bluetooth
®
mode)
4.
(Standby/On)Button
5. -VOLUME+Button
2
3
4
8
5
9
6 7
1
10
6. PRESET/SNOOZEButton
7.
(Play/Pause)/MEMORY/PAIRButton
8.
(Sleep) Button
9. 2 (Alarm 2) Button
10.
MIN/TUNINGButton
Front & Rear View
11
12
13
14 15 16 17 18 19
20
11. PM Indicator
12. BUZZ(Alarm1/beepalarmindicator)
13. RADIO alarm for alarm 1 Indicator)
14. ALM1 (Alarm 1 indicator)
15. Display(Hour Digits:Minute Digits)
16. ALM2 (Alarm 2 indicator)
17. RADIO alarm for alarm 2 Indicator
18. BUZZ(Alarm2/beepalarmindicator)
19. BT (Bluetooth
®
pairing for Indicator)
20. Speakers
21. USB Charger only (Max.5V 2.1A)
22. AC Power adaptor
22
21
• Donotplaceanyheavyobjectsontopoftheunit.
• WhentheunitisusedwithanACpoweradapter,donotwraptheunitinacloth,blanket,etc..Ifyoudoso,the
temperature inside and outside the unit may rise considerably, resulting in malfunctioning of the unit.
• Iftheunitisbroughtdirectlyfromacoldtoawarmlocation,orisplacedinaverydamproom,themoisture
may condense on the lens inside the unit. Should this occur, the unit will not operate. In this case, remove the
disc and leave the unit in a warm place for several hours until the moisture evaporates.
• Fortheunittooperateatitsbest,itshouldnotbesubjecttotemperaturesbelow41°F(5°C)orabove95°F
(35°C).
POWER SUPPLY
Using AC Adaptor
Before use, make sure that the rated voltage of your unit matches your local voltage.
Power Backup During Power Interruption
1. Open the battery compartment door on the bottom of the unit and insert
2AA-batteries(notincluded)intothebatterycompartment.
Note:Makesurethatthepositive(+)andnegative(-)terminalsonthe
batteryalignwiththe+and-symbolsinthebatterycompartment.
2. Close the battery compartment door.
We strongly recommend you install 2 AA-batteries for the power backup
function. If the AC power supply is interrupted, the battery supplies power to
keep the clock operating and the alarm time in memory.
To Wall Outlet
AC Adapter
• Duringapoweroutage,the timeismaintainedbutthedisplayturnsoto
conserve battery power until electrical power is restored. The alarm will also
not function, but the alarm time will be saved in memory. No other features of the clock radio will operate when
using backup battery power, this includes the radio which only functions with electrical AC power.
• Thisbatteryisonlyforclockoperationandalarmmemoryduringpowerinterruption.Youcannotlistentotheradio
with the battery.
When to Replace the Battery
To check the battery condition, unplug the AC adapter from the wall outlet and plug it in again aer a few minutes. If
the displayed time is incorrect, replace the battery with a new one.
Caution: To prevent electrical shock do not insert a Polarized plug into any outlet unless all blades can be fully inserted
and are unexposed aer insertion.
EN-1 EN-2 EN-3
Question and Answer IconNeed help?

Do you have a question about the Onn ONB14AV204 and is the answer not in the manual?

Summary

Safety Precautions and Compliance

General Safety Warnings

Provides critical safety warnings regarding electric shock, ventilation, and environmental exposure.

FCC Information

Details FCC compliance, operational conditions, and user guidance for interference.

Important Safety Instructions

Safety Instruction Guidelines

A comprehensive list of instructions to ensure safe operation and maintenance of the apparatus.

Device Overview and Power Supply

Top View Controls

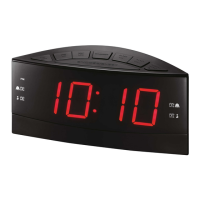
Identifies all buttons and controls located on the top surface of the clock radio.

Front and Rear Views

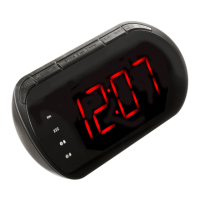
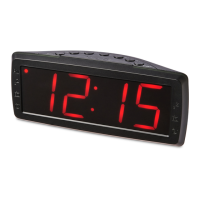
Illustrates the front and rear of the unit, highlighting indicators and ports.

Power Supply and Backup

Instructions for connecting the AC adapter and using batteries for power backup.

Clock and Alarm Functions

Clock Setting

Step-by-step guide to set the correct time on the clock radio in standby mode.

Setting Alarms

Instructions for setting Alarm 1 and Alarm 2, including radio or beep options.

Managing Alarms

Procedures for turning off the alarm via snooze or standby, and cancelling alarm modes.

Radio and Sleep Timer

Listening to Radio

Guide for tuning, searching, and presetting FM/AM radio stations.

Sleep Timer Setting

Instructions on how to set the automatic shut-off timer for listening.

Bluetooth Operation

Pairing and Connecting

Steps for initial pairing and reconnecting Bluetooth-enabled devices to the unit.

Connecting New Devices

Guidance on how to pair and connect a new Bluetooth device.

Troubleshooting Guide

Common Issues and Solutions

Provides solutions for common problems encountered with radio, clock, and Bluetooth functions.

Limited Warranty Information

Warranty Terms and Responsibilities

Details the 90-day warranty, customer responsibilities, and limitations.

Out of Warranty Service

Information on obtaining repair services after the limited warranty period has expired.

Overview

The Onn Clock Radio with Bluetooth® Technology, model ONB14AV204, is a versatile device designed to provide timekeeping, radio listening, and audio streaming functionalities. It features a clear digital display for time and radio information, along with intuitive controls for easy operation.

Function Description

The primary function of this device is to serve as a clock radio. It displays the current time prominently with hour and minute digits, and a PM indicator for afternoon hours. The clock setting process is straightforward, allowing users to adjust the hour and minute digits when the unit is in standby mode.

As a radio, the device supports both FM and AM bands. Users can manually tune to desired stations using the tuning buttons or utilize the automatic search function to find clear stations quickly. The unit can store up to 20 preset stations (10 FM and 10 AM), enabling quick access to favorite broadcasts. Presetting involves tuning to a station, pressing the MEMORY button, selecting a preset number, and confirming the storage.

A key feature of this clock radio is its alarm functionality. It supports two independent alarms, ALARM 1 and ALARM 2, which can be set to wake users with either a radio station or a beep sound. When setting an alarm, users can choose their preferred wake-up mode and adjust the volume for radio alarms. The alarm will sound for 59 minutes before automatically shutting off. For temporary silencing, a snooze function is available, muting the alarm for 9 minutes. Alarms can be completely turned off or canceled if no longer needed.

Bluetooth® connectivity is another significant aspect of the ONB14AV204. This allows users to wirelessly stream audio from Bluetooth® enabled devices such as smartphones. The pairing process is initiated by switching to Bluetooth® mode and holding the PAIR button, after which the device can be selected from the list of available devices on the external audio source. A solid red Bluetooth® indicator confirms a successful connection. The unit can only connect to one Bluetooth® device at a time. Reconnecting to a previously paired device is also simple, often occurring automatically when both devices are turned on. For new device pairings, any currently connected Bluetooth® device must first be disconnected.

The device also includes a sleep timer function, which allows users to set a specific duration (from 10 to 90 minutes) after which the unit will automatically turn off. This is particularly useful for falling asleep while listening to the radio. The remaining sleep time can be viewed by pressing the SLEEP button.

For convenience, the unit features a USB charger port (Max. 5V-2.1A) on the rear, allowing users to charge their mobile devices.

Usage Features

The control layout is designed for ease of use. Buttons for HOUR/TUNING, MIN/TUNING, VOLUME, FUNCTION, and PRESET/SNOOZE are clearly labeled on the top panel. Dedicated buttons for ALARM 1 and ALARM 2, along with a CLOCK button, simplify time and alarm settings. The / (Standby/On) button controls the unit's power.

The display brightness can be adjusted by pressing and holding the SNOOZE button, catering to different lighting conditions and user preferences.

Maintenance Features

The device is powered by an AC adapter, which connects to the AC Power adaptor port on the rear. For power backup during electrical interruptions, the unit requires two AA-batteries (not included) to be inserted into the battery compartment on the bottom. This backup power ensures that the clock continues to operate and alarm times are saved in memory, even though the display turns off to conserve battery power and other features like the radio will not function. It's important to replace the batteries when the displayed time becomes incorrect after a power interruption, indicating low battery power.

Cleaning the device should be done with a dry cloth. It's important to avoid blocking ventilation openings and to keep the unit away from heat sources, moisture, and direct sunlight to ensure optimal performance and longevity. The device should not be exposed to dripping or splashing liquids, and no objects filled with liquids should be placed on it. For any servicing needs, it is recommended to refer to qualified service personnel.

Onn ONB14AV204 Specifications

General IconGeneral
Display TypeLED
Snooze FunctionYes
Radio BandsAM/FM
Alarm TypeBuzzer
Power SourceAC Power

Related product manuals