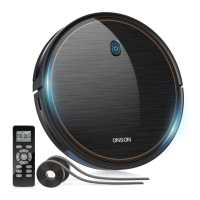
This document describes the ONSON J20C Robot Cleaner, a robotic vacuum designed for indoor use.
Function Description
The ONSON J20C Robot Cleaner is an automated cleaning device that can sweep and vacuum various floor types, including flat hard floors and carpets. It is designed to navigate and clean rooms, automatically returning to its charging dock when the battery is low or cleaning is complete. The robot can be controlled via a remote control or a mobile application (APP).
Key functions include:
- Automatic Cleaning: The robot can initiate cleaning automatically and will return to the charging dock for recharging if the battery is low before cleaning is completed.
- Fixed Point Cleaning: This mode allows the cleaner to concentrate on sweeping a specific local area by rotating outwardly in a spiral with a diameter of about 1m, and then spiraling inwards to the starting point. In this mode, suction is increased for better cleaning of the desired location.
- Border Cleaning: The robot sweeps along the edges of walls and furniture legs to ensure comprehensive cleaning.
- Random Sweep Mode: The machine operates in a random pattern to cover the cleaning area.
- Suction Adjustment: Users can adjust the suction strength during operation using the remote control.
- Scheduling: The cleaning time can be set and scheduled using the remote control, allowing for automated cleaning at specific times.
- Pause/Resume: Cleaning can be paused and resumed using the robot's button or the remote control.
- Boundary Strip Compatibility: The robot recognizes and avoids areas marked by a boundary strip, preventing it from entering blocked-off zones.
Important Technical Specifications
- Model: J20C
- Input: 19 V 0.6 A
- Working Voltage: 14.4 V
- Rated Power: 28 W
- Battery Type: DC 14.4 V Li-ion 2600 mAh
- Dust Box Volume: 0.5 L
- Max Cleaning Time: 20 mins
- Charging Duration: 300-360 mins
- Remote Control Effective Distance: 0-8 meters
- Boundary Strip Length: 6.6 ft/2 m (x2 strips included)
Usage Features
Quick Start:
- Charging Dock Setup: Connect the charging dock to its cable storage box and then to a wall socket. Place the dock against a wall on a leveled flat ground, ensuring 2m free space in front and 1m on both sides. The charging dock's light should be on when connected to power.
- Side Brush Installation: Install the side brush by slotting it into place until a "click" is heard.
- Power On: Turn on the power switch located at the bottom of the main engine (1 for on, 0 for off).
- Activate Product: Place the robot onto the charging dock, aligning the metal charging contacts. A series of tones will confirm successful activation, and the power button will illuminate.
Operation:
- Starting Cleaning: Press the power button once to wake up the cleaner, then press it again or use the "AUTO" button on the remote control to start automatic cleaning.
- Pausing Cleaning: Press the pause button on the cleaner or the remote control. Press again to resume.
- Turning Off: Long press the power button until the lights go out. Turn off the power switch at the bottom if not in use for a long time.
- Remote Control Usage: Install two AAA batteries in the remote control, ensuring correct polarity. Aim the remote control at the J20C sweeper for effective operation. The remote allows for auto clean, direction and time setting, clock setting, fixed time point sweep, random sweep, start/pause, reservation to sweep, sweeping along the side, and suction strength adjustment.
- Boundary Strip: Use the provided boundary strips to define areas the robot should avoid. Cut the strips to the desired length and apply them flat on the floor or under an area rug using the supplied adhesive tape.
- APP Control: The product can be connected to a mobile APP for operation; refer to the APP guide for details.
Safety Instructions:
- Read all safety and operation instructions before use.
- Keep the product away from clothes, paper, hanging curtains, power cords, and fragile items to prevent entanglement or damage.
- If there is a balcony, set up a protective fence.
- Do not place objects on top of the product.
- Exercise caution when walking in the cleaning area.
- Do not use on floors with exposed sockets or on rough/uneven floors.
- The product is for indoor use only and is not a toy; supervise children and pets.
- Only use standard power adapters and original rechargeable batteries.
- Store and use the product at room temperature.
- Avoid spraying water on the product.
- Do not use to clean sharp objects, glass, burning/smoking items, bleach, paint, or other chemicals.
- Do not immerse the battery in any liquid.
- For battery removal and disposal, follow local laws and regulations. If the battery leaks, avoid skin/eye contact and seek medical advice.
Maintenance Features
Regular cleaning and maintenance are crucial for ensuring the service life and optimal cleaning performance of the robot cleaner.
Recommended Cleaning/Replacement Frequency:
- Dust Box: After every use.
- Filter: Once weekly (replace every 2 months).
- Rolling Brush: Once weekly (replace every 6-12 months).
- Side Brush: Once monthly (replace every 3-6 months, or more frequently if there is significant wear and tear).
- Rolling Brush Guard Bar: Once monthly (replace every 3-6 months, or more frequently if there is significant wear and tear).
- Sensor: Once monthly.
- Charging Pole: Once monthly.
- Universal Direction Wheel: Once monthly.
- Oil Grease Treatment: Once monthly.
Maintenance Procedures:
- Empty Dust Box: Press the release button, remove the dust box, open its cover, and empty it.
- Clean Filter: Pull on the white label to remove the filter, then shake off any garbage.
- Clean Brushes and Passage: Remove the roller brush and clean the dust collection passage with a cloth. Use the provided cleaning tool knife to remove hair from the roller brush. Take off the side brush and clean it with a cloth brush.
- Clean Universal Wheel: Use a cleaning brush to clean the universal wheel.
- Dust Sensor: Dust the sensor with a cleaning brush to ensure optimum performance. Avoid wiping the optical flow sensor sleeve with your finger if there is too much dust or oil.
Troubleshooting and Alarm Notice:
The cleaner provides light indications and emits "beeps" to signal operational status or errors.
- Light Indications: Different light patterns (e.g., blue lamp on, purple breathe, red light constant on/flicker) indicate sleep mode, standby, work mode, recharging status, error mode, and Wi-Fi network link status.
- Alarm Notice (Red Lights Blinking/Always On with Beeps):
- 1 Beep (Gyroscope error): Keep the robot stable to restart.
- 2 Beeps (Bumper error): Check and remove any object blocking the bumper.
- 3 Beeps (Drop sensor error): Check if the bumper is dirty and clean the sensor.
- 4 Beeps (Low power or charging error): Robot voltage is too low; manually charge.
- 1 Beep (Driving wheel error): Check if the drive wheel is blocked.
- 2 Beeps (Side brushes error): Check if the side brush is blocked and clean it.
- 3 Beeps (Fan error): Clean up garbage and air ducts channel.
- 4 Beeps (Roller brush error): Check if the roller brush is entangled and clean it.
General Troubleshooting Tips:
If issues persist after following the above methods:
- Re-open the power switch at the bottom of the cleaner and restart it.
- If the problem cannot be solved by restarting, contact the after-sales service center for repair.
Battery Storage:
If the product is stored for a long period, remove the battery from the charging dock. Store products and batteries in a cool, dry place. For transportation, remove the battery, place tape on the charging poles, re-insert the taped battery, close the cover, and pack the product in original or suitable packaging. Transport by land only.