MuteIndicator
Displays whether the
microphone is muted
MissedCallIndicator
Displays when you have
missed calls to review
RingerOffIndicator
Displays when the ringer
volume is turned off
(this phone will not ring)
DoNotDisturbIndicator
Displays when Do Not
Disturb mode is enabled (no
phones will ring)
SignalStrengthIndicator
Signal bars show the connection
strength to the Ooma Telo
BatteryIndicator
Shows the battery charge level.
A lightning bolt will ash when
the batteries are charging
LineIndicators
Shows which line or lines are
currently in use
SpeakerphoneIndicator
Shows whether the speakerphone
functionality is engaged
HDIndicator
Displays when you have
established
an HD-quality call
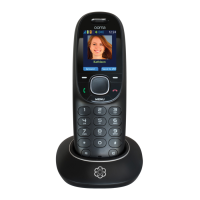
Quick Start Guide
Ooma HD2
Handset
Step 1
Insert Batteries
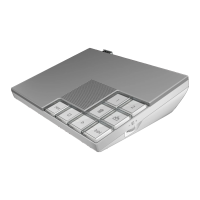
Package Contents
AC Adapter
Charging
Cradle
2 AA Batteries
(rechargeable)
Ooma
HD2 Handset™
WARNING: If you need to replace
the batteries included with your
handset, use only rechargeable
Nickel Metal-Hydride (Ni-MH)
batteries. Other types of batteries may
damage the handset or create a risk of re.
We recommend that you leave the hand-
set on the cradle for 30 minutes before
proceeding to the next step. The handset
requires 10 hours to fully charge.
IMPORTANT: The Ooma HD2 Handset is not compatible with
the rst-generation Ooma Telo Handset. If you wish to switch
from using the original Ooma Telo Handset to the new Ooma
HD2 Handset, you must rst dial
on a phone
connected to your Ooma Telo. The Telo will reboot and download a new
version of software. The upgrade will take about 5 minutes to complete.
Once the Telo is back in service, repeat Step 3. The Telo will now connect
to your HD2 Handsets. Any older Telo Handsets will no longer work.
™
700-0118-303
1 2 3
Getting Started
You’re just a few quick steps from making and receiving calls on your
new Ooma HD2 Handset. This handset is the perfect companion to
the Ooma Telo™—you’ll be able to access all Ooma features and
even unlock new functionality! Before you begin, please make sure
that your Ooma Telo is installed and operating properly, as your new
handset cannot be set up without a functioning Telo.
Remove the battery cover located on the
back of the handset by sliding it away
from the center of the device. Insert the
two rechargeable AA batteries, making
sure that you align the at end against
the springs. Replace the battery cover by
sliding it in the opposite direction.
Plug the AC adapter into a power outlet
and then connect the AC adapter cable
to the charging cradle. Put the handset
on the cradle.
When the handset is on its cradle, it will
show a lightning bolt in the battery icon
when it is charging.
Press the
key on your Ooma Telo
and hold it down for three seconds to
activate registration mode. When the
handset detects the Telo, press the
YES soft key to proceed.
Once the handset is successfully
registered, the home screen will be
displayed.
Each Ooma Telo supports up to four
Ooma HD2 Handsets.
Register the Handset
Step 3
Charge the Handset
Step 2
5
Navigating the User Interface
Microphone
Earpiece
Right soft key
Hangup key
Select key
Display screen
Left soft key
Answer key
Speakerphone
Menu key
Redial
4
After the handset is registered to your Telo, it will display a home
screen similar to the one pictured below.
Home Screen Quick Reference
Your Ooma HD2 Handset has an
easy-to-use interface that puts
the most common features at your
ngertips while still letting you access
all the advanced features the handset
is capable of.
Accessing the main menu
Press the key from the
home screen.
To select an item
Use the navigation pad to scroll
through a menu until you have
highlighted the item you want, then
press the center Selectkey.
Using the soft keys
There are two context-sensitive soft
keys just under the display. Shortcuts
to popular functions are assigned to
these keys. The handset will update
the label above the keys as you use
the phone. Press the appropriate soft
key to invoke the assigned function.
Accessing other options
To see a list of all available functions
on a screen, press the Options soft
key.
To exit a menu
Press the key or left on the
navigation pad to go back one menu
level. Press
to exit all menus.
Main Menu Options
The following options are available from the main menu:
Status bar
Right soft key
label
Left soft key
label
Handset
name
Voicemail
indicator
Date and
time
Navigation pad
Voicemail — Listen to and
manage your voicemail
Intercom — Intercom to or
monitor other handsets
Services — Engage features
like Do Not Disturb
Phonebook — Browse and
search your contacts
Favorites — Speed dial your
friends and family
Calllogs — Access a list of
your recent phone calls
About — Information about
your Ooma system
Settings — Congure your
phone preferences
Headset jack