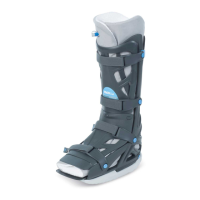
Purpose:
Lower leg and foot orthosis for immobilisation of the joints in dened,
adjustable positions, and for mobilisation in denable ranges of movement.
Safety information
The orthosis should only be tted and its use explained by trained
personnel.
The product is intended only for use on a single patient.
VACOped is not designed for dynamic stresses such as jumping and fast
walking. If you fall with the VACOped tted, check your VACOped
immediately for damage. If the VACOped is damaged, it can impair
your safety.
Never wear the product over open wounds and only wear it after prior
medical instruction.
The patient may only change the position of the device after consultation
with the physician responsible for their care.
If excessive pain, numbness or sensation changes occur, or if unusual
reactions or an unpleasant feeling are experienced while wearing the device,
please contact your doctor or orthopaedic technician without delay.
This orthosis has been developed for the indications listed and can be
damaged by unintended or inappropriate use, by activities such as sport,
falls or other accidents, and by liquids.
When used in combination with another medical product, consult your
doctor.
Only spare and/or replacement parts approved by OPED GmbH should be
used.
Please note the Road Trac Act applicable in your country.
Note: Not made from natural rubber latex.
LATEX
Check that the sole ts securely - otherwise there is a risk of slipping!
Sole: When the toe section is fully extended, the gait may be modied or
restricted.
The small spheres in the vacuum cushion can slide around. We therefore
recommend opening the valve every two to three days, smoothing any
collections of small spheres out and then restoring the vacuum.
Storage: The valve ap must always be closed!
The valve ring must be pushed downwards and the valve ap closed
(Figure 1 + Figure 2).
This product is intended to be used for no more than 4 months.
Indications
●
Ankle joint fractures
●
Metatarsal fractures
●
Achilles tendon ruptures
●
Calcaneal fractures
●
Severe sprains
●
Prosthesis
●
Arthrodeses
Contraindications
●
None known
How to use
Fitting the VACOped:
Pull the valve ring upwards (details can be found in “Valve functions”) to allow
air to ow in (Figure 3). If the small spheres in the liner (Figure 4) have grouped
together, stroke them smooth. Place your foot in the fabric liner (Figure 4) and
position it with the fabric liner all the way back in the lower shell (Figure 5).
Then close the fabric liner. Pull the liner slightly upwards (Figure 6). Fit the
upper shell (Figure 7) (top: outer towards the lower shell; bottom: tabs into the
lower shell) and close the strap by hand and as the pain allows (see graphic for
sequence) (Figure 8). When tting the upper shell, ensure that the valve is not
kinked. The upper shell should not be positioned against or over the valve.
Adjusting and securing the vacuum cushion:
Readjustable vacuum cushion: Inside the liner, there is a cushion containing
thousands of small spheres (Figure 9) which adapt perfectly to the anatomy and
any swelling of your ankle joint. Pressure-sensitive areas and swellings can be
relieved through the targeted redistribution of these small spheres. To ensure
that the spheres do not slide around inside the cushion, the air is extracted via
the valve using a suction pump, creating a vacuum (Figure 10).
Valve functions:
●
Open the valve/softens the vacuum cushion:
Pull the valve ring upwards and move it to the side to allow air to ow in
(Figure 3). Then slide the valve ring back to its original position.
●
Close the vacuum/hardens the vacuum cushion:
Push the valve ring downwards. Attach the suction pump and squeeze it
(approx. 7-8 times) until it no longer inates. Squeezing the pump removes
air from the cushion and creates a vacuum. This xes the adapted t in
place (Figure 11). To nish, close the valve cap (Figure 12).
●
Closing the valve cap
Push the valve ring downwards and close the valve cap. This sets the
vacuum (Figure 12).
Changing the cushion liner
Note: The replacement liner does not contain a cushion! When changing the
liner, the cushion must be removed from the used liner and inserted into the
new one!
Open the rear zip fastener all the way and remove the vacuum cushion from the
used liner. Open the valve and shake out the cushion so that the small spheres
can redistribute themselves (see Valve functions). Establish the vacuum (see
Valve functions), place the vacuum cushion in the new liner and slide the valve
through the button hole (Figure 9).
English
~)
................
..........................................................................................................................................................................
...........................................................................................................................................
t&S
®
'o/
w
w
w
w
w
w
w
w
w
w
w
w
w
w
w
-----------------------------
··········································································································································································
..........................................................................................................................................................................
............................................................................................................................................
..........................................................................................................................................................................
.
........................................................................................................................................................................
.
 Loading...