Hardware Interface
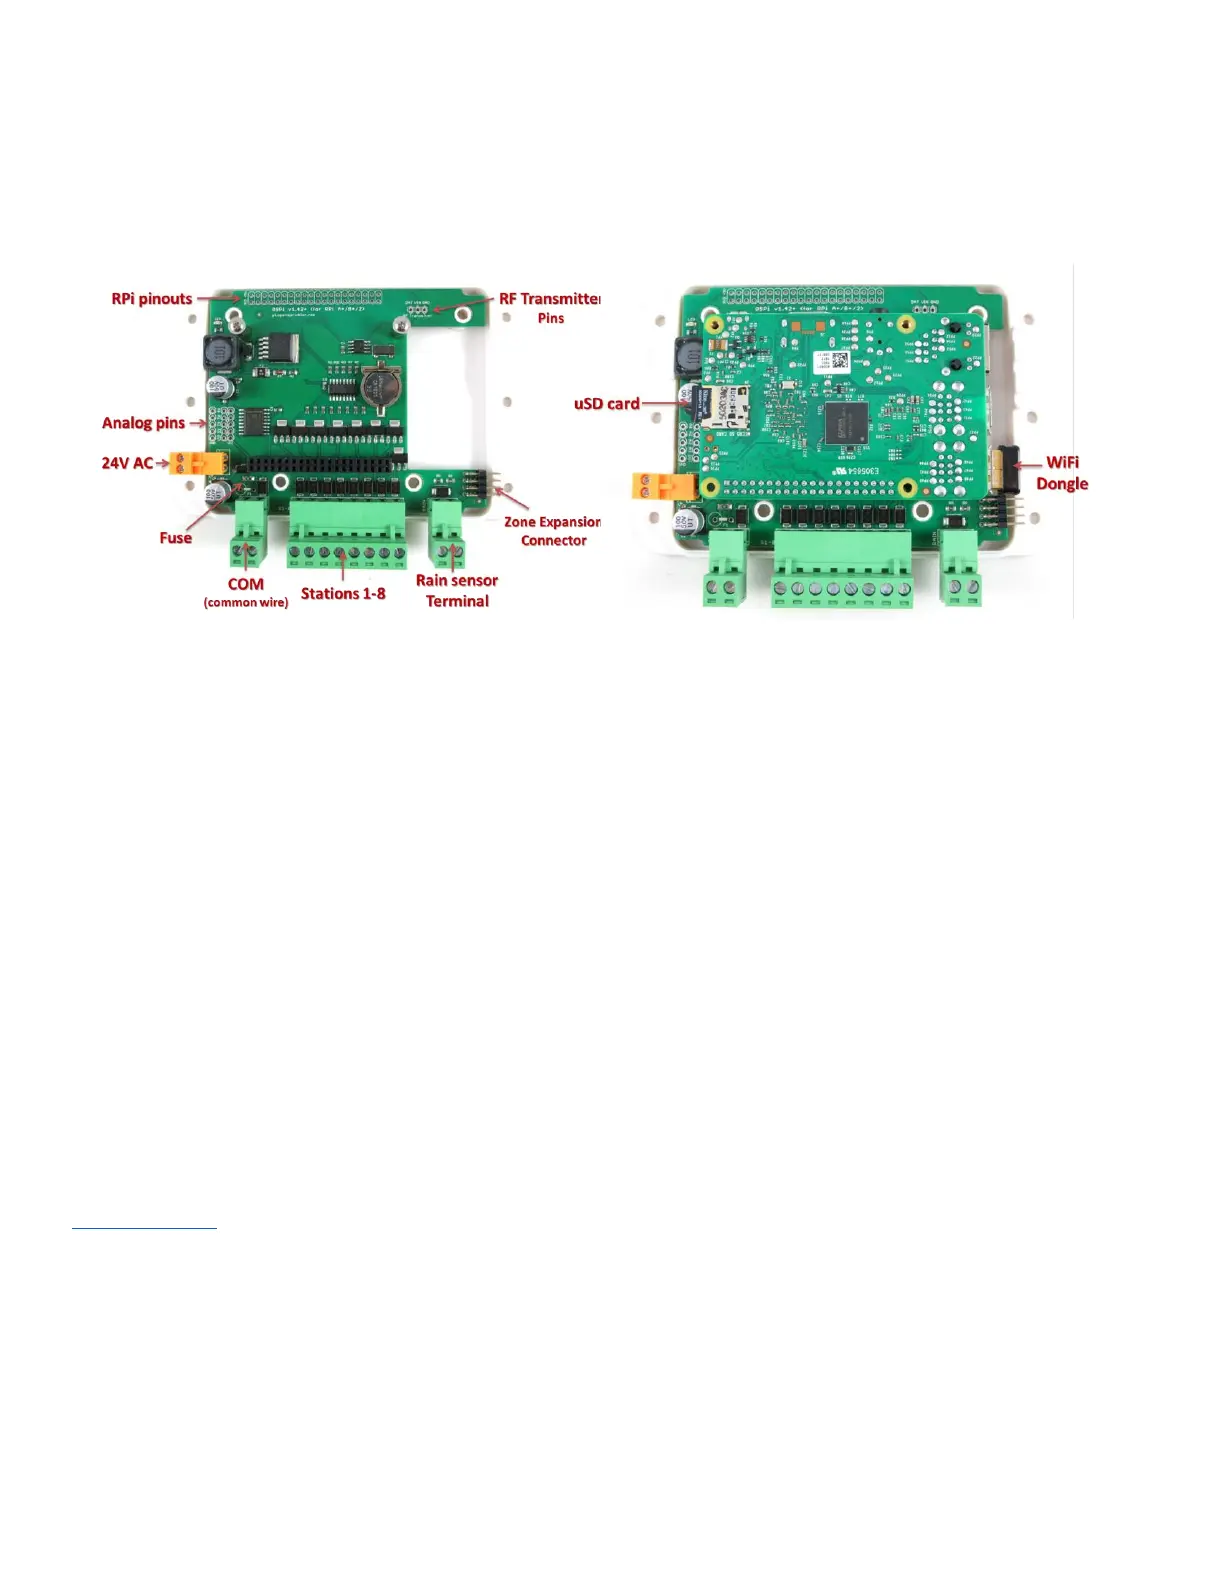
The left image below marks the connectors and locations of various pinouts. The right image marks the locations of the
USB WiFi dongle and SD card after the Raspberry Pi is plugged in.
Hardware Setup
0. Preparation
OSPi 1.43+ comes with a laser-cut acrylic enclosure. Enclosure assembly instructions can be found in this
Youtube Video. You can do so either before or after the following setup steps.
● If the RTC battery (CR1220) is not pre-installed, insert the battery to the brown battery jack, with positive
(marked by +) facing up.
● If terminal blocks are pre-installed, you need to first remove all terminal blocks before assembling the
acrylic enclosure.
1. Test Power Supply
Insert the sprinkler transformer wires into the orange terminal, then plug it into the matching terminal on OSPi. The
green LED should light up, indicating power is on. See pictures below.