Do you have a question about the Optics11 Life PIUMA NANOINDENTER and is the answer not in the manual?
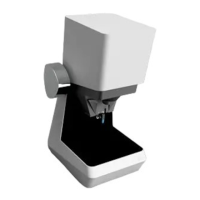
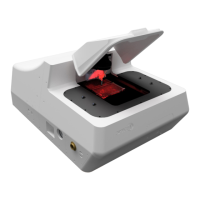
Overview of the Piuma Nanoindenter's five main components and their roles in the system.
Details the necessary cables and the schematic for connecting the Piuma Nanoindenter system components.
Step-by-step guide on powering up the computer, interferometer, and controller for initial system setup.
Guidance on selecting the appropriate probe and the procedure for physically installing it into the indenter head.
Explanation of the controls and display elements on the Piuma Nanoindenter's front panel.
Instructions on entering probe-specific parameters into the software for accurate measurement results.
Procedure for selecting the appropriate indenter head within the software's advanced options.
Steps to calibrate the optical signal, crucial for accurate measurements in different media.
Procedure to determine the geometrical factor, essential for correcting measurements based on probe bending.
Information on how calibration data is saved and where the save location can be configured.
Manual control of the Piuma's motorized stages for positioning the sample and probe.
Manual control of the piezo stack for precise indentation positioning.
Using the automated find-surface function to safely approach the sample surface.
Setting up sequences of indentations, scans, and moves for automated experimental runs.
Explanation of the three operational modes (D-mode, P-mode, I-mode) and their controlling parameters.
Using the Piuma Nanoindenter in dynamic mode for oscillatory measurements.
Accessing maintenance options, including PID tuning for controller performance.
How to save individual indentation or matrix scan data to a dedicated folder.
Executing configured experiments by running the 'Run Experiment' function in the software.
Interpreting indentation and scan results, including load-displacement curves and Young's modulus maps.
Methods for importing and analyzing load-displacement data and Young's Modulus maps.
Factors affecting measurement quality, focusing on temperature and vibration control.
Ensuring sample stability through proper mounting and temperature management.
Maintaining probe stability by addressing issues like air bubbles and solution temperature.
Explanation of how the Piuma Nanoindenter uses optical probes and interferometry to measure deformation.
Methods for calculating Young's modulus from load-indentation curves using material models.
Navigating the OP1550 interferometer menus for measurement, wavelength scan, and demodulation.
Troubleshooting common issues with the automated find-surface function, including signal amplitude and probe condition.
Diagnosing and resolving issues causing noise in indentation results, checking modulation settings.
Addressing issues where cantilever bending exceeds displacement, checking calibration and probe condition.
Troubleshooting stage motor movement issues during the initial homing procedure.
Guidance on selecting and replacing fuses for the instrument's power supply.
| Displacement Resolution | 0.01 nm |
|---|---|
| Imaging | Integrated optical microscope |
| Z-axis Approach Range | 20 mm |
| Data Acquisition Rate | Up to 10 kHz |
| Software | Intuitive control and analysis software |
| Indenter Types | Berkovich, Spherical |
| Applications | Polymers, Thin films |
| Microscope Compatibility | Integrated optical microscope |
| Probe Options | Customizable |