EasyManua.ls Logo

Optima Scale OP-916 - User Manual

Optima Scale OP-916
30 pages
Print Icon
To Next Page IconTo Next Page
Loading...
optimascale.com
OP-900 SERIES INDICATOR
USER’S MANUAL
(OP-900A, OP-900B Series)
9.9.19

Questions and Answers

Summary

Safety Precautions

Anti-Static Prevention Measures

Guidance on preventing static discharge to protect sensitive equipment and ensure accurate readings.

Technical Parameters

Accuracy Class

Specifies the accuracy class of the weighing indicator.

Specifications

Power Supply

AC Adapter Usage

Instructions for connecting and using the AC adapter for powering the indicator.

Optional Rechargeable Battery

Details on the optional rechargeable battery, charging, and maintenance.

Operating Instructions

Power On Procedure

Steps for powering on the indicator, including auto-check sequence.

Zeroing Function

Instructions on how to use the zero function and its limitations.

Tare Functionality

Detailed explanation of the Tare function, including gross and net modes.

Calibration Procedure

Accessing Calibration Menu

Initial steps to access the calibration setup menu.

Unit and Decimal Settings (C1, C2)

Navigating C1 for unit selection and C2 for decimal places.

Graduation and Capacity Settings (C3, C4)

Setting graduation (C3) and maximum capacity (C4).

Zero Calibration (C5)

Performing the zero point calibration using the C5 channel.

Single Point Calibration Setup (C06)

Proceeding to the C06 channel for single-point calibration setup.

Single Point Calibration Process

Inputting calibration weight and completing the single point calibration.

Linear Calibration Setup

Starting the linear calibration process by proceeding to C06.

Linear Calibration Weight Input

Specifying the number of weights and inputting calibration values.

Linear Calibration Execution

Placing calibration weights and completing the linear calibration steps.

Post-Calibration Checks

Verifying scale readings and troubleshooting common post-calibration issues.

Indicator Parameter Settings

Parameter Settings Navigation

Step-by-step guide to enter and navigate the parameter settings menu.

Communication Settings (C18)

Settings for communication protocols and output methods.

Analog Output Configuration (C31, C32)

Settings for 4-20mA analog output and current calibration.

Relay Output Configuration (C33)

Configuration for relay output functions.

Connectors and Wiring

Load Cell Connection Methods

Information on connecting load cells to the indicator via quick disconnect or hardwire.

Inner Terminal Block Connection

Procedure for connecting signals via the terminal block, with anti-static precautions.

RS232 Serial Output Format

Remote Display Continuous Sending Mode (C18=1)

Print Mode (C18 = 2)

Command Request Mode (C18=3)

Computer Continuous Sending Mode (C18=4)

PC or Remote Display Continuous Sending Mode (C18=5)

Label Printer Output (C18=5 & C18=6)

4-20 mA Analog Output (Optional)

Relay Output (Optional)

Troubleshooting

Error Code Explanations

Explanation of common error codes and their potential causes.

Calibration Error Solutions

Solutions for calibration errors like unstable signals or incorrect weight.

EEPROM and Zero Range Errors

Explanation for EEPROM errors and exceeding zero range.

Q&A

Scale Power-On Issues

Troubleshooting steps for when the scale fails to power on.

Negative Reading Resolution

Steps to resolve negative readings when a load is applied.

ERR6 Error Resolution

Detailed procedure to resolve ERR6 error codes.

Error Resolution for nnnnnn;uuuuuu

Troubleshooting steps for 'nnnnnn' and 'uuuuuu' error messages.

Overview

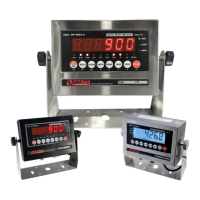
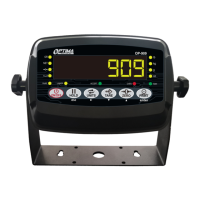
The Optima OP-900 Series Indicator is a digital weight indicator designed for various weighing applications, available in LED (OP-900A) and LCD (OP-900B) versions. This user's manual provides comprehensive instructions for its operation, calibration, and maintenance.

Function Description:

The OP-900 series indicator serves as the central display and control unit for weighing scales. It processes signals from load cells to display weight readings, perform various weighing functions, and interface with external devices. Its primary functions include:

  • Weight Display: Shows gross, net, and tare weights in multiple units (kg, lb, g, oz, lb:oz).
  • Counting Function: Allows for counting a large volume of identical parts by setting a sample weight.
  • Accumulation Function: Adds multiple weights and totals them together, capable of accumulating up to 999 different weights.
  • Hold Functions: Offers four different hold options:
    • Peak Hold: Captures and displays the highest weight recorded (useful for materials testing).
    • Manual Hold: Grabs and holds the current weight until released.
    • Auto Hold: Automatically holds stable weight data for 3 seconds when above 20 divisions.
    • Average Hold: Calculates and displays the average weight sampled over 3 seconds (ideal for animal weighing).
  • Zeroing: Resets the scale to zero when empty or to compensate for material build-up.
  • Tare Function: Allows for taring out container weights to display only the net product weight. It also supports pre-set tare weights.
  • Alarm Functions: Features upper and lower limit alarms, indicated by flashing "OVER," "ACCEPT," or "UNDER" lights.
  • Connectivity: Supports RS232 serial output for connecting to PCs, printers, or remote displays. Optional 4-20mA analog output and relay output are also available.

Important Technical Specifications:

  • Accuracy Class: 5000 e
  • Resolution - Display: 30,000
  • ADC Resolution: 2,000,000
  • Zero Stability Error (TK0): < 0.1μV/K
  • Span Stability Error (TKspn): < ± 6 ppm/K
  • Sensitivity (Internal): 0.3 μV / d
  • Input Voltage: -30 to +30mV DC
  • Excitation Circuit: 5 VDC, 4-wire connection, capable of connecting up to 6 load cells of 350ohm max.
  • AC Power: AC 100-250V (via a supplied 9V adapter).
  • Operation Temperature: -10 °C ~ +40 °C
  • Operation Humidity: ≤90%RH
  • Storage Temperature: -40 °C ~ +70 °C (32-104°F)
  • NTEP Approved: For 5,000 divisions.
  • Indicator Measurements (OP-900A SS): Approximately 9 inches (width) x 8 inches (height) x 8.5 inches (depth), with a display face of 6.75 inches (height) x 2.75 inches (depth) and a base of 3 inches.

Usage Features:

  • Multiple Weighing Units: Easily switch between kg, lb, g, oz, and lb:oz using the UNITS key.
  • Gross/Tare/Pre-Set Tare/Zero: Comprehensive functions for managing different weight readings.
  • Overload / Underload Indication: Visual alerts for weights outside the defined range.
  • Splash Proof Keyboard and Display: Designed for durability in various environments.
  • Power Saving Mode: Configurable automatic power-off and display dimming/backlight control to conserve battery life.
  • Gravity Modification: Ability to adjust gravity settings based on geographical location for accurate readings.
  • Rechargeable Battery (Optional): Provides portability and continuous operation during power outages. The OP-900A indicates low battery with a flashing red light, solid red during charging, and green when fully charged. The OP-900B uses a battery symbol on the LCD.
  • Parameter Settings: Extensive configurable parameters (C01 to C45) for fine-tuning indicator behavior, including decimal settings, graduation, maximum capacity, zero tracking, standstill time, digital and noise filters, and communication settings.
  • Serial Output Formats:
    • Continuous Sending Mode (C18=1): For remote displays/scoreboards.
    • Print Mode (C18=2): For non-adhesive ticket printers, with configurable date, time, and print content.
    • Command Request Mode (C18=3): Allows a computer to send ASCII commands (T, Z, P, R, C, G) to request specific data or actions from the indicator.
    • Computer Continuous Sending Mode (C18=4): Streams weight data continuously to a computer.
    • PC or Remote Display Continuous Sending Mode (C18=5): Combines features for both PC and remote display continuous data streaming.
    • Print to Adhesive Label Printers (C18=5 & C18=6): Supports printing to Optima and Zebra label printers with specific formats for date, time, net, tare, and gross weights.
  • DB9 Connection: A 9-pin serial connector for RS232, 4-20mA analog output, and relay output, depending on the indicator model and options.
  • Load Cell Connection: Supports 4-wire or 6-wire load cell connections, up to 6 load cells of 350Ω, via quick disconnect or inner terminal block.

Maintenance Features:

  • Calibration Procedure: Detailed steps for both single-point and linear (multiple weight) calibration, allowing for precise adjustment of the scale. This involves setting units, decimal places, graduation, maximum capacity, zero calibration, and span calibration.
  • Troubleshooting Guide: Provides solutions for common error codes such as overload, wrong load cell connection, calibration issues, negative input signals, unstable calibration signals, EEPROM errors, and exceed zero range.
  • Battery Management: Recommendations for fully discharging and recharging the optional internal battery monthly to maintain its condition and removing it for long-term storage to prevent leakage.
  • Anti-Static Prevention: Emphasizes the importance of discharging static electricity from the operator's body before opening the indicator to prevent damage to ESDS devices.
  • Professional Maintenance: Calibration inspection and maintenance are restricted to non-professional staff to ensure safety and accuracy.

The Optima OP-900 Series Indicator is a versatile and robust weighing solution, suitable for a wide range of industrial and commercial applications requiring accurate weight measurement and data management.

Optima Scale OP-916 Specifications

General IconGeneral
BrandOptima Scale
ModelOP-916
CategoryMeasuring Instruments
LanguageEnglish

Related product manuals