Operating Instructions – Start-up
®
OPTIMUM QUALITY MAXIMUM RELIABILITY
TM
5
TMS300 OPERATING INSTRUCTIONS
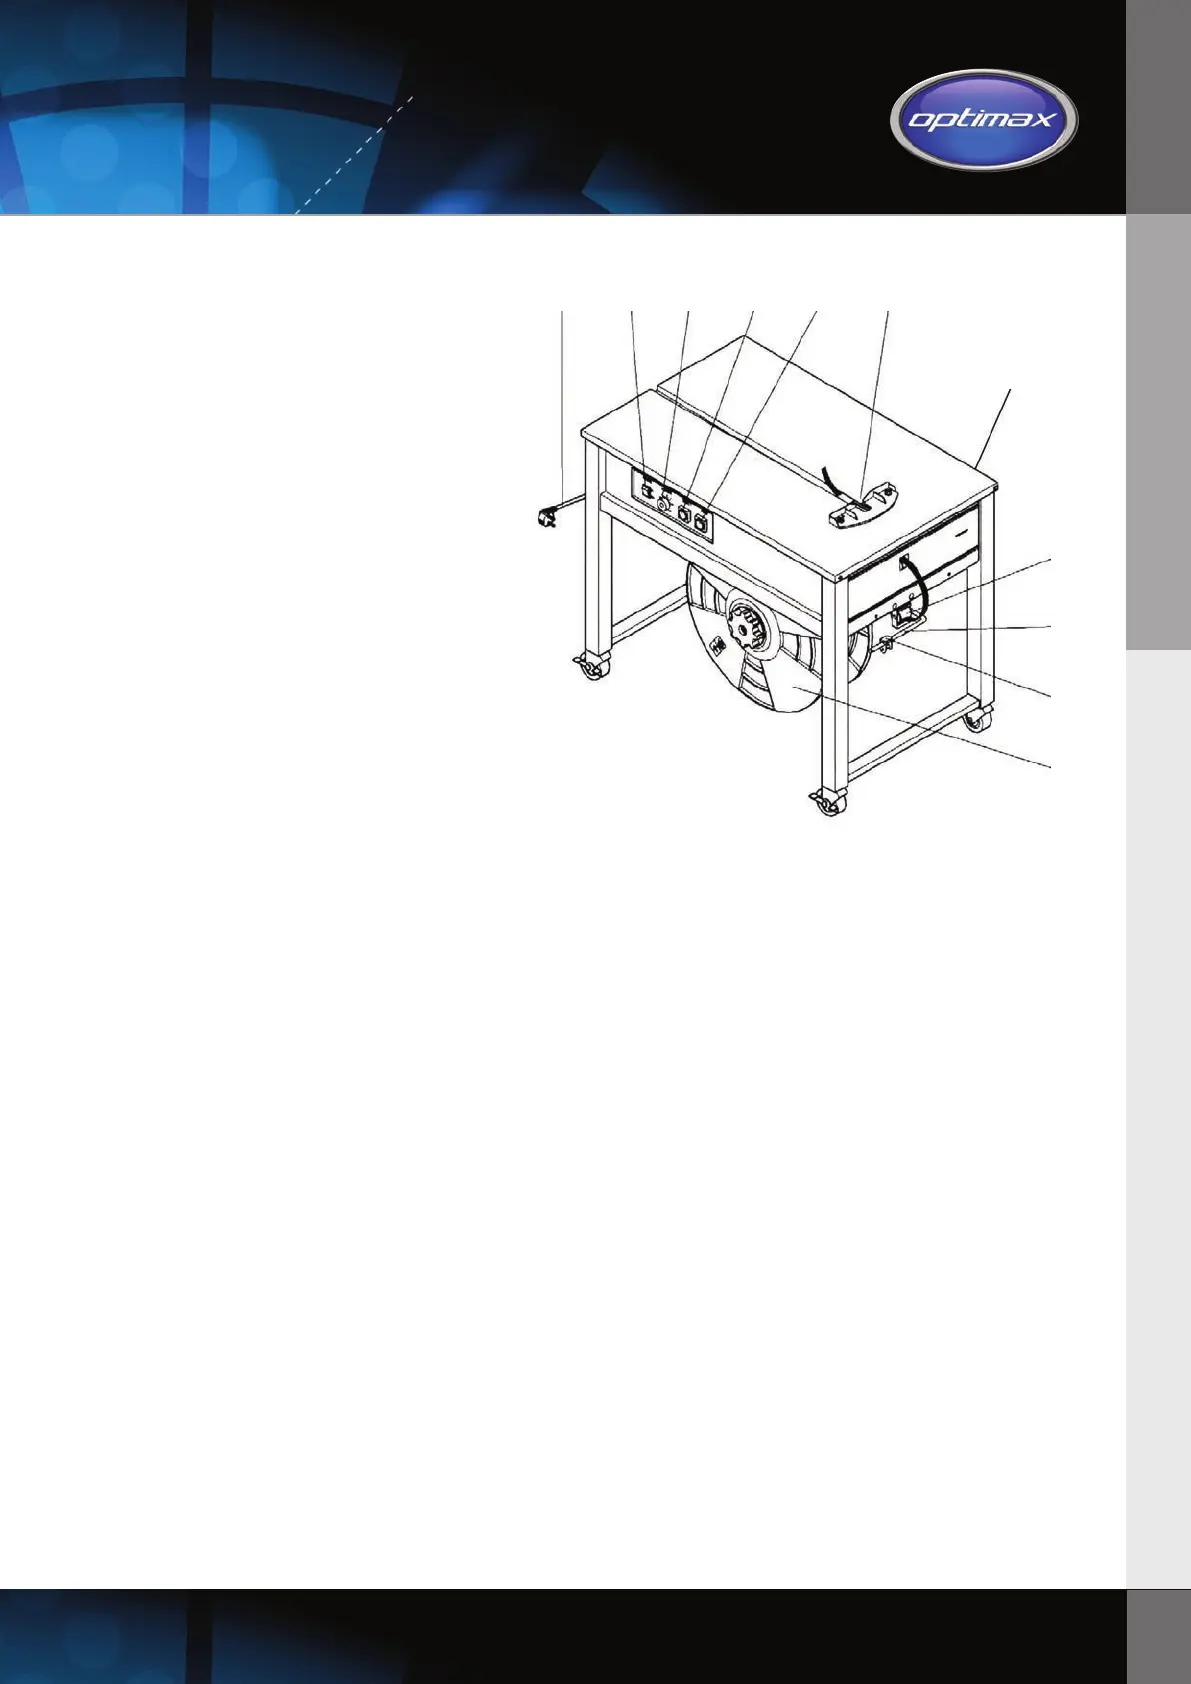
Machine overview
1. Power switch The feed motor starts running when this is pressed
2. Feed length adjustment Adjusts the amount of strap fed based on elapsed time
3. Reset button Pulls the strap back into the machine and cuts the strap
4. Strap feed switch Manual strap feed override, continues to feed strap while pressed
5. Power plug Connects machine to standard 230V power socket
6. Strap reel Holds 200mm dia. core reel (280mm dia. if centre drum removed)
7. Brake Prevents over-rotation of the strap reel
8. Brake strap guide Holds strap against brake
9. Strap bypass guide Holds strap in position for feed into machine
10. Strap insertion inlet Strap enters here and automatically feeds when detected
11. Tension control Manual adjustment of strap tension – clockwise to increase
5 1 2 3 4 10
11
9
7
8
6
Strap loading and threading
a. Turn reel nut (A) anticlockwise and remove it
b. Remove the outer flange (B) and mount the strap reel on the spindle
c. Check that the direction of reel rotation is clockwise (E) when unrolling
d. Replace the outer flange and secure the reel nut handle with a clockwise turn
e. Remove all adhesive tape holding the strap end to the reel
f. Unroll about 1.5 metres of strap and check that it is not twisted
g. Thread the strap through the brake strap guide and strap bypass guide in direction of arrow
h. Feed strap end into insertion outlet and allow it to feed through the machine
i. Use the strap feed button to manually dispense sufficient strap for your first strapping cycle
Operating the machine
a. Connect to the mains power supply and turn the power switch to the on position
b. Wait approximately three minutes to allow the heater to reach sealing temperature
c. Adjust the strapping tension to match the rigidity and strength of the package
d. Loop the strap around the package without twisting it and insert the strap end into the strapping head
e. The strapping head will detect the strap end and automatically feed it into the tensioning mechanism
f. Tensioning, sealing and cutting of the strap will occur automatically
g. Use the feed length adjustment to increase or decrease the length of strap fed prior to the next cycle