Assembly and maintenance instruction recirculating ball
OPTIMUM
MASCHINEN - GERMANY
5. Dezember 2007Page 24 Recirculating ball screw assembly and maintenance instruction ; Version 2.0
© 2007
GB
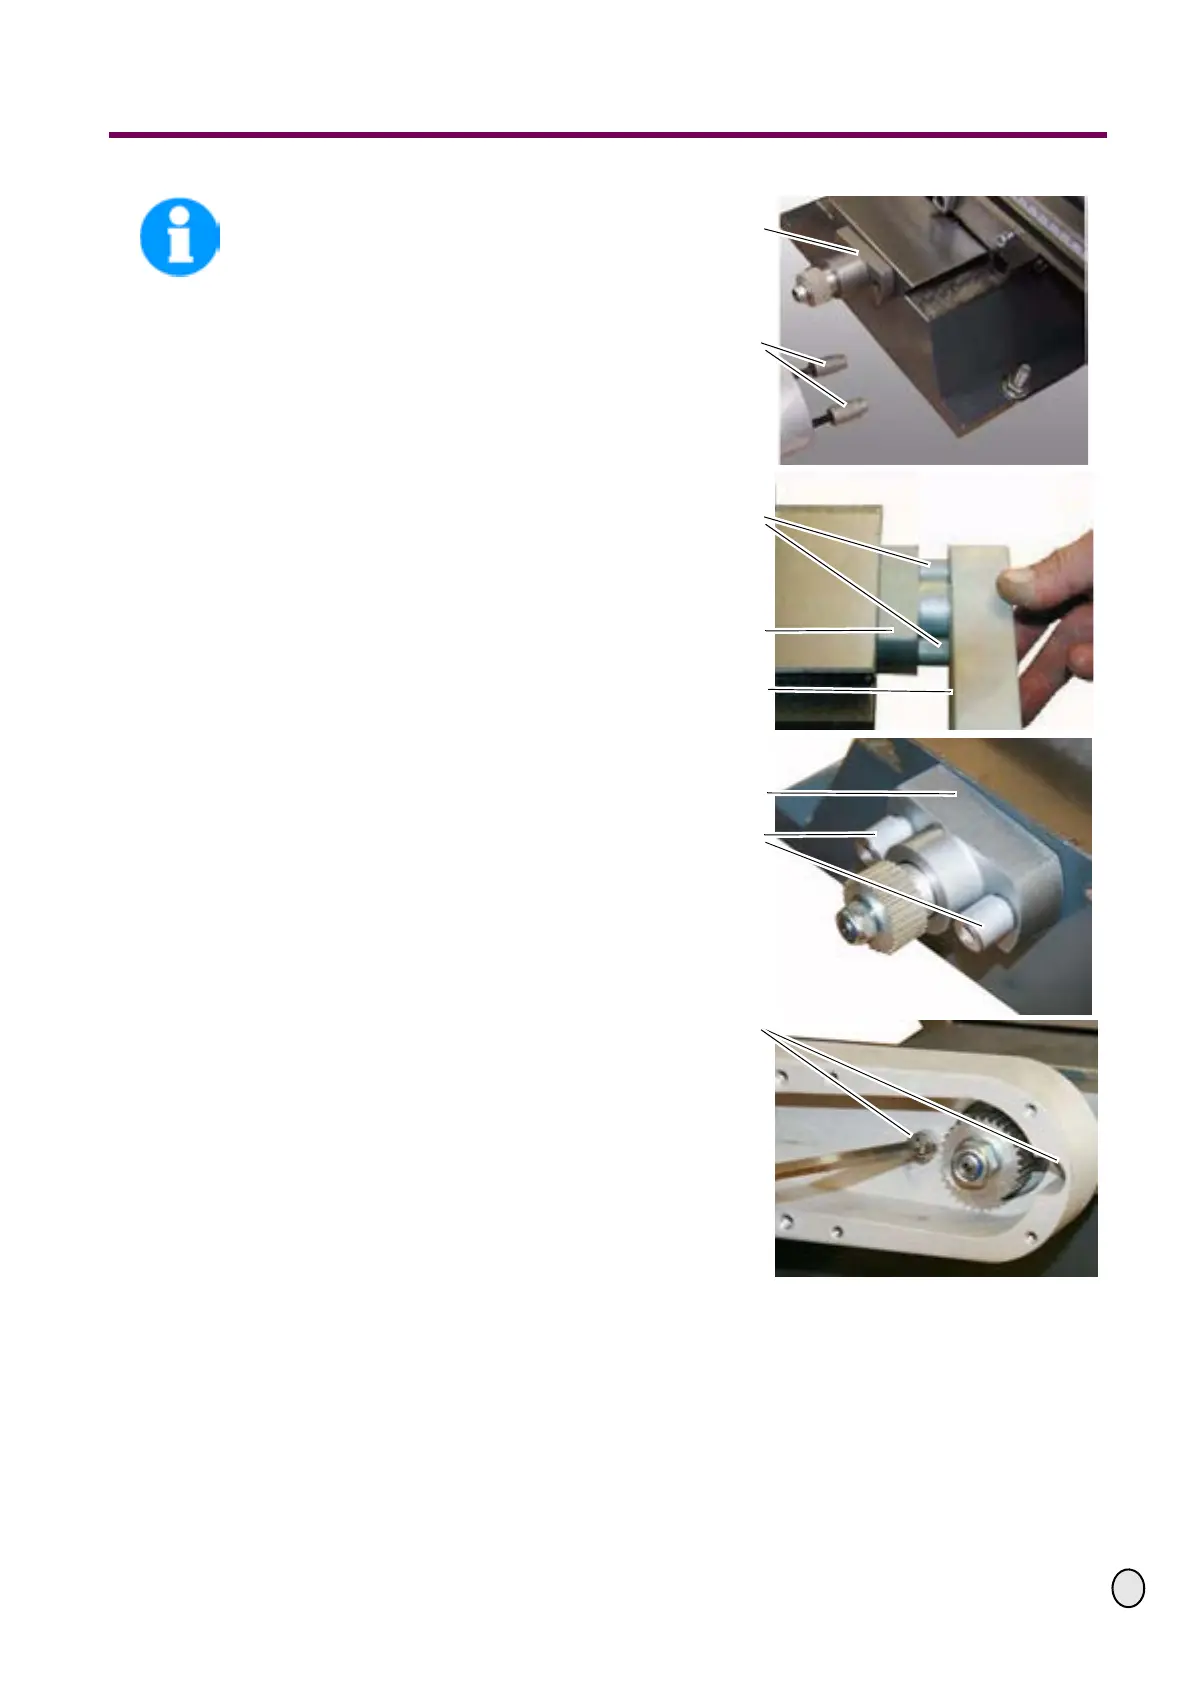
INFORMATION
For older versions of the BF 20, the pil-
low block of the Y-axis is a little smaller.
In this case, you should use the longer
supporting bushings (included in the
CNC add-on kit part No. 4).
£ For new versions (from 2007 on) of
the BF 20, the pillow block is built
stronger. Use the attached small sup-
porting bushings (included in the CNC
add-on kit part No. 11). If they are not
included in the delivery, turn the lar-
ger supporting bushings off to 14 mm
using a lathe with the help of the pro-
duction drawing (part 2). The rear of
the housing should be flush with the
shaft end of the pillow block as illu-
strated.
„Production drawings“ on page 40
£ Put the small or the turned off suppor-
ting bushings into the holes of the pil-
low blocks.
£ Mount the housing of the Y-axis using
the attached fixing material. Please
make sure that you only screw in the
hexagon socket screws, but do not
tighten them yet.
Fig.1-50: Assembly Y-axis
Pillow blockY-axis
(old version)
Supporting
bushings
Supporting
bushings
Pillow blockY-axis
Rear of the housing
Pillow blockY-axis
Supporting
bushings
Hexagon socket
screws
 Loading...