Do you have a question about the Optoma ML1080 and is the answer not in the manual?
Navigate to RS232 control settings via hotkey and OSD menu.
Set RS232 control to ON, configure Projector ID, and select Baud Rate.
Exit RS232 control mode, connect the RS232 cable, and send commands.
Navigate to RS232 control settings via hotkey and OSD menu.
Set the RS232 control function to OFF and exit the RS232 control mode.
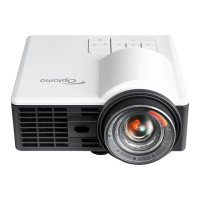
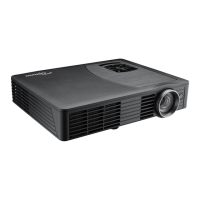
The Optoma L23 is a projector designed for versatile use, offering robust control and configuration options primarily through its RS232 interface. This device is engineered to integrate seamlessly into various environments, from educational settings to professional presentations, by providing reliable remote management capabilities. Its design emphasizes user-friendly setup and maintenance, ensuring a smooth operational experience.
The core function of the Optoma L23 projector is to display visual content from various sources onto a screen or surface. Beyond its primary display function, the projector incorporates an RS232 control mode, which is a critical feature for advanced remote management and integration into control systems. This mode allows users to send commands to the projector from a computer or a dedicated control panel, enabling comprehensive control over its functions without direct physical interaction. The RS232 interface facilitates actions such as powering the projector on or off, adjusting display settings, selecting input sources, and managing other operational parameters. This capability is particularly beneficial in installations where the projector is mounted in an inaccessible location or when it needs to be part of a larger automated system. The projector's design ensures that these control features are both powerful and intuitive, catering to both novice and experienced users.
The Optoma L23 offers a range of usage features that enhance its versatility and ease of operation.
Enabling RS232 Control: To activate the RS232 control mode, users must first power on the projector. Following this, a specific sequence of hotkey presses (POWER -> DOWN -> RIGHT -> MENU) is required to access the RS232 control setting OSD (On-Screen Display). Within this OSD, the "RS232 Control" option must be set to "ON." This step is crucial because the RS232 function is initially hidden and disabled by default, ensuring that it is only activated when intended. Once enabled, the projector can receive commands via the RS232 interface.
Configuring Projector ID: The projector allows users to set a unique "Projector ID," which is a two-digit number ranging from 00 to 99. This feature is particularly useful in multi-projector setups, where each projector needs to be addressed individually. By assigning distinct IDs, a single control system can manage multiple Optoma L23 units independently, sending specific commands to each one without affecting others. The default Projector ID is 00, but it can be customized as needed.
Setting Baud Rate: The baud rate, which determines the speed of data transmission over the RS232 connection, can also be configured. The available options typically include 9600 and 19200 bits per second (bps), with 9600 bps being the default. It is essential to match the projector's baud rate with that of the controlling device to ensure proper communication. Incorrect baud rate settings will prevent the projector from receiving or interpreting commands correctly.
Connecting the RS232 Cable: For RS232 communication, a physical connection is required. The Optoma L23 typically uses a USB Mini-B port on the projector side, which connects to a DB9 serial port on the controlling device (e.g., a computer or control system) via a specialized cable. This cable facilitates the serial data exchange necessary for remote control.
Sending RS232 Commands: Once the RS232 control is enabled, the Projector ID and baud rate are set, and the cable is connected, users can send RS232 commands to operate the projector. These commands are specific strings of characters that instruct the projector to perform various actions, such as turning on/off, switching inputs, adjusting volume, or modifying display parameters. The ability to send these commands programmatically allows for advanced automation and integration into complex AV systems.
Disabling RS232 Control: To disable the RS232 control, the process is similar to enabling it. After powering on the projector and navigating to the RS232 control setting OSD via the hotkey sequence, the "RS232 Control" option should be set to "OFF." This action effectively deactivates the RS232 interface, preventing any further remote commands from being processed until it is re-enabled.
The Optoma L23 incorporates several features and considerations related to maintenance and system stability, particularly concerning its RS232 settings.
Reset Conditions for RS232 Settings: It is important for users to understand when RS232 settings might be reset to their default values. The RS232 settings will be automatically reset under specific conditions, primarily related to factory resets or system-wide defaults. These conditions include:
Non-Reset Conditions for RS232 Settings: Conversely, there are specific actions that will not cause the RS232 settings to be reset. This ensures that certain routine operations do not disrupt the configured remote control capabilities. These non-reset conditions include:
Exiting RS232 Control Mode: After configuring the RS232 settings, users can exit the RS232 control mode OSD by pressing the "BACK" button. This action saves the changes and returns the projector to its normal operational display, allowing the newly configured RS232 settings to take effect.
In summary, the Optoma L23 projector is a robust display solution with advanced RS232 control capabilities designed for integration and remote management. Its detailed setup process for RS232, flexible ID and baud rate configurations, and clear guidelines on when settings are preserved or reset, make it a reliable choice for environments requiring precise and automated control over projection systems.
| Display Technology | DLP |
|---|---|
| Native Resolution | 1920 x 1080 |
| Light Source | LED |
| Light Source Life | 30, 000 hours |
| Throw Ratio | 1.2:1 |
| Zoom Type | Manual |
| Input Lag | 16 ms |
| I/O | HDMI |
| Projection Size | 30 to 300 inches |