EasyManua.ls Logo

Optoma TX1080 - User Manual

Optoma TX1080
90 pages
Print Icon
To Next Page IconTo Next Page
Loading...
SERVICE MANUAL
SI : TSE: Check: Approved:
Date Revise Version Description
2008.09.10 V1.0 Initial Issue
2008.09.22 V2.0 Modify Chapter 1 and add Chapter 7
2009.03.13 V3.0
Add EP1080 extended models: DX1080, OP1990,
VE810, DP7290, PV8530, P350, TX1080 and amend
the method of getting into FW mode in Chapter 5
EP1080/DX1080/OP1990/VE810/DP7290/
PV8530/P350/TX1080
Copyright March, 2009. All Rights Reserved P/N:36.8BH03G001

Table of Contents

Other manuals for Optoma TX1080

Questions and Answers

  • E
    emily27Aug 20, 2025
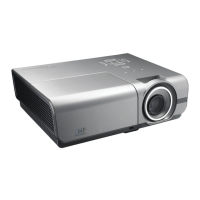
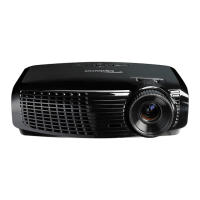
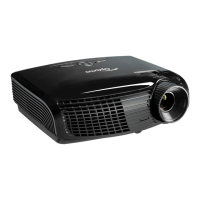
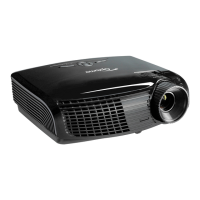
    Why does my Optoma Projector have no power?
    • C
      charlene01Aug 20, 2025
      If your Optoma Projector isn't turning on, make sure the power cord and AC power outlet are securely connected. Also, check the lamp cover and interrupt switch. Ensure all connectors are securely connected and aren’t broken. You may need to check the Lamp Driver, LVPS, Scaler Board, or Formatter Board.
  • P
    pwilliamsAug 22, 2025
    What causes image flicker on my Optoma Projector?
    • J
      jfloresAug 22, 2025
      Image flicker on your Optoma Projector can be resolved by doing a “Reset (All data)” of the OSD Menu. Also, ensure that the signal cables and source are working correctly. If not, check the Lamp Module, Color Wheel, DMD Board, Scaler Board, and Formatter Board.
  • D
    Derek HarrisonAug 25, 2025
    What to do if my Optoma TX1080 has no image?
    • K
      Kelly YangAug 25, 2025
      If your Optoma Projector is not displaying an image, ensure the signal cable and source are working. If multiple sources are connected, use the “Source” button to switch between them. Also, ensure all connectors are securely connected and aren’t broken. You may need to check the Scaler Board, Formatter Board, DMD Board, DMD Chip, or Engine Module.
  • D
    Daniel NewmanAug 26, 2025
    Why does my Optoma Projector display a garbage image?
    • T
      Tiffany MckeeAug 26, 2025
      If your Optoma Projector is showing a garbage image, ensure that the signal cables and source are working correctly. Also, check the Scaler Board, Formatter Board and DMD Board.
  • C
    Carol Taylor MDAug 27, 2025
    Why does my Optoma TX1080 shut down automatically?
    • J
      James SerranoAug 28, 2025
      Your Optoma Projector might be automatically shutting down due to several reasons. If the Lamp LED is flashing red, check the fan and Scalar Board or Formatter Board. If the Temp LED is red or flashing, check the thermal switch and the fan. If the Lamp LED is constantly red, check the lamp, Lamp Driver, Formatter Board or Photo Sensor.
  • G
    Gerald McdonaldAug 29, 2025
    What to do if my Optoma TX1080 Projector has color abnormalities?
    • J
      Jose MendezAug 30, 2025
      If your Optoma Projector displays abnormal colors, try performing a “Reset (All data)” from the OSD Menu. You can also try to adjust the Color Wheel Index. If the issue persists, check the Scaler Board, Formatter Board, DMD Board, or Color Wheel.
  • R
    Rhonda SmithAug 31, 2025
    Why is there no light on my Optoma TX1080?
    • F
      Felicia OdomSep 1, 2025
      If your Optoma Projector has no light, ensure all connectors are securely connected and aren’t broken. Check the Lamp Module, Lamp Driver, LVPS, Scaler Board, Formatter Board, Photo Sensor, and Color Wheel.
  • T
    terridoyleSep 3, 2025
    Why is my Optoma Projector making mechanical noises?
    • M
      Michelle LawsonSep 3, 2025
      If your Optoma Projector is making mechanical noises, check the Color Wheel and Fan Module.
  • M
    Mindy CisnerosSep 5, 2025
    What causes poor uniformity or shadows on my Optoma Projector's image?
    • F
      felicia82Sep 5, 2025
      To address poor uniformity or shadows on your Optoma Projector, ensure the projection screen is free of dirt and that the projection lens is clean. Also, ensure the brightness is within specified limits. If problems persist, check the rod alignment and Engine Module.
  • O
    omaddoxSep 7, 2025
    What to do if Optoma TX1080 Projector remote control or control panel failed?
    • Z
      zgoodwinSep 7, 2025
      If the remote control or control panel of your Optoma Projector is not working, start by checking the battery. If that's not the issue, check the Remote Controller, IR receiver, Scaler Board, Formatter Board, FPC, and Keypad.

Summary

Preface

Chapter 1 Introduction

Highlight

Provides key specifications and features of the projector model.

Compatible Mode

Details supported input resolutions and vertical sync frequencies.

Chapter 2 Disassembly Process

Equipment Needed & Product Overview

Lists necessary tools and provides an overview of the projector for disassembly.

Disassemble Lamp Cover Module

Step-by-step guide to removing the projector's lamp cover.

Disassemble Lamp Module

Instructions for safely removing the projector lamp module.

Disassemble Lens Shelter

Procedure for removing the projector's lens shelter.

Disassemble Top Cover Module

Detailed steps to remove the projector's top cover.

Disassemble Keypad Board Module

Guide to removing the projector's keypad board assembly.

Disassemble Vent

Instructions for removing the projector's cooling vents.

Disassemble Rear Cover Module

Steps for removing the projector's rear cover.

Disassemble Formatter Board and Scaler Board Module

Procedure for removing the main formatter and scaler boards.

Disassemble Air Ductor

Steps to remove the projector's air ducting.

Disassemble System Fan Module

Guide to removing the projector's cooling fan module.

Disassemble Left Shielding Module

Instructions for removing the left shielding module.

Disassemble Engine Module

Procedure for removing the projector's optical engine module.

Disassemble Color Wheel Module

Steps to remove the projector's color wheel module.

Disassemble DMD Chip

Guide to removing the projector's DMD chip.

Disassemble LVPS Module

Instructions for removing the Low Voltage Power Supply (LVPS) module.

Disassemble Ballast Module

Steps to remove the projector's ballast module.

Disassemble Blower Module

Guide to removing the projector's blower module.

Disassemble Safety Switch

Procedure for removing the projector's safety switch.

Disassemble IR Sensor Board and AIR Duct

Instructions for removing the IR sensor board and air duct.

Disassemble Left and Right Elevator Module

Steps to remove the projector's elevator modules.

Rod Adjustment

Procedure for adjusting the projector's internal rods for alignment.

Re-write Lamp Usage Hour

How to reset or update the projector's lamp usage hours.

Chapter 3 Troubleshooting

LED Lighting Message

Explains projector status based on LED indicator patterns.

Main Procedure

Provides systematic troubleshooting steps for common projector issues.

Chapter 4 Function Test & Alignment Procedure

Test Equipment Needed

Lists required equipment for functional testing and alignment.

Service Mode

Instructions on how to enter the projector's service mode.

OSD Reset

Procedure to reset the projector's On-Screen Display settings.

Test Condition

Specifies the environmental and operational conditions for testing.

Test Inspection Procedure

Outlines the inspection steps for various projector components.

PC MODE

Details procedures for testing and aligning the projector via PC connection.

Calibration

Describes video and PC calibration procedures for optimal performance.

Optical Performance Measure

Procedures for measuring projector brightness, contrast, and uniformity.

Video Performance

Testing procedures for CVBS, S-Video, HDTV/Component, HDMI, and Audio signals.

Network Function Test

Steps to test the projector's network connectivity and IP address.

Others

Includes functional inspection and check points for exterior and print patterns.

Chapter 5 Firmware Upgrade

Equipment Needed

Lists required software and hardware for firmware upgrades.

USB Driver Setup Procedure

Guide to installing the necessary USB drivers for firmware updates.

Firmware Upgrade Procedure

Step-by-step instructions for upgrading the projector's firmware via USB.

Chapter 6 EDID Upgrade

EDID Introduction

Explains what Extended Display Identification Data (EDID) is and its purpose.

Equipment Needed

Lists software and hardware required for EDID upgrades.

Setup Procedure (VGA-2 & DVI-D Port)

Instructions for connecting and setting up for EDID upgrade via VGA-2/DVI-D.

EDID Key-In Procedure (VGA-2 & DVI-D Interface)

Steps to input EDID data using the specified interface.

Setup Procedure (VGA-1 & HDMI Port)

Instructions for connecting and setting up for EDID upgrade via VGA-1/HDMI.

EDID Key-In Procedure (VGA-1 & HDMI Interface)

Steps to input EDID data using the specified interface.

Chapter 7 Network FW Upgrade Procedure

Equipment Needed

Lists necessary software and hardware for network firmware upgrades.

Read Projector IP

Guide to finding and noting the projector's IP address.

Network Setting

Procedures for configuring PC network settings for firmware update.

PC Hardware Link

Steps to establish a connection between PC and projector for firmware update.

Appendix A Exploded Image

Appendix B Serial Number System Definition

PCBA Code Definition

Explains the structure and meaning of PCBA (Printed Circuit Board Assembly) codes.

Optoma TX1080 Specifications

Power IconPower
power supply voltage range100-240 V
power supply frequency50-60Hz
power consumption400 Watts (Maximum)
standby power consumption<14 Watts
Display IconDisplay
native resolution1920 x 1080
maximum resolution1920 x 1200
brightness3600 ANSI Lumens
contrast ratio2200:1 (Full On/Full Off)
displayable colors1.07 Billion
Projection IconProjection
throw ratio1.85-2.22:1 (Distance/Width)
image size24.4” to 292.9” (0.6 to 7.4m)
projection distance3.9’ to 39.3’ (1.2 to 12m)
projection lensF = 2.6~2.89, f = 39.12~46.91 mm, 1.2x Manual Zoom and Focus
Audio IconAudio
speaker outputTwo 2-Watt Speakers
Operating Environment IconOperating Environment
operating temperature41 to 95°F (5 to 35°C)
humidity (maximum)80%
noise level (standard/bright)28dB/30dB
Weight and Dimensions IconWeight and Dimensions
width16.2” (411 mm)
height4.6” (116 mm)
depth12.2” (311 mm)
weight10.4 lbs (4.7 kg)

Related product manuals