EasyManua.ls Logo

Optus X Tap 2 - User Manual

Optus X Tap 2
2 pages
Print Icon
To Next Page IconTo Next Page
Loading...
1 3 5
42
PHONE & SIM
QUICK START GUIDE
Optus X Tap 2
Proximity &
Light Sensor
nano-SIM/
microSDXC
Card Tray
Earpiece
Front
Camera
Touch
Screen
Volume
Key
Power
Key
Microphone
Indicator
Light
Back
Cameras
& Flash
Fingerprint
Sensor
NFC Area
Speaker
Charging/
micro-USB
Jack
Headset
Jack
Getting started
The OPTUS X Tap 2 is specially designed for the OPTUS
Network to give you the best experience possible. It’s easy
to set up and use, but if you need extra help, this guide will
take you through the process. Plus it’s packed with tips to
help you get the most out of your new phone.
Choose your Prepaid plan
While you’re activating your SIM, we’ll ask you to pick your
Prepaid plan. We have plans to suit different types of usage
and if the one you choose doesn't work for you, you can
change it. See the full range at optus.com.au/prepaidplans
All information contained in this booklet is correct as at
October 2022. For the most up-to-date information visit
optus.com.au/prepaidplans
The details
To request the barring of all premium SMS and MMS services
go to optus.com.au/premiumsms
Emergency calls to 000 are free; you don’t need credit.
Your ID may need to be veriied by the government DVS
(Document Veriication Service) so it will need to be current
and valid.
To learn more about your privacy at OPTUS,
visit optus.com.au/privacypolicy
For more details about your Prepaid plan, visit
optus.com.au/CIS and optus.com.au/standardagreements
Setting Up Your Phone
The nano-SIM card can be installed or removed while the
phone is turned on.
WARNING!
To avoid damage to the phone, do not use any other kind
of SIM cards, or any non-standard nano-SIM card cut from
a SIM card. You can get a standard nano-SIM card from your
service provider.
1. Insert the tip of the tray eject tool into the hole on
the card tray.
CAUTION:
Never replace the included tray eject tool with sharp objects.
Ensure that the tray eject tool is perpendicular to the hole.
Otherwise, the phone may be damaged.
2. Pull out the card tray and place the nano-SIM card
and the microSDXC card (optional) on the tray, as shown.
Carefully slide the tray back into place.
microSDXC
card
nano-SIM
card
Question and Answer IconNeed help?

Do you have a question about the Optus X Tap 2 and is the answer not in the manual?

Summary

Getting Started and Phone Setup

Getting Started Overview

Introduction to the OPTUS X Tap 2 and its benefits for the OPTUS Network.

Choose Your Prepaid Plan

Guide to selecting a prepaid plan during SIM activation; visit optus.com.au/prepaidplans.

Important Details

Information on premium SMS barring, emergency calls, ID verification, and privacy policy.

Setting Up Your Phone

Install SIM and microSD Card

Step-by-step instructions for inserting the nano-SIM and optional microSDXC card.

Phone Operation and Charging

Charging The Phone

How to charge the phone's battery using approved chargers and USB cables.

Powering On;Off Your Phone

Instructions for turning the phone on, off, and restarting using the Power key.

Waking Up Your Phone

How to turn on the display and unlock the screen from sleep mode.

Safety and Legal Information

Product Safety Information

Essential safety precautions and warnings for phone usage, driving, and health.

Legal Information and Disclaimers

Copyright, disclaimers, trade marks, and terms of use.

Overview

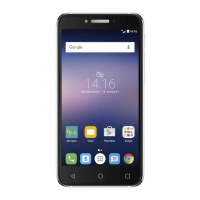
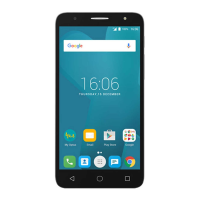
The Optus X Tap 2 is a smartphone designed for use on the Optus Network, offering a user-friendly experience with various features for communication and daily tasks. This guide provides essential information for setting up, using, and maintaining the device.

Device Overview and Setup

The front of the device features an earpiece, front camera, proximity and light sensor, and an indicator light. The display is a touch screen interface. On the side, there are volume keys and a power key. The bottom of the device includes a microphone and a charging/micro-USB jack. The top houses a headset jack. The back of the phone includes back cameras with flash, an NFC area, and a speaker.

To begin using the Optus X Tap 2, you'll need to install a nano-SIM card. The phone supports nano-SIM cards and an optional microSDXC card for expanded storage. To install these, locate the card tray on the side of the phone. Insert the tip of the provided tray eject tool into the small hole on the card tray. Gently pull out the tray, place the nano-SIM card and the microSDXC card (if desired) onto the tray as shown in the diagram, and then carefully slide the tray back into the phone until it clicks into place. It's important to use only standard nano-SIM cards and avoid cutting a larger SIM card, as this can damage the phone. The SIM card can be installed or removed even when the phone is turned on.

Getting Started with Your Optus Plan

When activating your SIM, you will be prompted to choose a Prepaid plan. Optus offers a range of plans to suit different usage needs, and you can change your plan if your initial choice doesn't fit. Detailed information on Prepaid plans, terms, and conditions can be found on the Optus website.

For managing premium SMS and MMS services, you can request barring through the Optus website. Emergency calls to 000 are free and do not require credit. Identity verification may be required using the government's Document Verification Service (DVS), so ensure your ID is current and valid. Optus also provides information on its privacy policy and standard agreements online.

Charging the Phone

Before initial use, or if the battery is low, the phone should be fully charged. Connect the adapter to the charging jack, ensuring it is inserted in the correct direction. Then, connect the charger to a standard AC power outlet. The indicator light may show the charging status. Once the battery is fully charged, disconnect the charger. It is crucial to use only Optus-approved chargers and USB cables to prevent damage to the phone or battery explosion. The battery is not removable; attempting to remove it may cause fire or explosion. If the battery is extremely low, the phone might not power on immediately even when charging. In such cases, charge it for at least 20 minutes before attempting to power it on again. If issues persist, contact customer service.

Powering On/Off and Waking Up the Phone

To power on the phone, press and hold the Power key until the screen illuminates. To power off, press and hold the Power key to open the options menu, then select the power off option. If the screen freezes or becomes unresponsive, you can force a restart by pressing and holding the Power key for over 10 seconds.

The phone automatically enters sleep mode after a period of inactivity to save power and lock the keys, preventing accidental operations. To wake up the phone, press the Power key to turn on the screen, then swipe up on the screen. If you have set up security features like face verification, fingerprint, an unlock pattern, PIN, or password, you will need to use the corresponding method to unlock your screen.

Safety and Maintenance

Adhering to safety guidelines is essential for the proper functioning and longevity of your Optus X Tap 2.

  • Driving Safety: Avoid making or receiving phone calls and never text while driving.
  • Body Proximity: Keep your phone at least 5mm away from your body when making calls.
  • Choking Hazard: Small parts of the phone could pose a choking hazard.
  • Hearing Protection: The phone can produce loud sounds. To prevent possible hearing damage, avoid listening at high volume levels for extended periods. Exercise caution when holding the phone near your ear while the loudspeaker is in use.
  • Magnetic Interference: Avoid contact with magnetic objects.
  • Medical Devices: Keep the phone away from pacemakers and other electronic medical devices.
  • Restricted Areas: Turn off the phone in hospitals, medical facilities, on aircraft, at airports, near explosive materials or liquids, and at petrol stations.
  • Light and Heat: The phone may produce a bright or flashing light. Avoid extreme temperatures. Do not dispose of your phone in fire.
  • Liquid Exposure: Avoid contact with liquids and keep your phone dry.
  • Disassembly: Do not attempt to disassemble your phone. Only use approved accessories.
  • Charging: For pluggable equipment, the socket-outlet should be installed near the equipment and be easily accessible.
  • Emergency Communications: Do not rely on your phone as a primary device for emergency communications.

The content of this guide is copyrighted by OPTUS Pty Ltd. All rights reserved. No part of this publication may be reproduced without prior written permission from OPTUS. Optus reserves the right to modify specifications or correct print errors without prior notice. For the most up-to-date information, including self-service options and supported product models, visit the Optus website. This Quick Start Guide is a condensed version; the full user guide can be downloaded from the Optus website.

Optus disclaims liability for faults and damage caused by unauthorized modifications of the software. Images and screenshots in this guide may differ from the actual product or software.

Trademarks:

  • Android™ is a trademark of Google.
  • The Bluetooth® word mark and logos are registered trademarks owned by the Bluetooth SIG, Inc., used under license by OPTUS.
  • microSDXC Logo is a trademark of SD-3C, LLC. Other trademarks and trade names belong to their respective owners.

Optus X Tap 2 Specifications

General IconGeneral
RAM2 GB
Storage32 GB
Front Camera5 MP
Rear Camera13 MP
SIMNano-SIM
Network4G

Related product manuals