lead acid batteries must not be charged with this product. There is
danger of explosion!
Batteries should be removed from the device if it is not used for a
long period of time to avoid damage through leaking. Leaking or
damaged batteries might cause acid burns when in contact with skin,
therefore use suitable protective gloves to handle corrupted
batteries.
Batteries must be kept out of reach of children. Do not leave the
battery lying around, as there is risk, that children or pets swallow it.
Batteries must not be dismantled, short-circuited or thrown into fire.
Never recharge non-rechargeable batteries. There is a risk of
explosion!
Repair works must only be carried out by a specialist/specialist
workshop.
If you have queries about handling the device, which are not
answered in this operating instruction, please check with the
distributor for further help.
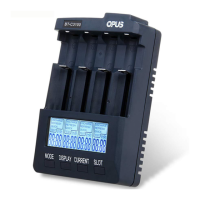
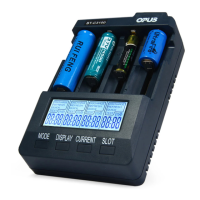
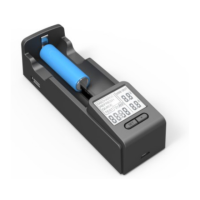
4. Operating Elements
5. Power Supply
The shipped power adapter is the power supply for this charger. In case you need to use other power adapter, please be aware that power supply has the
correct polarity plug. Also please be noted that power supply need be able to supply minimum 3.0A current. Low output power adapter could lead to working
improperly. After powering up, all LCD segments will light up and then showing firmware version 2.1 momentary. “null” will be shown when no battery is
loaded inside charger.
6. Operation
Once a rechargeable battery is inserted, its present voltage( for example, “1.12v”) will be displayed for 3 seconds, then 500mA default charging current will
be shown on display for another 3 seconds. If MODE or CURRENT button is not pressed during this 6 seconds, charging process will start. During the first 6
second time, If any button is pressed, the unit will wait for another 10s before finishing current slot setting. Press “SLOT” button will confirm the setting right
way without the needs of waiting the 10s auto time-out time elapsed. All other battery can be handled the same. So each battery can have its own setting
independently.
While the previous battery slot setting mode is in effective (telling by the flashing display of that battery slot LCD ), and the next battery is inserted, then both
battery slot display will be flashing, which means that any setting change will be applied for all batteries in setting mode at the same time.
Once start normal working mode, charging current can no longer be changed unless its working mode is changed or batteries are taken out from charger
and insert into charger again.
During normal working mode, if no particular slot is selected by pressing the SLOT button, MODE, CURRENT and DISPLAY button are always referring to 4
slots simultaneously. If a different working or display mode is desired for particular slot, press the SLOT button to select the slot and then
press “Mode” or “Display” to select your wanted working or display mode..
6.1 Mode Selection
Press and hold the “MODE” button for 2 seconds to start working mode selection for all four battery slot.
Press the “MODE” button subsequently to toggle among the “Charge”, ”Discharge”, ”Test” , “Quick Test” and “Refresh” mode