ST 6100 Terminal Installation Guide
R9015 Version 03 3 © ORBCOMM
®
Proprietary
• DO NOT mount the terminal close to air horns or any tractor roof hardware (for example, emergency
lights) that could interfere with satellite communications.
• DO NOT install the terminal inside the truck under the roof liner.
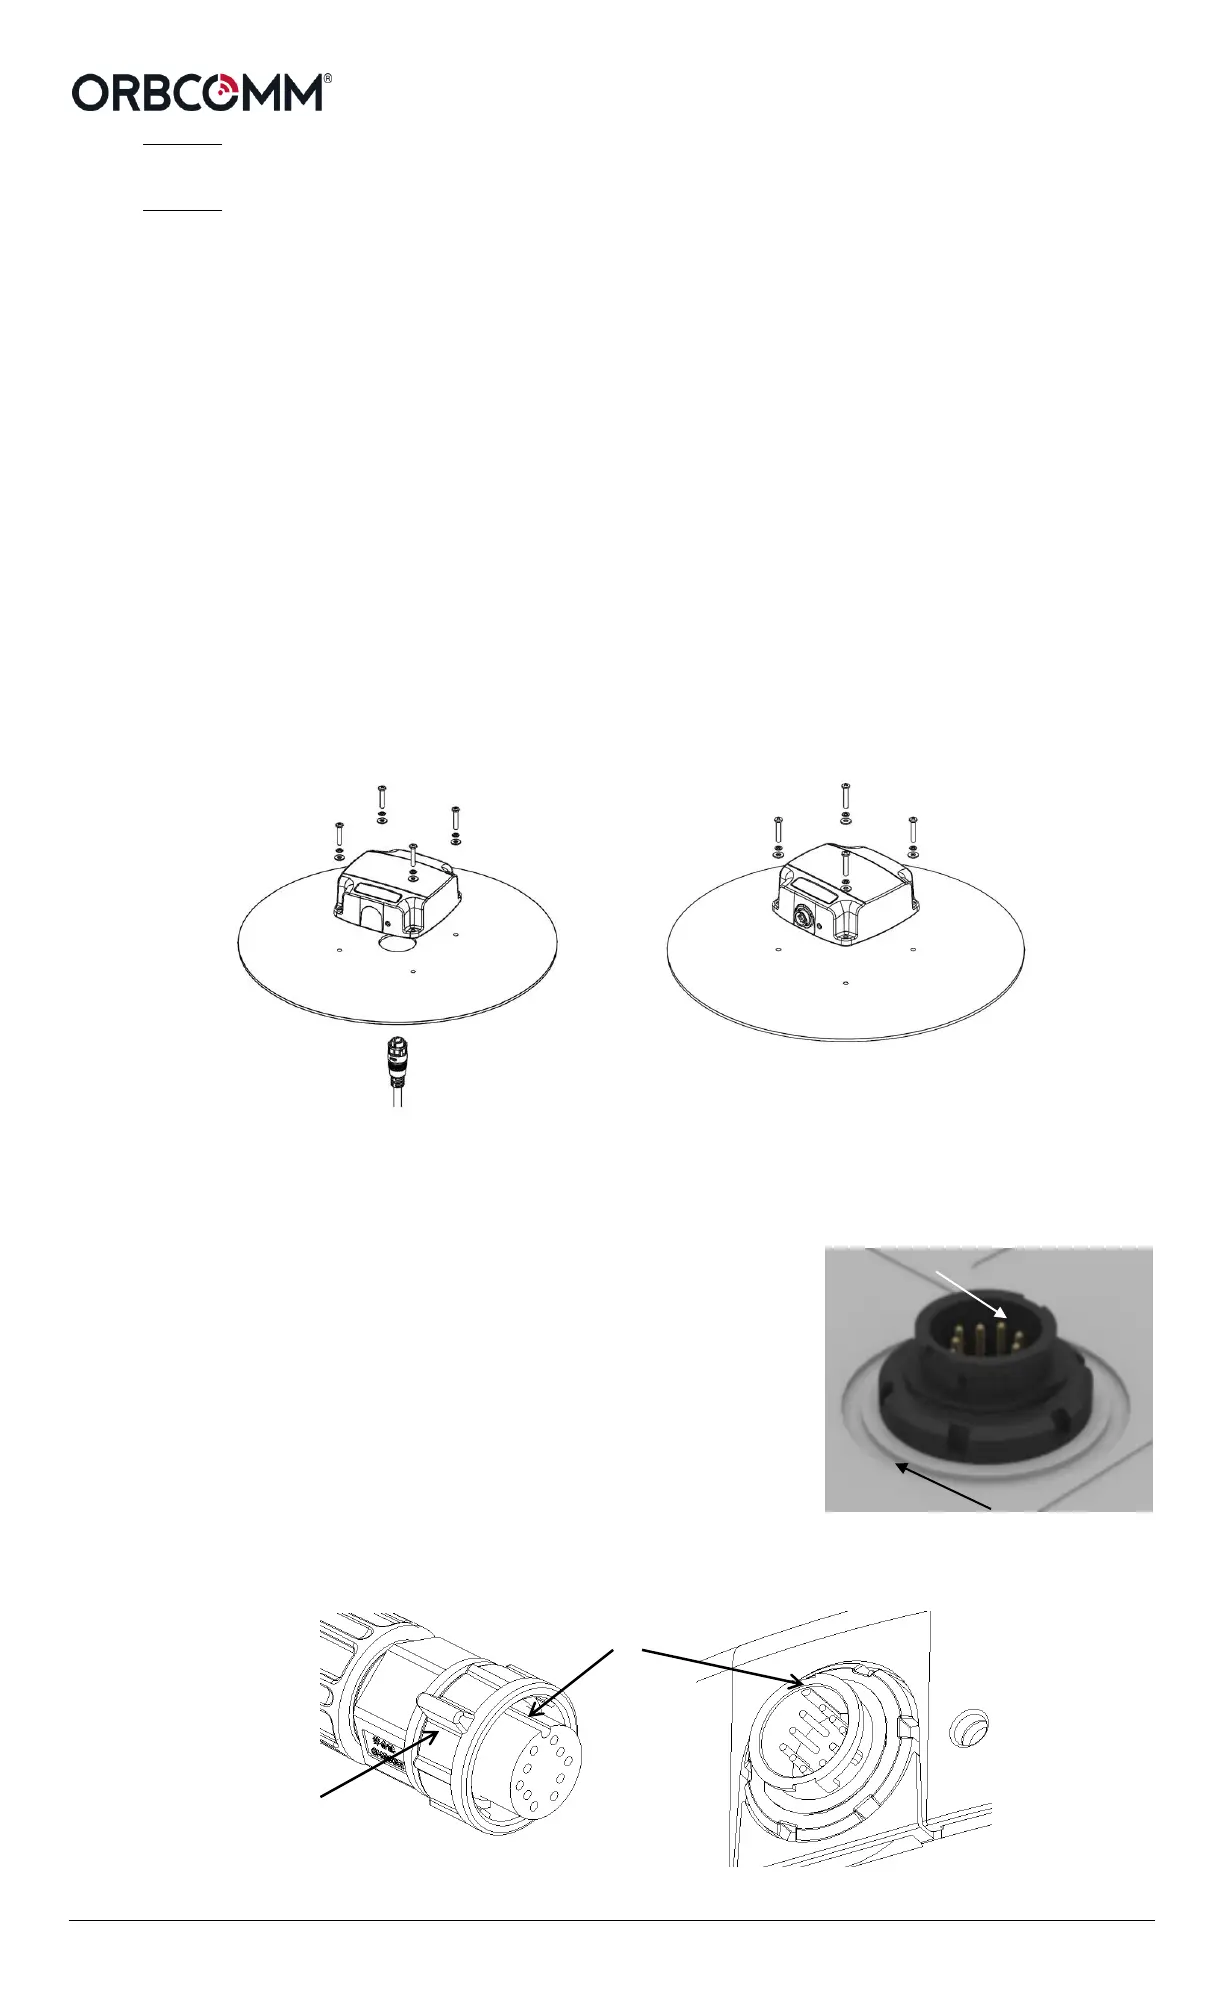
Install the Terminal
Once you have selected the mounting location, mount the terminal. Select either bottom connector mounting
(Figure 2) or the side connector mounting (Figure 3) depending on the terminal’s connector type.
The duplicate mobile ID labels, shipped with the terminal, can be placed on the asset where the terminal is
mounted and/or on any customer paperwork. For outdoor applications these labels should be protected by
applying the clear overlays provided.
In some cases, the Solution Provider may provide a mounting bracket with the terminal. In this case, the
following instructions are not required. Refer to the instructions with the mounting bracket.
1) Use the drill template (Figure 8) to mark the location of the four mounting holes and the connector hole
(if bottom connector). The orientation of the terminal with a bottom connector is not important.
2) Fill the ribbed channel around the connector (Figure 4) with waterproof sealing compound (bottom
connector only). You can also apply waterproof sealing compound to the drilled mounting holes before
inserting the screws.
3) Secure the terminal in place with the mounting hardware using the screwdriver and socket set.
CAUTION Do not over-tighten.
Figure 2 Figure 3
Bottom Connector ST 6100 Shown Side Connector ST 6100 Shown
4) Cut off one end of the tube of dielectric grease. Adding the dielectric grease makes sure that there is a
watertight seal. Figure 4 Terminal Connector
5) Insert the tube into the male end of the mating connector and
squeeze the dielectric grease into the mating connecter opening
(Figure 4) until it is full. Some dielectric grease will spill out.
CAUTION Do not apply pressure to the cable/connector
during the installation.
6) Connect the cable connector to the terminal by aligning the
corresponding connector key slot (Figure 5) and gently squeezing
together.
CAUTION Do not force the connector pins to mate since
this may damage the pins.
Figure 5 Key Slot
 Loading...