EN
12
shows on the clock display when batteries are low
or when there are no batteries installed and only the
adaptor is connected.
The LED indicator on the motion sensor and vibration
alarm will flash in red when the batteries are low.
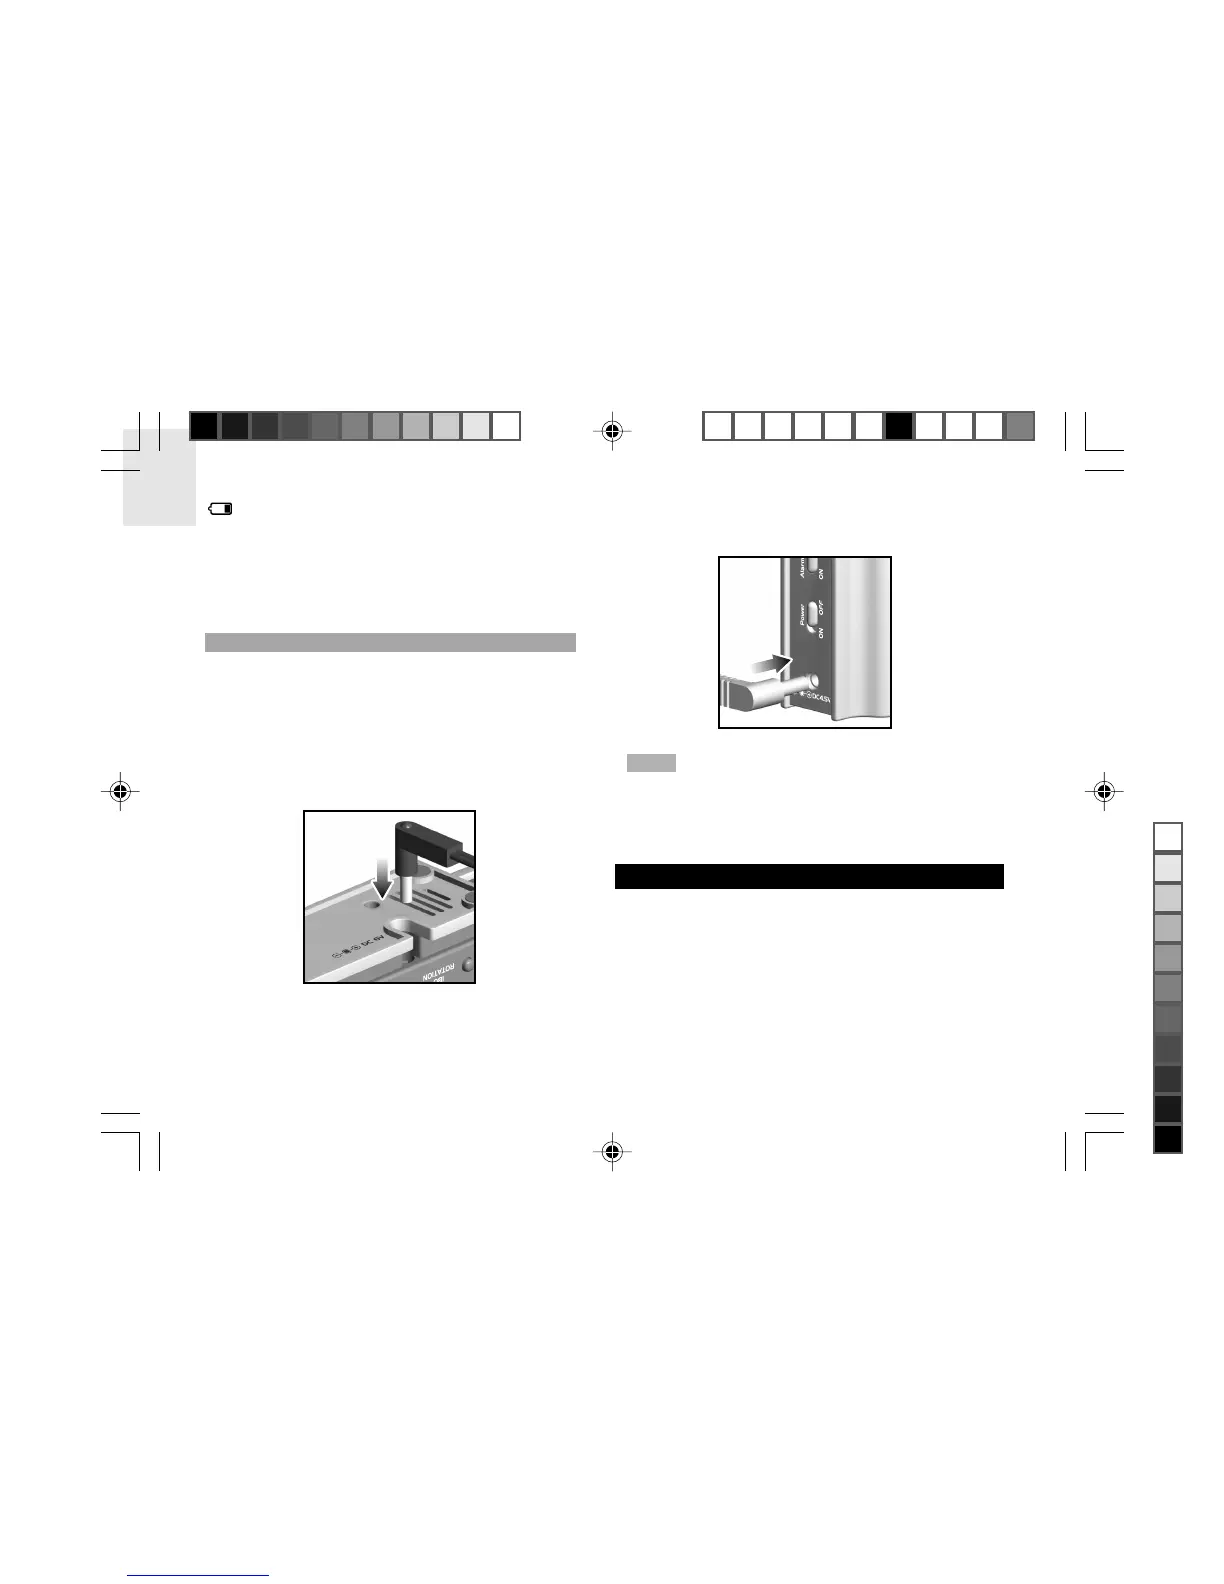
AC ADAPTOR
The clock / projector and the motion sensor use 6V and
4.5V AC / DC adaptors respectively. (Adaptor for the
motion sensor is not included.)
The clock AC adaptor socket is found on the bottom of
the clock. The jack can be inserted into the socket as
shown below:
The remote sensor jack can be inserted into the socket
as shown below:
The motion sensor has a Power ON / OFF
switch to help conserve energy. Use the AC adaptor
when using the motion sensor for long periods of time.
The batteries are a good power source for back-up use.
ABOUT RADIO RECEPTION
This clock can automatically synchronize the date and
time with official time-keeping organizations in Frankfurt
(Germany) and Rugby (England). The unit can pick up
a Radio Frequency (RF) signal when it is within 1500km
(932 miles) of these locations.
To select the most suitable radio signal for your location,
slide the EU / UK switch to the appropriate setting. Press
RESET whenever you change the selected setting.
NOTE
RMR939P English R8 OP 8/23/04, 11:55 AM12
Black

 Loading...