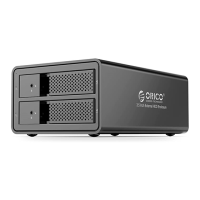
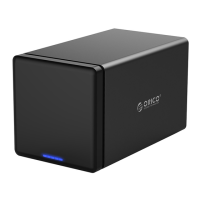
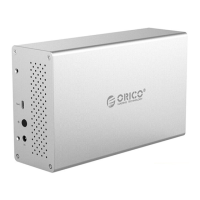
The ORICO 35RU3 Series is a versatile external hard drive RAID enclosure designed for desktop storage, offering robust data management and protection capabilities. This series is fully compatible with both 2.5-inch and 3.5-inch SATA HDDs and SSDs, making it a flexible solution for various storage needs. Its USB3.0 output interface ensures high-speed data transmission, supporting rates up to 5Gbps. The enclosure's construction from aluminum alloy contributes to its strength and durability, providing a secure housing for your valuable data.
Function Description:
The primary function of the 35RU3 Series is to provide external storage with RAID array capabilities. RAID (Redundant Array of Independent Disks) allows users to configure multiple hard drives to work together as a single logical unit, offering benefits such as improved performance, data redundancy, or a combination of both. The series supports multiple RAID modes, including RAID 0, RAID 1, RAID 3, RAID 5, RAID 10, SPAN, CLONE, and PM/Normal, catering to different application requirements for data storage.
- RAID 0 (Striping): This mode offers the fastest data read speed by distributing data across multiple disks. However, it lacks data protection; if one hard drive fails, all data will be lost. It's ideal for temporary storage and high-speed data transmission, such as video editing.
- RAID 1 (Mirroring): Prioritizing data safety, RAID 1 duplicates data across two or more disks. If one hard drive is damaged, data remains safe on the other disk(s). The trade-off is that only 50% of the total disk capacity is usable. This mode is suitable for scenarios demanding high data security.
- RAID 3 & RAID 5: These modes offer a balance between data safety and capacity utilization. They consume the equivalent of one hard drive's capacity for parity information, providing data protection while maximizing usable storage. RAID 5 is widely used as a RAID mode.
- RAID 10 (RAID 1+0): Combining the benefits of RAID 1 and RAID 0, RAID 10 offers both security and enhanced transmission performance. It requires at least four drives and provides 50% usable capacity, recommended for applications with high demands on data safety.
- PM (Port Multiplier)/Normal: In this mode, each hard drive is ejected and recognized separately by the computer. This allows for direct access and management of individual drives, making it convenient for users who prefer to use drives independently.
- SPAN / JBOD (Just a Bunch Of Disks): This mode binds multiple hard drives of different capacities into a single large volume. While it maximizes storage capacity, it does not offer data protection; the failure of one drive will result in the loss of all data. It is generally not recommended for critical data.
- CLONE: This mode involves at least two drives storing duplicate copies of the same data. Data is simultaneously written to two or more disks, ensuring redundancy. The storage capacity is limited to the size of the smallest disk.
The enclosure also incorporates intelligent sleep technology, which helps conserve energy and extend the lifespan of the hard disks by allowing them to enter a low-power state when not in use. A built-in low-noise, high-speed cooling fan, combined with an air convection cooling duct design, ensures efficient heat dissipation, maintaining optimal operating temperatures for the hard drives.
Usage Features:
The 35RU3 Series is designed for ease of use, supporting hot plug functionality and plug-and-play operation, eliminating the need for driver installations. It is fully compatible with Windows, Mac OS, and Linux multi-platform operating systems.
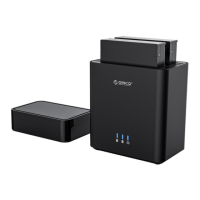
Installing hard disks is a straightforward process:
- Push the slip buckle to auto-pop the tray handle.
- Pull out the tray.
- Install 2.5-inch or 3.5-inch SATA HDD/SSD onto the tray and secure it with screws. For 2.5-inch drives, four bottom screws are used, while for 3.5-inch drives, four screws on both sides are used.
- Load the tray back into the enclosure.
Setting up RAID can be done either through a physical RAID control switch or via the ORICO HW RAID Manager Software.
Setting RAID via Control Switch:
- Turn off the HDD enclosure and HDDs.
- Switch the RAID control switch to the "PM" position.
- Press and hold the "Set" button.
- Turn on the power switch of the HDD enclosure.
- Release the "Set" button after about 10 seconds. A buzz indicates successful PM mode setup.
- Turn off the enclosure and HDDs again.
- Switch the RAID control switch to the desired RAID mode position.
- Press and hold the "Set" button.
- Turn on the power switch.
- Release the "Set" button after about 10 seconds. A buzz confirms successful RAID mode setup.
After RAID setup, the HDD(s) or HDD group will appear on the computer, requiring initialization and partitioned formatting before use. If not displayed, restarting the enclosure, computer, or resetting the RAID mode may be necessary.
Setting RAID via ORICO HW RAID Manager Software:
- Download and install the ORICO HW RAID Manager from the official ORICO website. Unzip the software if it's in RAR format.
- Turn off the HDD enclosure.
- Run
Setup.exe to install the software. A PC restart might be required.
- After installation, a shortcut will appear on the desktop. Turn on the HDD enclosure and HDDs.
- Double-click the shortcut to run the software.
- In the software interface, click the icon in the left box to access the basic RAID setting interface.
- Choose the desired RAID mode from the list and click "Apply."
- A prompt will appear, warning that specifying a basic RAID configuration will delete previous volumes and data. Click "Yes" to proceed or "No" to cancel.
- Upon clicking "Yes," the setting process will begin, indicated by a progress bar. A confirmation message will appear once the RAID is successfully created.
Similar to the physical switch method, the HDD(s) or HDD group will need initialization and formatting after software-based RAID setup.
New hard drives must be initialized and formatted to function correctly.
- Ensure the ORICO enclosure is properly installed and connected to the computer.
- On Windows, right-click "My Computer," select "Computer Management," then "Disk Management."
- Choose either "MBR" (for disks less than 2TB) or "GPT" (for disks greater than 2TB) partition form and click "OK." Using GPT for larger disks is crucial to access the full capacity.
- Right-click the "unallocated" disk space and select "New Simple Volume" to start the formatting wizard.
- Specify the volume size. Users can customize the partition capacity or use the default maximum simple volume size, resulting in a single disk partition.
- Allocate a drive letter and path (e.g., C, D, E, F, G drive).
- Format the partition, setting the file system (NTFS, FAT32, or exFAT), allocation unit size (default), and volume label. "Perform a quick format" is recommended.
- Click "Finish" to complete the formatting. The new partition drive letter will appear in the explorer within 5-30 seconds.
Maintenance Features:
The device is designed with several features that contribute to its longevity and ease of maintenance:
- Aluminum Alloy Construction: The full range is made of aluminum alloy, which provides excellent durability and helps protect the internal components.
- Intelligent Sleep Technology: This feature automatically puts the hard drives into a low-power sleep state when inactive, reducing wear and tear, conserving energy, and extending the lifespan of the hard disks.
- Efficient Cooling System: A built-in low-noise, high-speed cooling fan and an air convection cooling duct design ensure optimal heat dissipation. This prevents overheating, which can degrade performance and shorten the life of hard drives.
- Driver-Free Installation: The plug-and-play nature of the device means no complex driver installations are required, simplifying setup and reducing potential software conflicts.
- Hot Plug Support: The ability to hot-plug hard drives allows for easy replacement or addition of drives without needing to power down the entire system, streamlining maintenance tasks.
Important Considerations for Maintenance and Usage:
- Data Backup: Always back up all files before setting or changing RAID modes, as these operations will clear all data stored on the HDDs in the enclosure.
- Disk Order: Do not change the order of HDD bays under RAID mode to prevent unstable running or data loss.
- HDD Removal: Do not forcibly remove HDDs from the enclosure under RAID mode. Always delete the hardware and exit media on the computer before removal. For Normal mode, removing or inserting an HDD will restart the enclosure, temporarily disconnecting other HDDs; therefore, it's recommended to add or remove HDDs after powering off the device.
- Precision Equipment: HDDs are precision equipment, and RAID is a precision system. Always operate carefully and back up files regularly to avoid data mistakes or loss from improper operations.
- Physical Care: Avoid hitting, throwing, puncturing, dropping, squeezing, or bending the product. Keep it away from humid, hot, high-dust, corrosive environments, and direct sunlight. Do not use chemical solutions for cleaning.
- Disassembly: Do not disassemble or repair the product or its accessories without authorization from ORICO.
- New Hard Drives: New hard drives must be initialized and formatted to work properly.
- Customer Support: If any questions arise during use, contact your dealer or ORICO Customer Service Center.
The ORICO 35RU3 Series is designed to be a reliable and user-friendly external storage solution, offering various RAID options to suit diverse data management strategies while ensuring data integrity and device longevity through thoughtful design and features.