EasyManua.ls Logo

Orion COMBI 2612 - Disassembly Instructions; Removal of Mechanical Parts and P.C. Boards

Orion COMBI 2612
68 pages
Print Icon
To Next Page IconTo Next Page
To Previous Page IconTo Previous Page
Loading...
DISASSEMBLY
INSTRUCTIONS
1.
REMOVAL
OF
MECHANICAL
PARTS
AND
P.C.
BOARDS
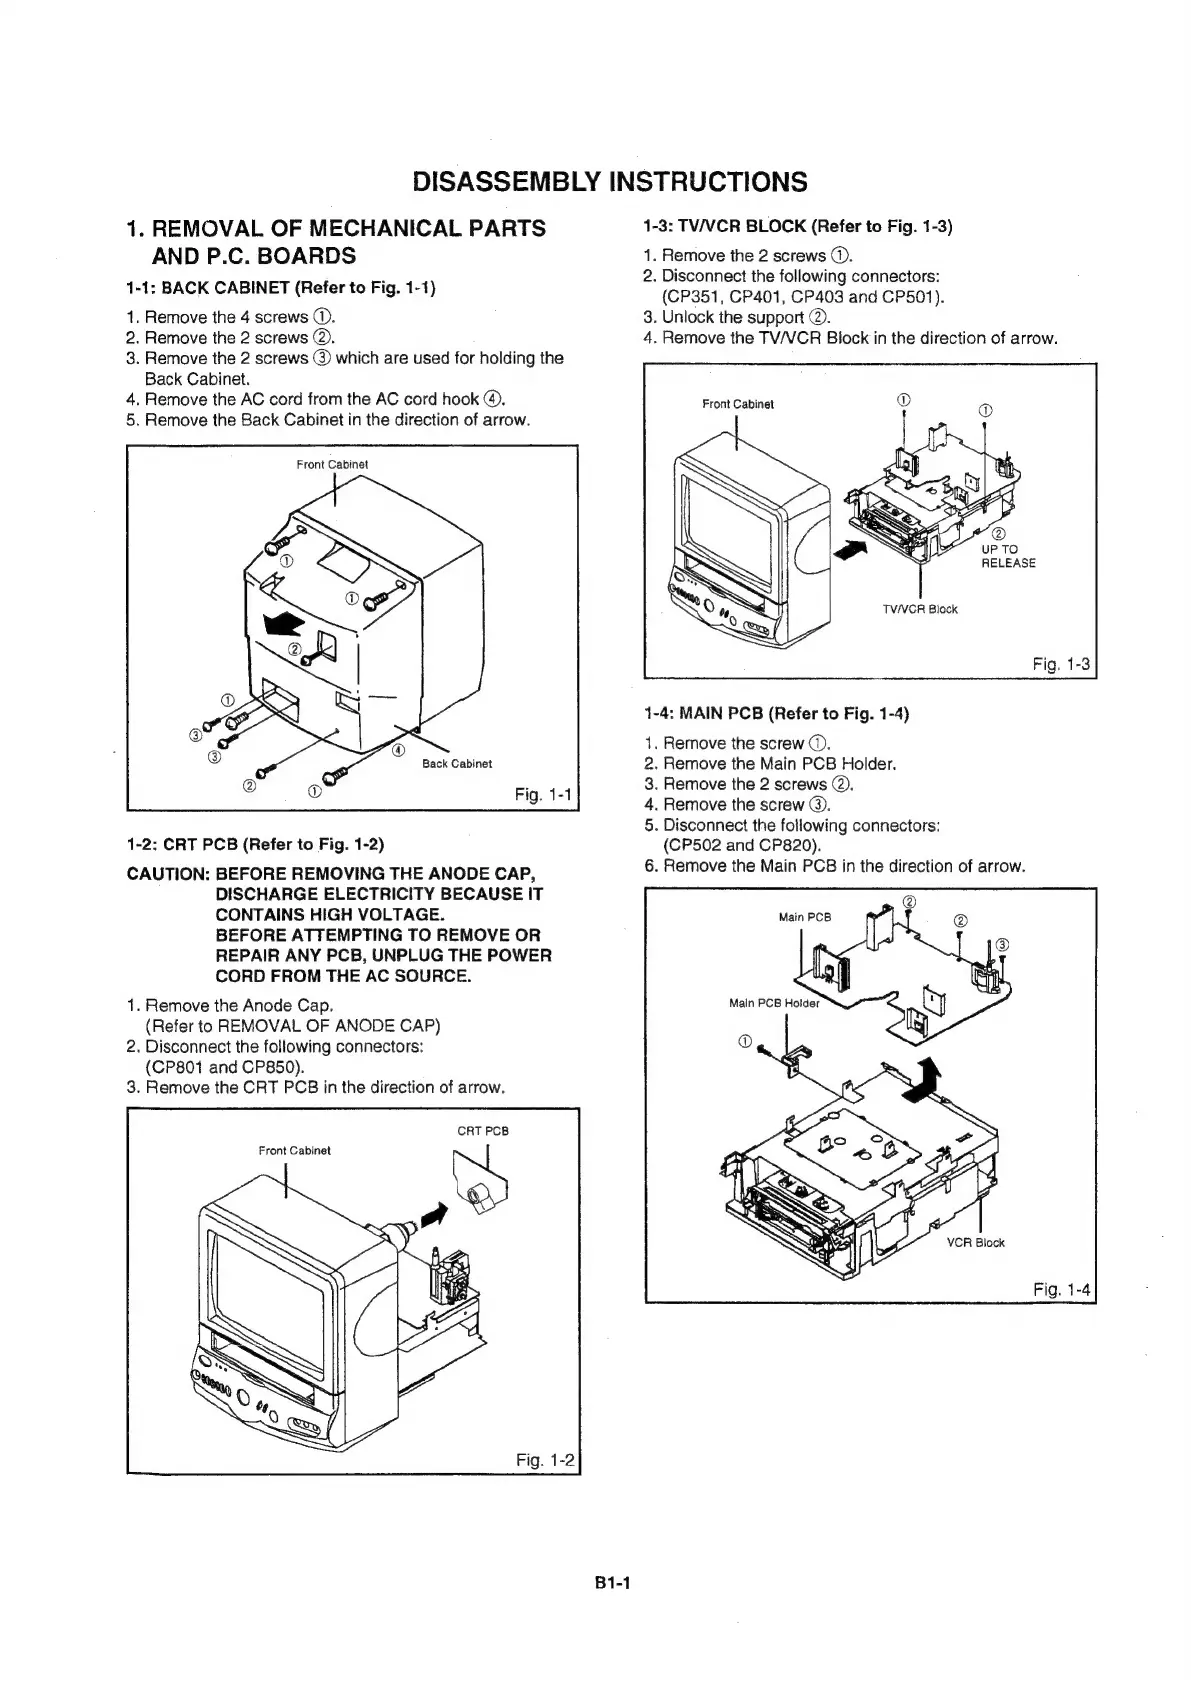
1-1:
BACK
CABINET
(Refer
to
Fig.
1-1)
1.
Remove
the
4
screws
©.
2.
Remove
the
2
screws
@.
3.
Remove
the
2
screws
@
which
are
used
for
holding
the
Back
Cabinet.
4,
Remove
the
AC
cord
from
the
AC
cord
hook
@.
5.
Remove
the
Back
Cabinet
in
the
direction
of
arrow.
Front
Cabinet
Back
Cabinet
Fig.
1-1
1-2:
CRT
PCB
(Refer
to
Fig. 1-2)
CAUTION:
BEFORE
REMOVING
THE
ANODE
CAP,
DISCHARGE
ELECTRICITY
BECAUSE
IT
CONTAINS
HIGH
VOLTAGE.
BEFORE
ATTEMPTING
TO
REMOVE
OR
REPAIR
ANY
PCB,
UNPLUG
THE
POWER
CORD
FROM
THE
AC
SOURCE.
1.
Remove
the
Anode
Cap.
(Refer
to
REMOVAL
OF
ANODE
CAP)
2.
Disconnect
the
following
connectors:
(CP801
and
CP850).
3.
Remove
the
CRT
PCB
in
the
direction
of
arrow.
Front
Cabinet
1-3:
TV/VCR
BLOCK
(Refer
to
Fig.
1-3)
1.
Remove
the
2
screws
@.
2.
Disconnect
the
following
connectors:
(CP351,
CP401,
CP403
and
CP501).
3.
Unlock
the
support
@.
4.
Remove
the
TV/VCR
Block
in
the
direction
of
arrow.
Front
Cabinet
TVNVCR
Block
1-4:
MAIN
PCB
(Refer
to
Fig.
1-4)
1,
Remove
the
screw
©.
2.
Remove
the
Main
PCB
Holder.
3.
Remove
the
2
screws
@).
4,
Remove
the
screw
@.
5.
Disconnect
the
following
connectors:
(CP502
and
CP820).
6.
Remove
the
Main
PCB
in
the
direction
of
arrow.
VCR
Block

Related product manuals