4
Open the shipping box and, referring to the above Parts List
and Figure 2, check that all the parts are present. Remove
all of the accessories from their individual boxes and bags.
Remember to save all of the original packaging in case the
scope needs to be returned to Orion for warranty repair, or
should you wish to return the scope under the 30-day return
policy. Especially in the latter case, the original packaging is
required. If anything is missing, contact Orion Customer Ser-
vice at (800) 676-1343, or support@telescope.com.
Assembly
Setting Up the Tripod and Mount arm
1. Stand the tripod legs upright and spread the legs out as
wide as they will go.
2. Remove the knob and washer from the bottom of the
tripod’s center support shaft. Slide the tripod support
tray up onto the shaft; the flat side of the support tray
should be facing up. Make sure the “V” of each tray arm
is against a tripod leg. Place the washer on the center
support shaft against the tray, then thread the knob back
onto the shaft until tight (Figure 3). The tripod support
tray provides additional stability for the tripod, and has
holes for eyepieces and other accessories..
3. Place the base of the mount arm onto the tripod’s top
plate, lining up the three holes in the bottom of the arm
base with the three bolts in the top plate (Figure 4A).
Turn the three knobs under the tripod top plate clockwise
until tight (Figure 4B).
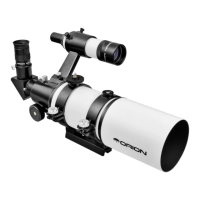
Figure 2. Included components of the StarSeeker IV GoTo telescope. (StarSeeker IV 127mm Mak-Cass shown)
Tripod
Optical tube
Diagonal
(Refractor and
Mak-Cass only)
Collimation cap
(Reflectors only)
DC power cable
Accessory
tray/spreader
Center support
knob
Washer
Objective cap
SynScanHand
controller
Hand controller
cable
Hand controller
holder
Mount
arm
PC interface
(serial) cable
EZ Finder II
Compass
Eyepieces
Figure 3. Install the accessory tray/tripod spreader before
attaching the mount arm.

 Loading...