4 5
row support base. We recommend using a compact autoguider, such as the
StarShoot AutoGuider or any guider the size of an eyepiece barrel. However
many other autoguider cameras with female T-threads or eyepiece male barrel
size are also appropriate.
Using the TOAG
1. Adjust the prism
2. Set the correct imaging camera and autoguider spacing
3. Determine what kind of setup you wish to use
1.1 Adjusting the Prism Position
It is important to set the pick-off prism to the proper position
Prism Tube Stabilization Setscrews
Since the initial release of the TOAG, we have added four prism tube stabiliza-
tion setscrews to eliminate any possible flexing of the guide camera relative to
the TOAG main body (Figure 2). No other thin off-axis guider on the market has
this unique stabilization feature. The four setscrews provide enhanced rigidity to
the prism tube and, thus, to the autoguider platform where the guide camera is
installed. These four setscrews are perpendicularly oriented relative to the other,
lateral setscrews that also serve to secure the prism tube to both the guider
platform and the TOAG main body. This cross-directional stabilization provides a
highly rigid, flexure-free unit to insure trouble-free guiding.
Center to Perimeter Adjustment
The pick-off prism should positioned be as close as possible toward the center
of the TOAG but without obstructing the light path to the main imaging camera.
If you can see the shadow of the prism on your images, you should move the
prism up and out of the light path.
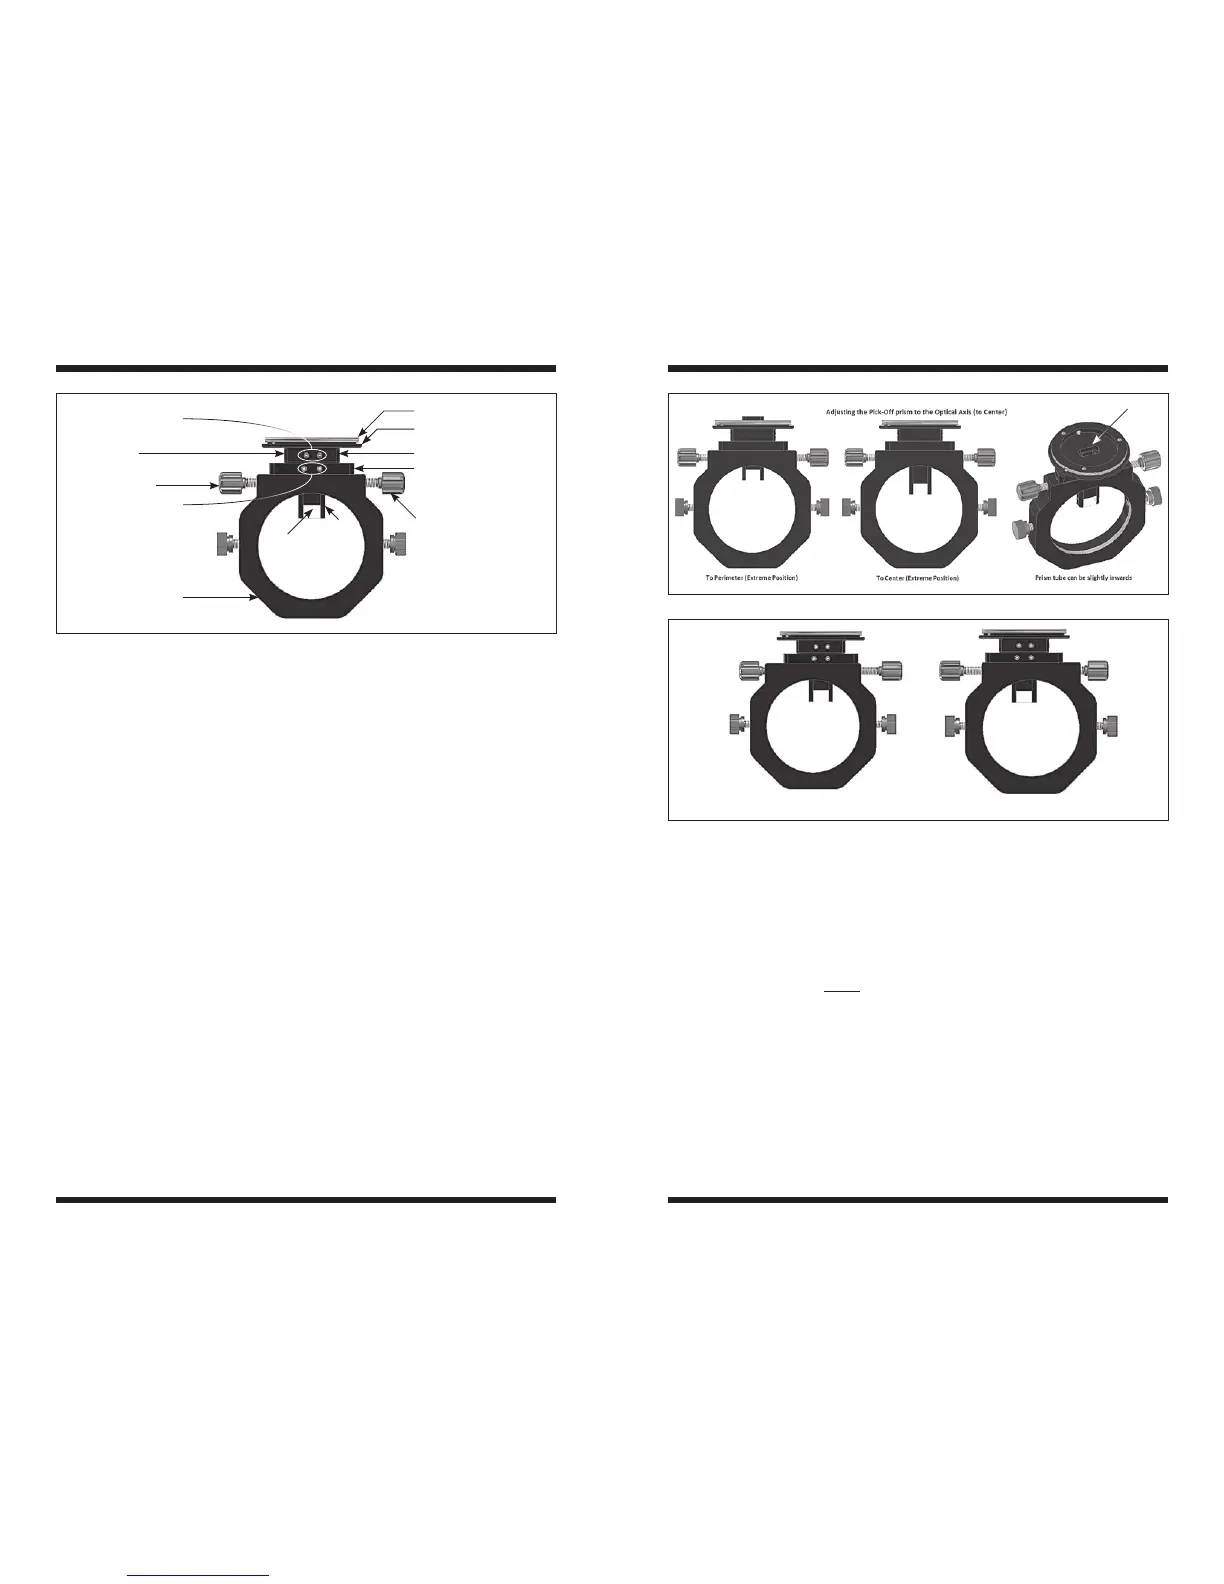
To adjust the prism’s vertical position (Figure 3), first loosen the lower two prism
tube stabilization setscrews under the guider platform, facing the telescope side.
Use the included hex key to loosen each about half a turn. Then loosen the lat-
eral setscrew to the right of the lower two stabilization setscrews. Now the prism
tube should be able to be moved freely up or down. Set the correct position (see
Section 3) then re-tighten the three setscrews.
Note that you can move the prism tube relative to the guider platform a limited
amount by loosening the upper two prism tube stabilization setscrews and the
two lateral setscrews to the left and right of them. The top of the prism tube can
be sunk down slightly from the surface of the guider platform (see right-most
illustration of Figure 3), but care should be taken to avoid having the tube drop
down too far or slip out.
Optional Side-to-Side Adjustment (Transverse Adjustment)
The pick-off prism can be adjusted side-to-side a small distance, using the two
transverse adjustment thumbscrews (Figure 2). Turn both thumbscrews toward
or away from you to move the prism laterally (Figure 4). This is a great feature
when looking for a suitable guide star, as it allows having a virtual prism with
about twice the width of the original prism. This adjustment should only be done
Figure 3. Up-down, or center to perimeter adjustment.
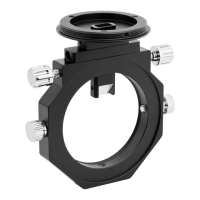
Figure 2. Parts of the TOAG
Upper prism tube
stabilization setscrews
Guider platform
T-threads
Setscrew Setscrew
Setscrew
Lower prism tube
stabilization setscrews
Transverse
adjustment
thumbscrews
Transverse adjustment
thumbscrew
Prism
tube
TOAG main body
Pickoff
prism
Figure 4. Side-to-side adjustment
To right (extreme position) To left (extreme position)
 Loading...