6 7
Simple imaging trains are preferable to more complex ones. Simplicity means
fewer variables to control. Below you will find some examples that we consider
simple and that cover a diversity of use.
2.1.1. DSLR Camera and Autoguider
2.1.2. DSLR Camera with Coma Corrector
2.1.3. CCD Imaging Camera and Autoguider
2.1.1. DSLR Camera and Autoguider
This is probably the most common use of a TOAG as it allows it to be used with
a wide range of telescopes and DSLRs. Below we discuss mounting a Canon
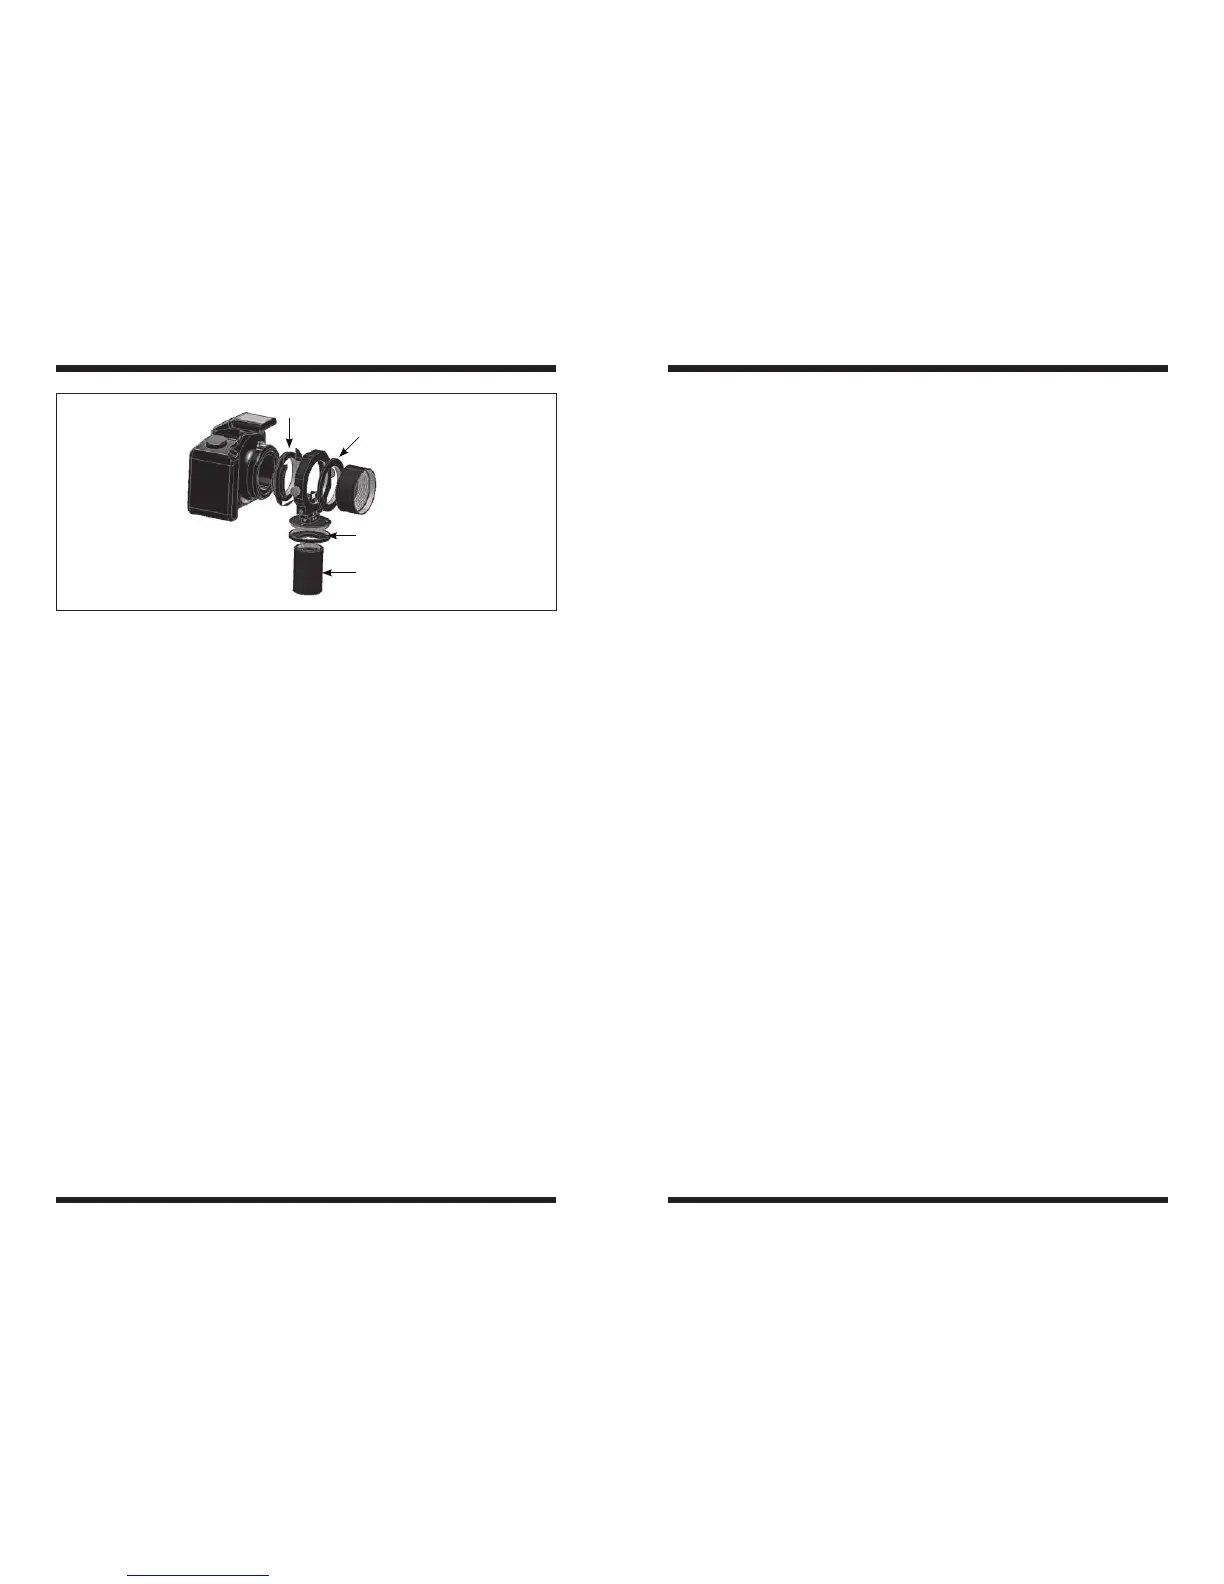
DSLR body onto a telescope. Refer to the schematic in Figure 5.
Choose the Canon-camera compatible adapter (#3) from the supplied adapters.
Start by removing the DSLR objective lens, by pressing the objective release
button on the camera body to remove the lens.
Installing the Canon-camera compatible adapter is done the same way as install-
ing a lens. Rotate it until it clicks, just like the lens would do.
Now place the autoguider on the guide end of the TOAG. You can thread the
guide camera to the supplied C-mount to T-threads adapter (#7) if the autoguider
is compatible with C-mount threads, or alternatively you can thread the auto-
guider to the TOAG if it uses T-threads.
We have designed the TOAG so even autoguiders that are not compatible with
C-mount or T-threads can be used (if the autoguider has a 1.25" barrel). Simply
insert the camera barrel on the guide platform inside the ring of T-threads and
use the supplied hex key to secure it.
Insert the TOAG (the autoguider already installed) into the Canon-camera ring
so that the pick-off prism is centered between the Canon Ring “lips” (Figure 5).
This is important if you wish to use the side-to-side adjustment, as it requires
enough space to move the prism from one side to the other.
Spacers might be required to adjust the distance from the guide camera sensor
to the TOAG prism.
2.1.2. DSLR Camera with Coma Corrector
The TOAG is especially interesting when used in combination with a coma cor-
rector, which can improve star size and star shape on the edge of the image
frame.
As mentioned before, the correct distance between the coma corrector and the
camera sensor is important to achieve good results. Getting pinpoint star images
across the full frame depends on how well the correct distance is achieved.
This distance depends not only on the telescope f-ratio but also on the camera
make/model. In the example below, we use the MPCC III Coma Corrector (not
after setting the correct main camera and autoguider spacing and when looking
for a guide star.
1.2. Setting the Correct Main Camera and Autoguider Spacing
The main camera and autoguider must come to the same focus point to suc-
cessfully operate the TOAG. The imaging chip in your CCD or DSLR camera
and the detector in your autoguider must be equidistant to the focal plane of
your telescope. We suggest using the Orion T-thread Spacing Kit #05528 (not
included) to add spacing, if necessary, to achieve the required focus distance.
It may be necessary to add more than one spacer to the imaging end or to the
guide end.
Start by measuring the distance from the main camera sensor to the center of
the TOAG. The measured distance should then be applied to the same auto-
guider sensor as well.
2. Matching the Orion TOAG to Different
Imaging Trains
Once having successfully determined the required spacing between the main
camera and autoguider to the prism (both cameras are now equidistant), and
adjusted the pick-off prism depth, you are ready for the next step: preparing your
setup. Here are three examples to help you get started.
2.1. Basic Imaging Train Set-Up
An imaging train is usually composed of a main camera, the autoguider, the
TOAG and other useful accessories such as a filter wheel.
Figure 5. DSLR camera and eyepiece barrel-size autoguider
DSLR
camera
Canon ring
Stepdown ring
2" Nosepiece
adapter
C-Mount to
T-thread adapter
Eyepiece barrel
size guide camera
 Loading...