39
PINPOINT LOCATION:
The sensors, the 3 reception antennas and the patented
circular illustration on the S1 simplify pinpoint location
and make it more precise.
The process of pinpoint location begins automatically at
a distance of 3m. The searcher is approaching the victim:
the arrows show towards the centre of the circle.
The closer he comes to the victim the faster the acoustic
signal sounds. Do not turn or tip the S1 during pinpoint
location!
The searcher is approaching the victim:
the distance is 2m, the circle becomes smaller and
the arrows are pointing to the centre of the circle.
The searcher is moving away from the victim.
The circle becomes larger, the arrows are pointing
outwards as the distance increases. The previously
achieved, closer position is stored and is referenced
by the inner, lighter circle shown on the screen.
The searcher is once again approaching the victim.
The circle is becoming smaller, the arrows are pointing
to the centre and the distance to the victim is reducing.
The victim is buried at a depth of 0.9m. No further and
no smaller circles are visible. Use the select button to
mark the position.
The first victim has been found and is marked using
the confirmation button (“select”, 7). Now the search
can begin for the second and third victims (at distances
of 10m and 15m respectively).
The reverse arrow signals that the searcher should turn
around and move in the opposite direction.
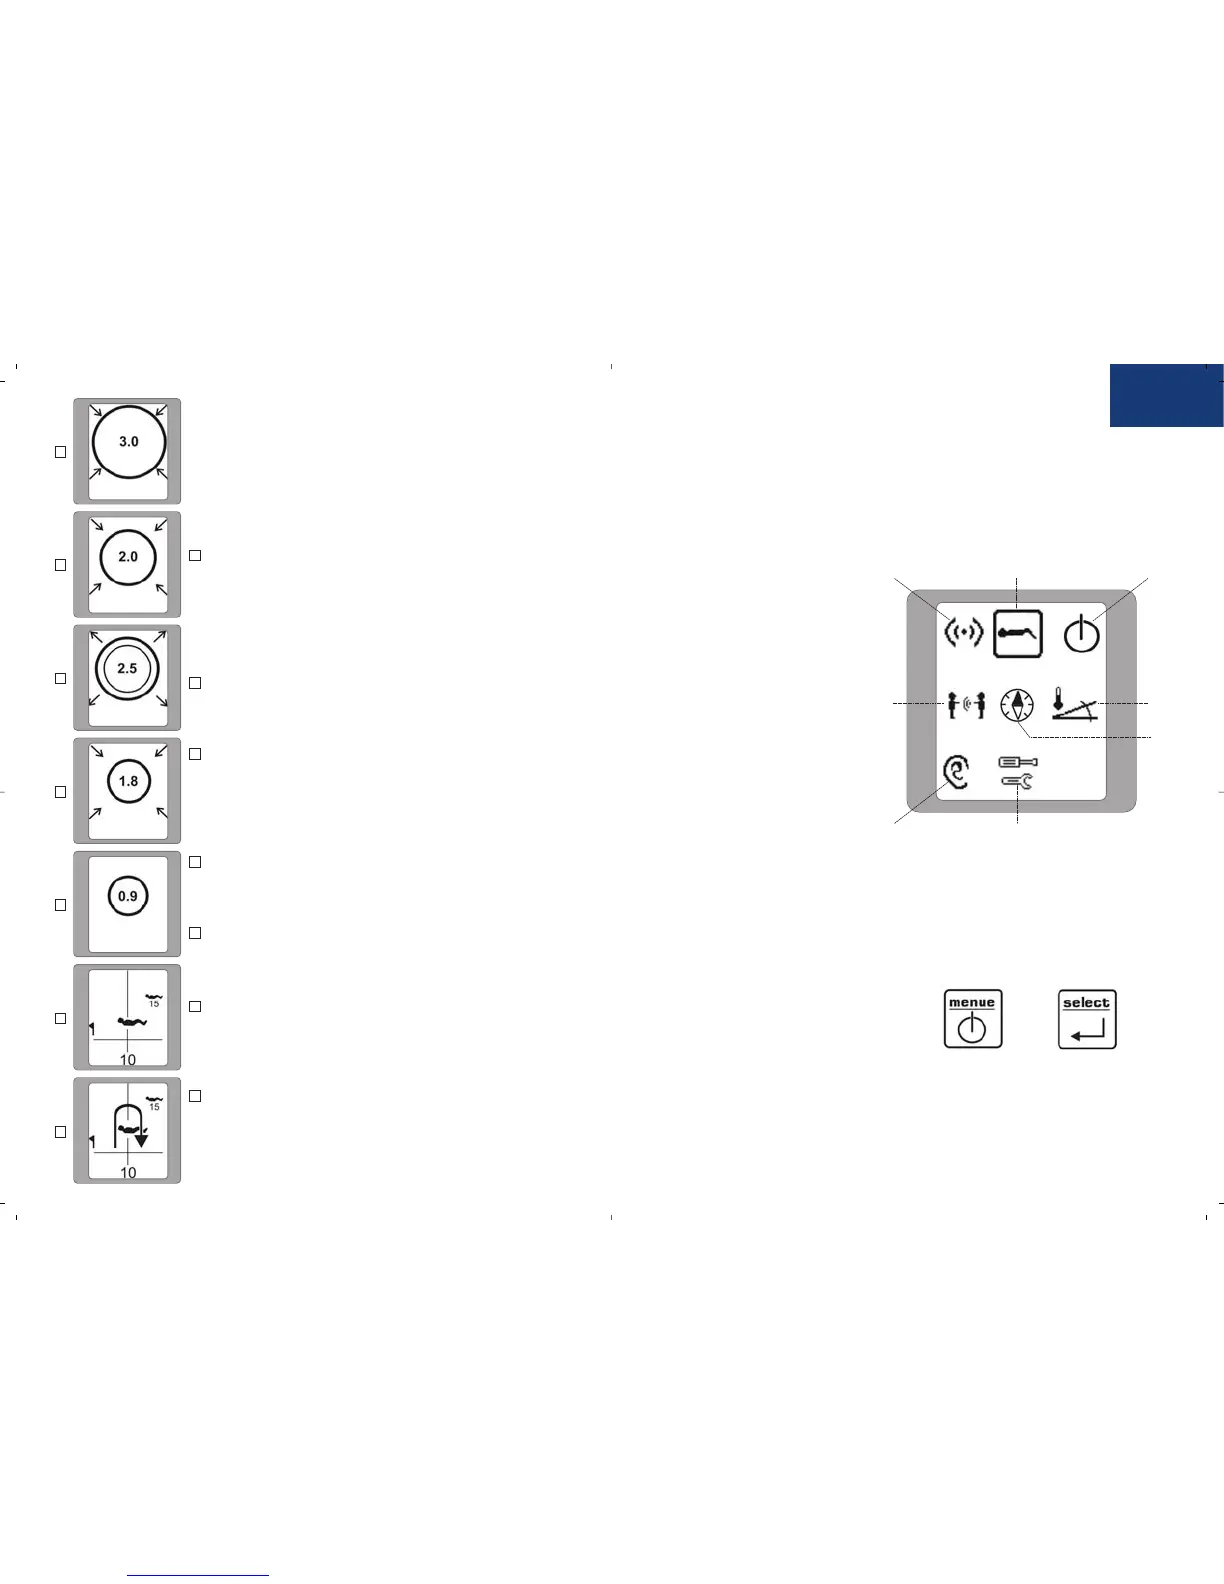
MENU:
In order to call up the menu of the S1 open the S1 while it is switched on
and press the ON/OFF button (‘menue’). The following symbols will appear
in the display.
Search (A)
Switch off (B)
Temperature and slope angle (C)
Compass (D)
Tool (E)
Acoustic search (F)
Fast group test (G)
Demand to close the equipment (H)
Using the ON/OFF button (‘menue’)
it is possible to switch from one
symbol to the next. The function of
the symbol is called up using the
‘select’ button.
(1) (7)
ENGLISH
A
B
C
D
E
F
G
A
B
C
D
E
F
G
A
B
E
C
F
H
G
D
 Loading...