EasyManua.ls Logo

Ortur Ortur-4 - User Manual

Ortur Ortur-4
27 pages
Print Icon
To Next Page IconTo Next Page
Loading...
Dongguan Ortur Intelligent Technologies Co., Ltd.
www.ortur3d.com www.ortur3dprinter.com
No.27, Second Industrial Park, Heshi Road, Qiaotou Town, Dongguan 523527, Guandong Province, China
1
Operation Manual of Ortur-4
Phase 1: The Operation Menu Before Printing:
1. “Print from SD” Menu:-----------------------------------------------------------------------------------------------------------------3
2. “Motion” Menu:-------------------------------------------------------------------------------------------------------------------------4
2.1 “Move axis” Menu: -------------------------------------------------------------------------------------------------------------------4
2.1.1 “Soft Endstops Option:-----------------------------------------------------------------------------------------------------------4
2.1.2 Move X” Menu:---------------------------------------------------------------------------------------------------------------------5
2.1.3 “Move Y” Menu + 2.1.4 “Move Z Menu+ 2.1.5 “Extruder Menu:--------------------------------------------------------5
2.2 “Auto home Command:-----------------------------------------------------------------------------------------------------------5
2.3 “Home X” Command:----------------------------------------------------------------------------------------------------------------6
2.4 Home Y” Command:----------------------------------------------------------------------------------------------------------------6
2.5 “Home Z Command:----------------------------------------------------------------------------------------------------------------6
2.6 “Bed Leveling” Menu:---------------------------------------------------------------------------------------------------------------6
2.6.1 Auto Home” Command:----------------------------------------------------------------------------------------------------------7
2.6.2 “Level bed Command:-----------------------------------------------------------------------------------------------------------7
2.6.3 “Edit Mesh Menu:-----------------------------------------------------------------------------------------------------------------7
2.6.4 “Bed Leveling” Option:-----------------------------------------------------------------------------------------------------------8
2.6.5 “Fade Height” Menu:--------------------------------------------------------------------------------------------------------------8
2.6.6 Probe Z Offset” Menu:-----------------------------------------------------------------------------------------------------------8
2.6.7 Load setting” Command:-------------------------------------------------------------------------------------------------------9
2.6.8 Store setting Command:------------------------------------------------------------------------------------------------------9
2.7 “Disable Steppers” Command:---------------------------------------------------------------------------------------------------9
3. “Temperature Menu:---------------------------------------------------------------------------------------------------------------10
3.1 “Nozzle Menu:-----------------------------------------------------------------------------------------------------------------------10
3.2 “Bed Menu:--------------------------------------------------------------------------------------------------------------------------10
3.3 “Fan speed Menu:------------------------------------------------------------------------------------------------------------------11
3.4 Preheat PLA Menu:---------------------------------------------------------------------------------------------------------------11
3.4.1 “Preheat PLA Command:-------------------------------------------------------------------------------------------------------12
3.4.2 “Preheat PLA End” Command:-------------------------------------------------------------------------------------------------12
3.4.3 “Preheat PLA Bed” Command:------------------------------------------------------------------------------------------------12
3.5 “Preheat ABS Menu:--------------------------------------------------------------------------------------------------------------13
3.5.1 “Preheat ABS” Command + 3.5.2 Preheat ABS End” Command + 3.5.3 Preheat ABS Bed” Command:---13
4. “Configuration Menu:--------------------------------------------------------------------------------------------------------------13
4.1 “Advanced Settings” Menu:------------------------------------------------------------------------------------------------------13
4.1.1 “Probe Z Offset” Menu:-----------------------------------------------------------------------------------------------------------14
4.1.2 “Set home offsets Command:------------------------------------------------------------------------------------------------14

Table of Contents

Question and Answer IconNeed help?

Do you have a question about the Ortur Ortur-4 and is the answer not in the manual?

Summary

Print from SD Menu

Motion Menu

Move axis Menu

Allows manual control of the printer's X, Y, and Z axes.

Soft Endstops Option

Software limits to prevent axis movement beyond safe boundaries.

Move X Menu

Incremental movement control for the X-axis.

Move Y Menu + Move Z Menu + Extruder Menu

Incremental movement control for Y, Z axes, and extruder.

Auto home Command

Moves all axes to their home (zero) positions.

Home X Command

Moves the X-axis to its home position.

Home Y Command

Moves the Y-axis to its home position.

Home Z Command

Moves the Z-axis to its home position.

Bed Leveling Menu

Accesses functions to ensure the print bed is level.

Disable Steppers Command

Disengages motors for manual axis movement.

Bed Leveling Menu

Auto Home Command

Initiates homing before bed leveling.

Level bed Command

Probes print bed to measure surface flatness.

Edit Mesh Menu

Manual Z-value adjustment for specific bed points.

Bed Leveling Option

Toggles the auto bed leveling feature.

Fade Height Menu

Sets compensation fade distance for bed leveling.

Probe Z Offset Menu

Fine-tunes Z-axis offset for auto-leveling probe.

Load setting Command

Loads previously saved bed leveling configurations.

Store setting Command

Saves current bed leveling configurations.

Temperature Menu

Nozzle Menu

Adjusts the hotend nozzle's target temperature.

Bed Menu

Adjusts the heated print bed's target temperature.

Fan speed Menu

Controls the speed of the part cooling fan.

Preheat PLA Menu

Quick setup for PLA filament printing temperatures.

Preheat PLA Command

Preheats nozzle and bed for PLA.

Preheat PLA End Command

Preheats only the PLA nozzle.

Preheat PLA Bed Command

Preheats only the PLA bed.

Preheat ABS Menu

Quick setup for ABS filament printing temperatures.

Preheat ABS Command + Preheat ABS End Command + Preheat ABS Bed Command

Commands to preheat for ABS (nozzle, end, or bed).

Configuration Menu

Advanced Settings Menu

Accesses detailed printer configuration options.

Runout Sensor Option

Enables/disables filament runout detection.

Outage Recovery Option

Manages power loss recovery and print resume.

Preheat PLA configuration Menu

Configures custom PLA preheat settings.

Preheat ABS Configuration Menu

Configures custom ABS preheat settings.

Store setting Command

Saves current user-defined settings.

Load setting Command

Loads previously saved user settings.

Restore failsafe Command

Resets all settings to factory defaults.

Advanced Settings Menu

Probe Z Offset Menu

Fine-tunes Z-axis offset for auto-leveling probe.

Set home offsets Command

Establishes custom axis home offsets.

Velocity Menu

Adjusts axis movement speed limits.

Acceleration Menu

Adjusts axis movement acceleration limits.

Jerk Menu

Controls axis jerk settings for smoother motion.

Steps;mm Menu

Configures motor steps per millimeter for movement accuracy.

Temperature Menu

Accesses temperature-related configuration settings.

Filament Menu

Accesses filament-specific configuration settings.

Initialize EEPROM Menu

Clears EEPROM to reset all settings to factory defaults.

Change filament Menu

Preheat PLA Command

Step-by-step guide to changing PLA filament.

Preheat ABS Command

Step-by-step guide to changing ABS filament.

Preheat Custom Command

Custom preheating for non-standard filaments.

Pause print Command

Stop print Menu

Tune Menu

Speed Menu

Adjusts print speed percentage during operation.

Nozzle Menu

Real-time adjustment of the nozzle temperature.

Bed Menu

Real-time adjustment of the bed temperature.

Fan speed Menu

Real-time adjustment of the cooling fan speed.

Flow Menu

Real-time adjustment of filament extrusion flow rate.

Babystep X Menu

Fine-tune Z-axis height for X-axis during print.

Babystep Y Menu

Fine-tune Z-axis height for Y-axis during print.

Probe Z Offset Menu

Adjusts Z-axis offset during the print.

Overview

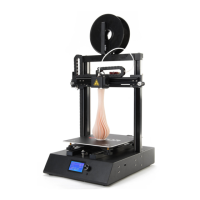
This document provides an operation manual for the Ortur-4 3D Printer, detailing its various menus and commands for both pre-printing setup and during-printing adjustments. The manual is structured into two main phases: "The Operation Menu Before Printing" and "The Operation Menu During Printing."

Phase 1: The Operation Menu Before Printing

This phase covers the initial setup and configuration options available before a print job begins.

This menu allows users to select and initiate print jobs from Gcode files stored on an SD card.

  • Usage Features:
    • Navigate through Gcode files using the Control Button (clockwise or anticlockwise rotation).
    • Press the Control Button to start the selected print.
  • Important Note: Before printing, ensure the X-axis and hotbed are leveled to prevent printer damage.

"Motion" Menu:

The "Motion" menu provides controls for manually moving the printer's axes and performing homing operations.

  • 2.1 "Move axis" Menu:
    • Function Description: Allows for precise manual movement of the X, Y, and Z axes, as well as the extruder.
    • 2.1.1 "Soft Endstops" Option:
      • Function Description: A safety feature that prevents motors from moving axes to negative coordinate values.
      • Usage Features: Toggle "Soft Endstops" on or off using the Control Button.
      • Maintenance Features: Protects the printer from damage if XYZ end stops are faulty, preventing continuous driving of motors.
    • 2.1.2 "Move X" Menu:
      • Usage Features: Select displacement distances (10mm, 1mm, 0.1mm) to move the X motor.
    • 2.1.3 "Move Y" Menu + 2.1.4 "Move Z" Menu + 2.1.5 "Extruder" Menu:
      • Usage Features: Similar operation to the "Move X" menu for Y, Z, and Extruder movements.
      • Important Note for Extruder: To move the Extruder Motor, the hotend must be preheated to allow filament removal.
  • 2.2 "Auto home" Command:
    • Function Description: Automatically moves all XYZ axes to their home positions (X:0, Y:0, Z:0).
    • Usage Features: Press the Control Button to execute.
  • 2.3 "Home X" Command:
    • Function Description: Moves only the X-axis to its home position (X:0).
    • Usage Features: Press the Control Button to execute.
  • 2.4 "Home Y" Command:
    • Function Description: Moves only the Y-axis to its home position (Y:0).
    • Usage Features: Press the Control Button to execute.
  • 2.5 "Home Z" Command:
    • Function Description: Moves only the Z-axis to its home position (Z:0).
    • Usage Features: Press the Control Button to execute.
  • 2.6 "Bed Leveling" Menu:
    • Function Description: Provides options for automatic and manual bed leveling.
    • 2.6.1 "Auto Home" Command:
      • Usage Features: Must be performed before activating the Auto Bed Leveling function.
    • 2.6.2 "Level bed" Command:
      • Function Description: Initiates the sensor to probe the hotbed's levelness at 25 points.
      • Usage Features: Press the Control Button to start probing.
      • Maintenance Features: If the hotbed is moved, re-probe and then "Store Setting" to save the new configuration.
    • 2.6.3 "Edit Mesh" Menu:
      • Function Description: Allows manual adjustment of the Z-value for any specific point on the bed mesh.
      • Usage Features: Navigate to this menu and adjust Z-values by hand.
      • Important Note: This menu is generally considered complex and unnecessary for normal users; "Level Bed" is usually sufficient.
    • 2.6.4 "Bed Leveling" Option:
      • Usage Features: Toggle the "Bed Leveling" function on or off.
    • 2.6.5 "Fade Height" Menu:
      • Function Description: Adjusts the height range during which the "Bed Leveling" function remains active.
      • Usage Features: Turn the Control Button clockwise or anticlockwise to adjust the height.
      • Recommendation: Set Fade Height to "0" for bed leveling to be active throughout the entire print.
    • 2.6.6 "Probe Z Offset" Menu:
      • Function Description: Allows adjustment of the Z Offset value.
      • Usage Features: Turn the Control Button clockwise or anticlockwise to adjust the Z Offset.
      • Important Note: Refer to the "How to set up the Auto-Leveling & Probe Z Offset Function" manual for critical instructions, as incorrect operation can damage the printer.
    • 2.6.7 "Load setting" Command:
      • Function Description: Loads previously stored bed leveling settings.
      • Usage Features: Press the Control Button to load. Useful if you don't want to activate newly set configurations.
    • 2.6.8 "Store setting" Command:
      • Function Description: Saves the current bed leveling settings.
      • Usage Features: Press the Control Button to store settings once satisfied.
  • 2.7 "Disable Steppers" Command:
    • Function Description: Disables the stepper motors, allowing manual movement of the XZY axes.
    • Usage Features: Press the Control Button to disable steppers.

"Temperature" Menu:

This menu provides controls for managing the temperatures of the nozzle and hotbed, as well as fan speed and preheating options.

  • 3.1 "Nozzle" Menu:
    • Function Description: Adjusts and preheats the nozzle to a target temperature.
    • Usage Features: Turn the Control Button to set the target temperature, then press to preheat.
  • 3.2 "Bed" Menu:
    • Function Description: Adjusts and preheats the hotbed to a target temperature.
    • Usage Features: Turn the Control Button to set the target temperature, then press to preheat.
  • 3.3 "Fan speed" Menu:
    • Function Description: Adjusts the blower fan speed.
    • Usage Features: Turn the Control Button to set the target speed, then press to start the fan.
  • 3.4 "Preheat PLA" Menu:
    • Function Description: Provides commands to preheat the printer for PLA filament.
    • 3.4.1 "Preheat PLA" Command:
      • Function Description: Preheats both the nozzle and hotbed to the target temperatures for PLA.
      • Usage Features: Press the command to execute.
      • Customization: Target temperatures and fan speed can be configured in "Configuration => Preheat PLA Configuration."
    • 3.4.2 "Preheat PLA End" Command:
      • Function Description: Preheats only the nozzle to the target temperature for PLA.
      • Usage Features: Press the command to execute.
    • 3.4.3 "Preheat PLA Bed" Command:
      • Function Description: Preheats only the hotbed to the target temperature for PLA.
      • Usage Features: Press the command to execute.
  • 3.5 "Preheat ABS" Menu:
    • Function Description: Provides commands to preheat the printer for ABS filament.
    • 3.5.1 "Preheat ABS" Command + 3.5.2 "Preheat ABS End" Command + 3.5.3 "Preheat ABS Bed" Command:
      • Usage Features: Operates identically to the "Preheat PLA" commands but for ABS filament.

"Configuration" Menu:

This menu contains advanced settings for printer behavior, sensor options, and preheat configurations.

  • 4.1 "Advanced Settings" Menu:
    • 4.1.1 "Probe Z Offset" Menu:
      • Usage Features: Identical to the "Probe Z Offset" menu under "Bed Leveling."
      • Important Note: Refer to the "How to set up the Auto-Leveling & Probe Z Offset Function" manual for critical instructions.
    • 4.1.2 "Set home offsets" Command:
      • Function Description: Allows the printer to set home offsets.
      • Usage Features: Press the Control Button to execute.
    • 4.1.3 "Velocity" Menu, 4.1.4 "Acceleration" Menu, 4.1.5 "Jerk" Menu, 4.1.6 "Steps/mm" Menu, 4.1.7 "Temperature" Menu, 4.1.8 "Filament" Menu:
      • Important Note: For normal users, it is recommended not to change any configurations in these menus.
    • 4.1.9 "Initialize EEPROM" Menu:
      • Function Description: Cleans all user-defined settings and restores the printer to default factory settings.
      • Usage Features: Press the Control Button to enter the menu, then execute the "Initialize EEPROM" command.
      • Maintenance Features: After execution, press the "Reset" Button and re-do any necessary manual settings (e.g., Bed Leveling).
  • 4.2 "Runout Sensor" Option:
    • Function Description: Toggles the Filament Run-out Detection Function on or off.
    • Usage Features: Press the Control Button to turn on or off.
  • 4.3 "Outage Recovery" Option:
    • Function Description: Toggles the Power Outage Recovery & Resume Print Function on or off.
    • Usage Features: Press the Control Button to turn on or off.
  • 4.4 "Preheat PLA configuration" Menu:
    • Function Description: Allows adjustment of fan speed, nozzle temperature, and hotbed temperature specifically for PLA preheating.
    • Usage Features: Adjust values and then "Store settings" to save the new configuration.
  • 4.5 "Preheat ABS Configuration" Menu:
    • Function Description: Allows adjustment of fan speed, nozzle temperature, and hotbed temperature specifically for ABS preheating.
    • Usage Features: Adjust values and then "Store settings" to save the new configuration.
  • 4.6 "Store setting" Command:
    • Function Description: Saves the current manual settings.
    • Usage Features: Press the Control Button to store.
  • 4.7 "Load setting" Command:
    • Function Description: Loads previously stored settings.
    • Usage Features: Press the Control Button to load.
  • 4.8 "Restore failsafe" Command:
    • Function Description: Loads the default factory settings.
    • Usage Features: Press the Control Button to load.

"Change filament" Menu:

This menu guides the user through the process of changing filament.

  • 5.1 "Preheat PLA" Command:
    • Function Description: Initiates a step-by-step process to change PLA filament.
    • Usage Features:
      • First Step: Extruder Head homes all axes.
      • Second Step: Nozzle heats to the target PLA temperature.
      • Third Step: Filament is automatically unloaded; manually pull out the old filament.
      • Fourth Step: Insert new PLA filament through the sensor, extruder, and tube to the head.
      • Fifth Step: Nozzle heats to the target PLA temperature.
      • Sixth Step: New PLA filament is loaded into the nozzle.
      • Seventh Step: Old fused PLA filament is purged from the nozzle.
      • Eighth Step: Choose "Purge more" to continue purging or "Continue" to resume printing.
      • Ninth Step: Printer waits to resume printing.
  • 5.2 "Preheat ABS" Command:
    • Usage Features: Operates identically to the "Preheat PLA" command for changing ABS filament.
  • 5.3 "Preheat Custom" Command:
    • Function Description: Used when the filament is neither PLA nor ABS. Allows setting a custom target nozzle temperature for the specific filament.
    • Usage Features: Adjust the target temperature, then proceed with the same steps as "Preheat PLA."

Phase 2: The Operation Menu During Printing

This phase covers the options available while a print job is in progress.

"Pause print" Command:

  • Function Description: Pauses the current print job.
  • Usage Features: Press the Control Button to pause.

"Stop print" Menu:

  • Function Description: Stops the current print job.
  • Usage Features: Navigate to this menu, then press the Control Button to stop the print.

"Tune" Menu:

This menu allows for real-time adjustments during printing.

  • 8.1 "Speed" Menu:
    • Function Description: Adjusts the print speed by percentage.
    • Usage Features: Turn the Control Button clockwise or anticlockwise to increase or decrease speed.
  • 8.2 "Nozzle" Menu:
    • Function Description: Adjusts the nozzle temperature in Celsius degrees.
    • Usage Features: Turn the Control Button clockwise or anticlockwise to change the temperature.
  • 8.3 "Bed" Menu:
    • Function Description: Adjusts the hotbed temperature in Celsius degrees.
    • Usage Features: Turn the Control Button clockwise or anticlockwise to change the temperature.
  • 8.4 "Fan speed" Menu:
    • Function Description: Adjusts the blower fan speed.
    • Usage Features: Turn the Control Button clockwise or anticlockwise to change the fan speed.
  • 8.5 "Flow" Menu:
    • Function Description: Adjusts the filament flow rate by percentage.
    • Usage Features: Turn the Control Button clockwise or anticlockwise to change the flow rate.
  • 8.6 "Babystep X" Menu:
    • Function Description: Allows for very fine adjustments to the X-axis position.
    • Usage Features: Turn the Control Button clockwise or anticlockwise to adjust the X-value incrementally.
  • 8.7 "Babystep Y" Menu:
    • Function Description: Allows for very fine adjustments to the Y-axis position.
    • Usage Features: Turn the Control Button clockwise or anticlockwise to adjust the Y-value incrementally.
  • 8.8 "Probe Z Offset" Menu:
    • Function Description: Allows for very fine adjustments to the Z Offset value during printing.
    • Usage Features: Turn the Control Button clockwise or anticlockwise to adjust the Z-value incrementally.

"Configuration" Menu:

  • Usage Features: This menu is identical to the "Configuration" menu described in Phase 1, allowing access to advanced settings during printing.

"Change filament" Command:

  • Function Description: Allows changing filament during a print job.
  • Usage Features: Operates identically to the "Preheat PLA" command described in Phase 1 for changing filament.

Ortur Ortur-4 Specifications

General IconGeneral
Category3D Printers
Nozzle Diameter0.4 mm
Filament Diameter1.75 mm
Printing MaterialPLA, ABS, PETG, TPU
Bed TemperatureUp to 100°C
Nozzle TemperatureUp to 260°C
ConnectivityUSB, SD Card
Printing TechnologyFDM
Power Supply24V
Frame MaterialAluminum

Related product manuals