2 After the used coee grounds have cooled, carefully open the lter basket and
discard them.
3 Make sure the decanter is empty before starting to brew coee again.
4 Be sure to turn your coeemaker o when no longer using it.
Brewing coee later
1 You must rst set the time for when you would like the coeemaker to begin
brewing your coee as described in “Setting the Clock and the Delay Brew Timer”
section.
2 Prepare your coeemaker as described in “Adding Water and Ground Coee” section.
3 To activate DELAY BREW and program your coeemaker to brew coee at a
later time, press the AUTO button. The AUTO indicator light will illuminate. The
coeemaker is now set to automatically brew coee at the pre-set later time.
4 At the pre-set time, the red indicator light will turn on and the Auto indicator will
turn o, indicating the brewing has started.
5 The coeemaker warming plate will keep your coee hot for 2 hours and then will
automatically turn o.
As a safety feature,
your coeemaker will NOT start again automatically the
next day. If you want your coee to brew at the same time the following day,
simply add a new lter, coee and water and set DELAY BREW, by repeating
Steps 2 and 3 above.
To cancel DELAY BREW: Press the AUTO button. The DELAY BREW green indicator light
will turn o.
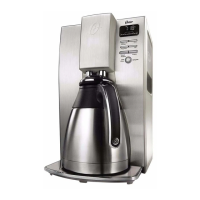
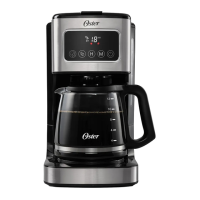
CLEANING AND MAINTAINING
Daily Cleaning
Always unplug the coeemaker and allow to cool before cleaning.
Remove the lter basket, permanent lter (not included on all models), decanter and
decanter lid and wash them in a solution of hot water and mild liquid soap.
Never use abrasive cleansers, steel wool pads or other abrasive materials. Dishwasher top
rack safe parts: glass decanter and lid, lter basket and permanent lter.
CAUTION! Never immerse the coeemaker itself in water, in any other liquid or place in
the dishwasher.
Regular Cleaning and Maintenance
Decalcifying your Oster® Coeemaker
Minerals (calcium) found in water will leave deposits in your coeemaker and will aect it.
It’s recommended that you regularly remove these deposits by using vinegar.
1 Pour 4 cups or 20 . oz. of undiluted, white household vinegar into the
water reservoir.
8
2 Place an empty 10–12 cup basket-style paper lter or permanent lter into
the lter basket and close reservoir lid.
3 Place the empty decanter back in the unit, centered on the warming plate.
4 Brew three cups of cleaning solution through the coeemaker.
5 Turn the coeemaker o and let stand for 30 minutes.
6 Run the remainder of the cleaning solution through the coeemaker.
7 Discard the cleaning solution and rinse the decanter thoroughly with clean water.
8 Fill the water reservoir with clean, fresh water.
9 Place the empty decanter back on the coeemaker, centered on the warming plate.
10 Remove and discard the paper lter used during the cleaning cycle. If a MR. COFFEE®
permanent lter was used during cleaning, remove it and rinse it thoroughly before
replacing it in the lter basket.
11 Begin brewing and allow the full brew cycle to complete.
12 Repeat Steps 8 through 11 one more time.
Your coeemaker is now clean and ready to brew the next pot of delicious, hot coee!
Suggested Decalcifying Interval:
Type of Water Cleaning Frequency
Soft Water Every 80 Brew Cycles
Hard Water Every 40 Brew Cycles
Cleaning the Decanter:
Hard water can leave a whitish stain on the decanter, and coee may then turn this stain
brown.
To remove decanter stains:
1 Fill the decanter with a solution of equal parts water and vinegar and let the solution
stand in the decanter for approximately 20 minutes.
2 Discard the solution, then wash and rinse the decanter.
Do not use harsh abrasive cleaners that may scratch the decanter, scratches may cause
the decanter to break.
NOTE: Do not place thermal carafe in the dishwasher.