/7 /6 ENGLISH ENGLISH
1. Microphone
2. Configuration key
3. + control key
4. – control key
5. Call acceptance and internal call
key
6. Gate opening control key
7. Latch opening control key
8. MUTE indicator LED
9. Ringtone volume button
10. Tune selection button
9
10
PRÉSENTATION
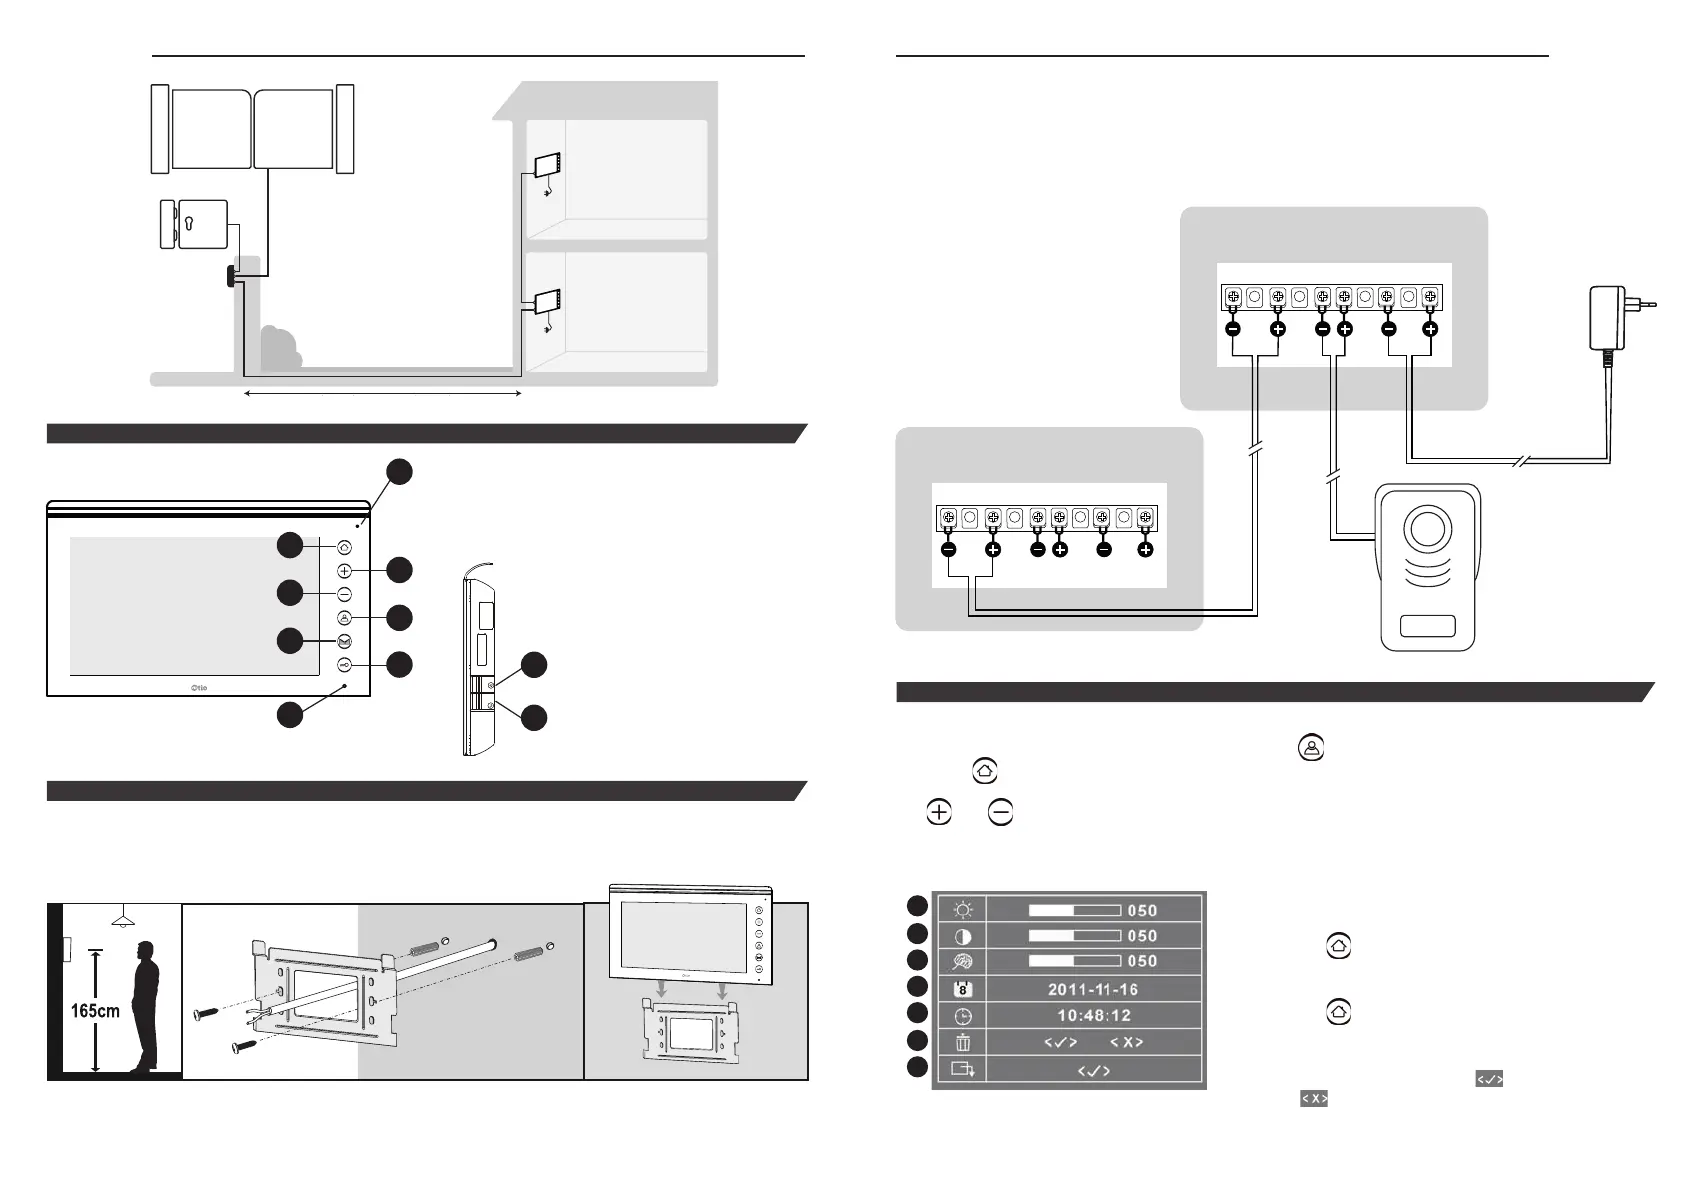
INSTALLATION
Recommendation: Prior to starting installation, turn off electrical power.
The monitor must not be supplied with power before full electrical connection of the outdoor unit
and all electrical equipment. This product is not suitable for extreme weather conditions
Attach your bracket using the plugs and screws provided.
Place the monitor on the attached bracket.
Place the monitor on the bracket,
sliding it into the notches on the
back of the monitor.
Recommended
attachment height:
1.65 m
5m. (min.) à 100m. (max.)
Otio MONITOR
optional
sold separately
MONITOR Otio
Otio OUTDOOR UNIT
sold separately
3
4
5
6
7
8
2
1
Electrical connection
For optimal operation, we recommend you use:
• 0 to 50 m: 0.6 mm diameter telephone cable
• 50 to 100 m: 1.5 mm
2
coaxial or shielded cable
Configuration
The configuration menu can be accessed by pushing the key.
Press the
key to list the settings.
The
and keys are used to modify the settings. The following screen appears on the monitor:
1
2
3
4
5
6
7
1. Brightness
2. Contrast
3. Colour
4. Date
The
key is used to confirm
and go to the next setting.
5. Time (set before first use)
The
key is used to confirm
and go to the next setting.
6. Delete all memory
The corresponding icon:
to confirm,
to exit without deleting.
7. Exit the configuration menu
CARACTÉRISTIQUE
OPTIONAL MONITOR
sold separately
MONITOR
2 wires
2 wires
2 wires
INSTRUCTIONS
Otio OUTDOOR UNIT
sold separately
5 m. (min.) to 100 m. (max.)

 Loading...