NOTICE
Thermal overloading of the product
Damage due to improper thermal treatment
► Do not carry out any heat treatment at temperatures above 300°C
(570°F).
► Prior to thermal treatment, remove all temperature-critical components
(suchas plastic parts).
Vacuum forming the orthosis
> Required materials: 743A7 pivot point adjustment aid, 623T3 Perlon
stockinette, Loctite241, plaster negative, metal rod, parallel retainer,
Plasticine or 636K8 Plastaband, thermoplastic material
> Prerequisite: A patient-specific plaster model has been fabricated.
1) Mark the compromise axis of rotation of the anatomical ankle joint on the
plaster negative. Use the 743A7 pivot point adjustment aid for this pur
pose (see fig.3).
2) Open the plaster negative at the marked compromise pivot points (see
fig.4).
3) Insert the parallel retainer. Ensure that the parallel retainer does not
bend (see fig.5). Optional: Use the 743Y57 alignment insert, size 5.
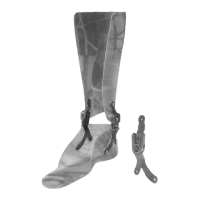
4) Insert a metal rod into the plaster negative. Ensure that the metal rod and
the parallel retainer do not touch (see fig.6).
5) Fabricate the plaster positive.
6) Remove the plaster negative.
7) Shorten the parallel retainer. The parallel retainer has to be flush with the
contour of the plaster positive (see fig.7).
8) Mark the alignment reference lines of the orthotic joints on the plaster
positive. Use the 743A7 pivot point adjustment aid for this purpose (see
fig.8).
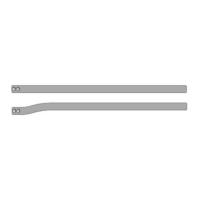
9) Adjust the orthotic joints and the foot stirrups. Use bending irons (see
fig.9, see fig.10).
10) Attach the orthotic joints to the parallel retainer with the shoulder
screws.
11) Attach the orthotic joints to the plaster positive with Plasticine. The Plas
ticine has to be flush with the plaster positive (see fig.11).
12) Pull two layers of Perlon stockinette over the plaster positive.
13) Vacuum form the heated thermoplastic material over the plaster positive
(see fig.12).
14) Mark the cut edges of the orthosis (see fig.13).
16
 Loading...