4 Scope of delivery
Quant
ity
Designation Reference number
1 Instructions for use –
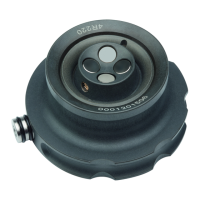
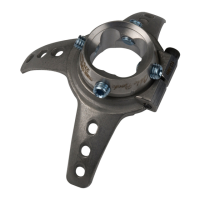
1 Tube clamp adapter –
For 4R21, 4R21=1, 4R52, 4R52=1, 4R56*
4 Set screw 506G3=M8x12-V
For 4R69*, 4R82, 4R91, 4R156*, 4WR95=3
4 Set screw 506G3=M8x14
Spare parts/accessories (not included in the scope of deliv
ery)
Designation Reference
number
Single component pack for 4R156*
Consisting of: Cap screw, clamping bolt,
clamping bolt with interior thread, plastic ring
4D28
5 Preparing the product for use
CAUTION
Incorrect alignment or assembly
Risk of injury due to damaged prosthetic components
►
Observe the alignment and assembly instructions.
CAUTION
Improper assembly of the screw connections
Risk of injury due to breakage or loosening of the screw connec
tions
►
Clean the threads before every installation.
►
Apply the specified torque values.
►
Follow the instructions regarding the length of the screws and
about how to secure the screws.
11
5.1 Mounting the adapter
CAUTION
Incorrect mounting of the tube
Risk of injury due to breakage of load-bearing components
►
Slide the tube all the way to the stop in the intended prosthetic
component when mounting.
> Required materials: torque wrench (e.g.710D20), degreasing
cleaner (e.g.acetone), 636K13 Loctite241
1) Loosen the tube clamp cap screw by twoturns.
2) For final assembly: Degrease the insertion range of the tube
clamp adapter and tube adapter.
3) Insert the tube adapter fully into the tube clamp adapter up to the
stop. Align the clamping slot:
Tube clamp adapter: anterior
Tube clamp adapter, sliding: anterior or medial
4) 4WR95=3 only: Apply Loctite to the tube clamp cap screw.
5) Tighten the cap screw (tightening torque according to thread dia
meter: M4:5Nm, M5:10Nm, M6:13Nm).
5.2 Installation in the modular prosthesis
> Required materials: torque wrench (e.g.710D20), 636K13 Loc
tite241
►
Install the other prosthetic components as described in the
respective instructions for use.
6 Cleaning
1) Clean the product with a damp, soft cloth.
2) Dry the product with a soft cloth.
3) Allow to air dry in order to remove residual moisture.
7 Maintenance
►
A visual inspection and functional test of the prosthetic compon
ents should be performed after the first 30days of use.