Do you have a question about the Outsunny 84B-670 and is the answer not in the manual?
Provides essential tips for safe domestic use, placement, and avoiding hazards.
Covers precautions before assembly, cleaning, and storage conditions to prevent mold.
Identifies all individual parts included in the assembly kit.
Lists and identifies all bolts, nuts, shims, and other hardware.
Insert round bolts into the front, left, and right rails to begin frame assembly.
Place the front rail on the floor and connect it with other base rails using bolts.
Expand the canopy frame structure to prepare it for attachment to the base.
Secure the front ribs to the canopy plate using round bolts and nuts.
Insert the lever tool into the center of the canopy plate for manipulation.
Grasp the lever tool and front rib, then squeeze together to align holes.
Insert a short flat head bolt and nut to secure canopy components.
Squeeze the lever tool and front rib together until the hole is clear.
Insert a short flat head bolt and nut to secure canopy components.
Insert a shim between the first rib and long bolt if needed for alignment.
Tuck the roof flap under and hook it into place on the canopy.
Position the canopy onto the base, aligning ribs with tabs.
Fasten the canopy to the base using U-bolts and nuts into the tabs.
Feed the floor flap between bolts and front rail, securing canopy with long bolts.
Position front ribs on the front rail and secure with round head bolts.
Fold the floor flap inside the canopy and attach to velcro on rib sleeves.
Insert the pad and pillow into the canopy for final comfort.
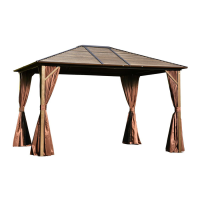
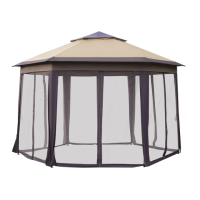
| Type | Gazebo |
|---|---|
| Material | Steel, Polyester |
| Color | Beige |
| Assembly Required | Yes |
| Eaves Height | 6.5 ft |
| Top Height | 8.2 ft |