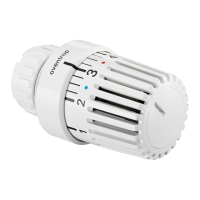
2 2017
3
5
1
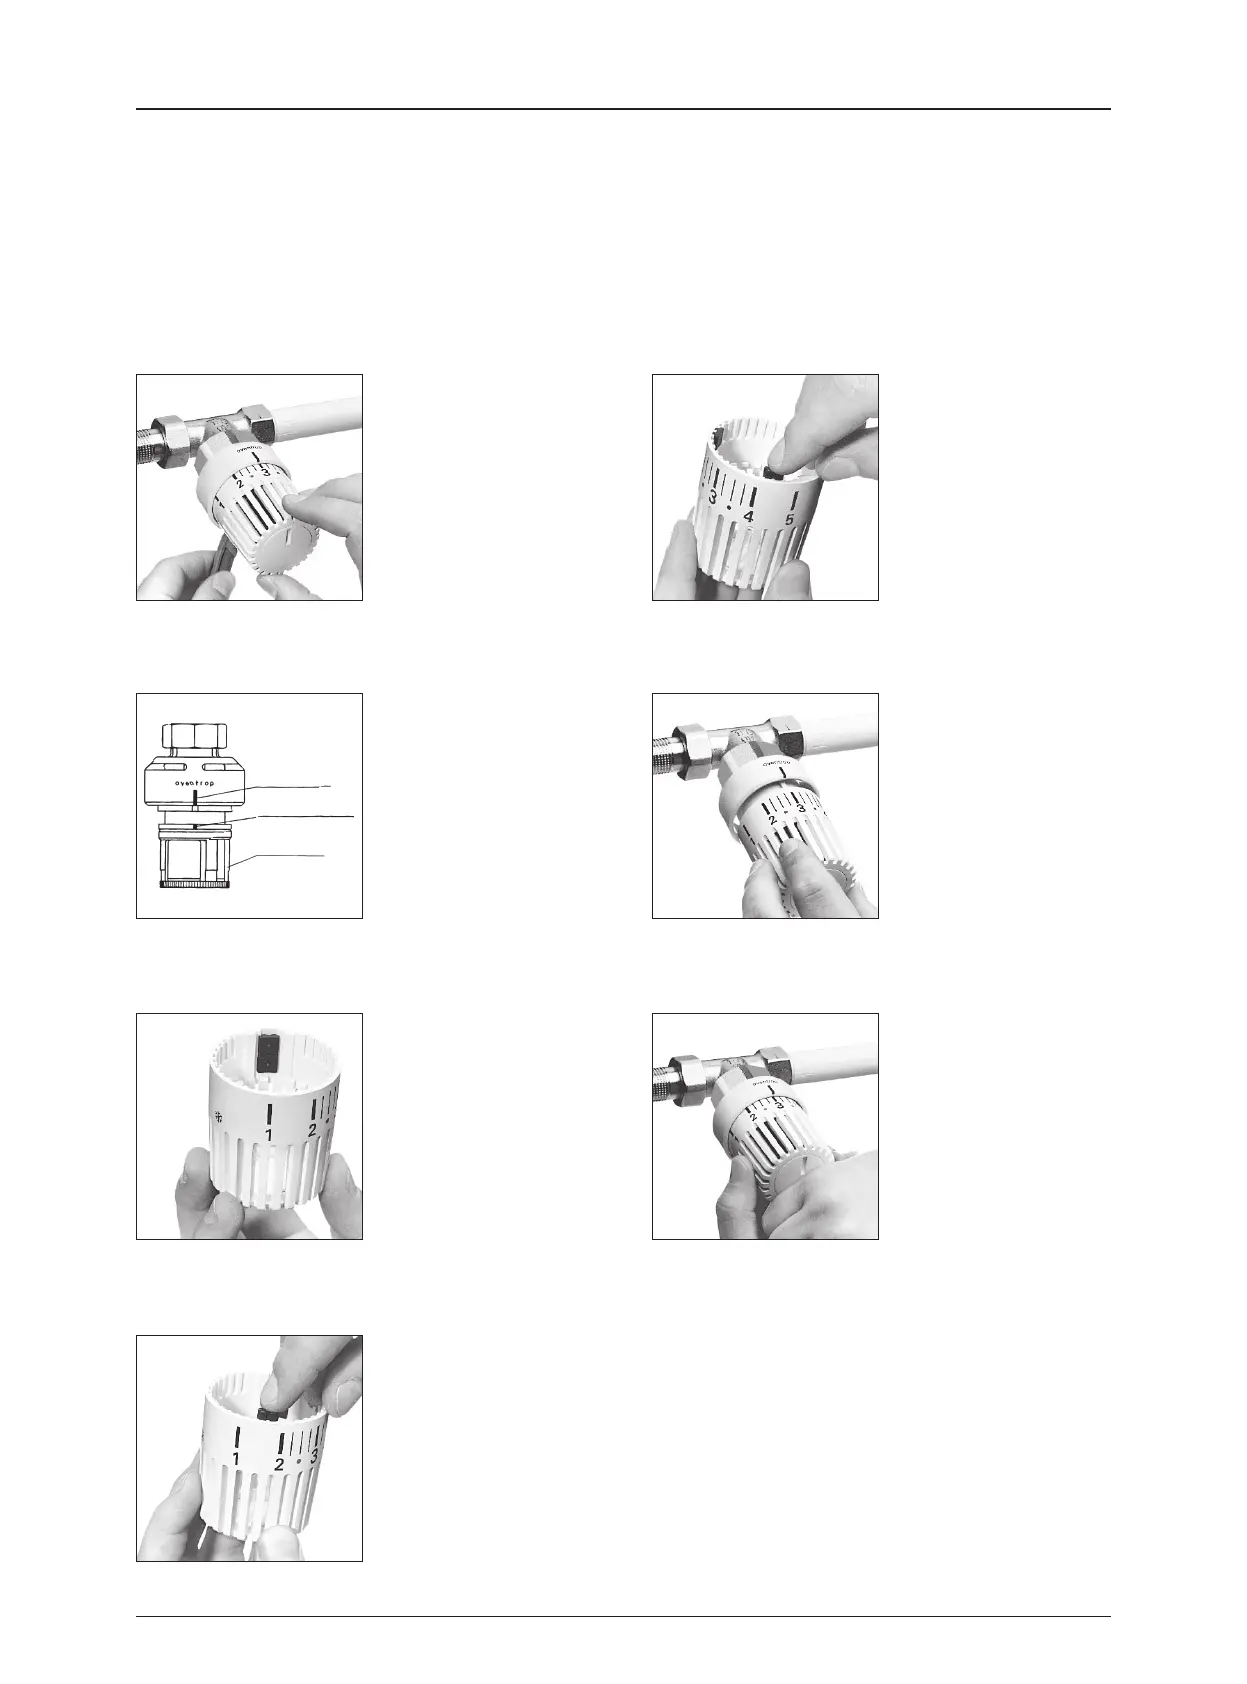
Limitation of the control range
The control range of the thermostat can be limited to any upper
or lower value with the help of the clips attached to the inner side
of the handgrip. The clips can only be inserted on the inner side
of the handgrip. The two bridges of a clip have to be inserted
into two grooves of the inner framework.
Example: Limitation of the control range to a lower nominal value
of 16 °C (gure “2”) and an upper nominal value of 24 °C (gure
“4”) (e.g. for living rooms, retirement home).
Illustration 1: Remove the
handgrip with the tool (item
no. 1989100) or a pin, e.g.
with the push button of a pen.
Insert the tool/pin in the hole
provided on the lower side
of the thermostat. By turning
the handgrip to the shut-off
position, it is easily removed.
(compare illustration 16.)
Illustration 2: After having
removed the handgrip, turn
the sensor casing to the left
until the calibration mark
(bore or white stroke) is in line
with the indicator mark.
Illustration 3: On the inner
side of the handgrip you will
nd two clips in the “parking”
position. They are removed by
sliding them to the outside.
(When not in use, the clips may
of course be put back in the
“parking” position.)
4
Illustration 4 : To limit the
control range to the lower
nominal value, e.g. to gure “2”
(equals about 16 °C), one clip
is tted into the groove before
gure “2” as illustrated. (The
groove right in front of gure
“2” thus remains free.)
Illustration 5: To limit the
control range to the upper
nominal value, e.g. to gure
“4” (equals about 24 °C), the
second clip is tted into the
groove after gure “4”. (The
groove right in front of gure
“4” thus remains free.)
6
Illustration 6: Ret the
handgrip so that gure “3” is
in line with the indicator mark.
7
Illustration 7: Push down the
handgrip with the hand until it
engages. The control range of
the thermostat is now limited
and you can only set values
between gures “2” and “4”
(about 16 °C - 24 °C).
2
Indicator mark
Calibration mark
Sensor casing
Thermostatic radiator valves
Thermostats “Uni LH” and “Uni LD”
 Loading...


