Do you have a question about the Overhead door 450A and is the answer not in the manual?
Procedures to ensure the garage door is in good working condition before opener installation.
Determine door width and mark the center line on the door and header.
Position and secure the header bracket to the header based on door travel and headroom.
Mark horizontal center line for header bracket 5/8" to 2-1/2" above door travel.
Connect the header pulley assembly to the header bracket using bolts and locknuts.
Differentiates installation for extension spring vs. torsion spring doors.
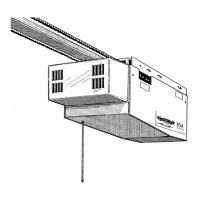
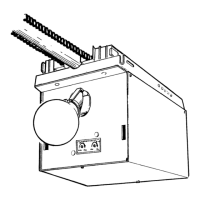
Raise powerhead and position boom above high arc of door travel for installation.
Use a wood block to align the boom with the door's center line for correct positioning.
Install ceiling mounting angle and vertical angles to support the opener.
Details for mounting opener to lengthwise ceiling joists (off-center and on-center).
Instructions for mounting opener to crosswise ceiling joists, including high ceiling variations.
Plug in opener, route cord, connect drawbar to carriage with clevis and hitch pins.
Attach yokes to door bracket, ensuring free movement before bolting to drawbar.
Position door bracket to check drawbar angle and adjust if necessary.
Install door bracket on wood, steel, or fiberglass doors using appropriate hardware.
Final check of all installed components and adjustments for proper operation.
Prepare the push button wire end by cutting insulation without cutting the wire itself.
Shape wire leads and connect them to the push button terminals.
Route the push button wire from the powerhead to the garage entrance door.
Ensure electrical power is off before working on the opener and follow grounding precautions.
Connect opener to mains power using permanent wiring, ensuring proper grounding.
Adjust chain limit cams to control door travel limits for opening and closing.
Set the down limit to ensure the door closes properly and seals to the floor.
Set the up limit to stop the door just after clearing the top of the opening.
Instructions for attaching the transmitter's visor clip for convenient use.
Information on transmitter-receiver interaction, factory contact, and radio frequency.
Steps to change transmitter and receiver codes to prevent phantom operation.
Adjusting the safety reversing system for proper obstruction detection and door reversal.
Fine-tune the force required to stop the door's upward movement upon encountering an obstruction.
Explains how to manually operate the door using the emergency release mechanism.
Lists common opener problems, their symptoms, and possible causes for diagnosis.
Tips for diagnosing and resolving short distance or inoperative transmitter problems.
Detailed list of parts with numbers, descriptions, and ordering information.
Information on obtaining parts and service, including where to mail units for repair.
Details the warranty coverage, duration, limitations, and buyer obligations.
| Brand | Overhead door |
|---|---|
| Model | 450A |
| Category | Garage Door Opener |
| Language | English |