EasyManua.ls Logo

Overhead door 450A - General Installation Notes; Preparing Door for Opener

Overhead door 450A
20 pages
Print Icon
To Next Page IconTo Next Page
To Previous Page IconTo Previous Page
Loading...
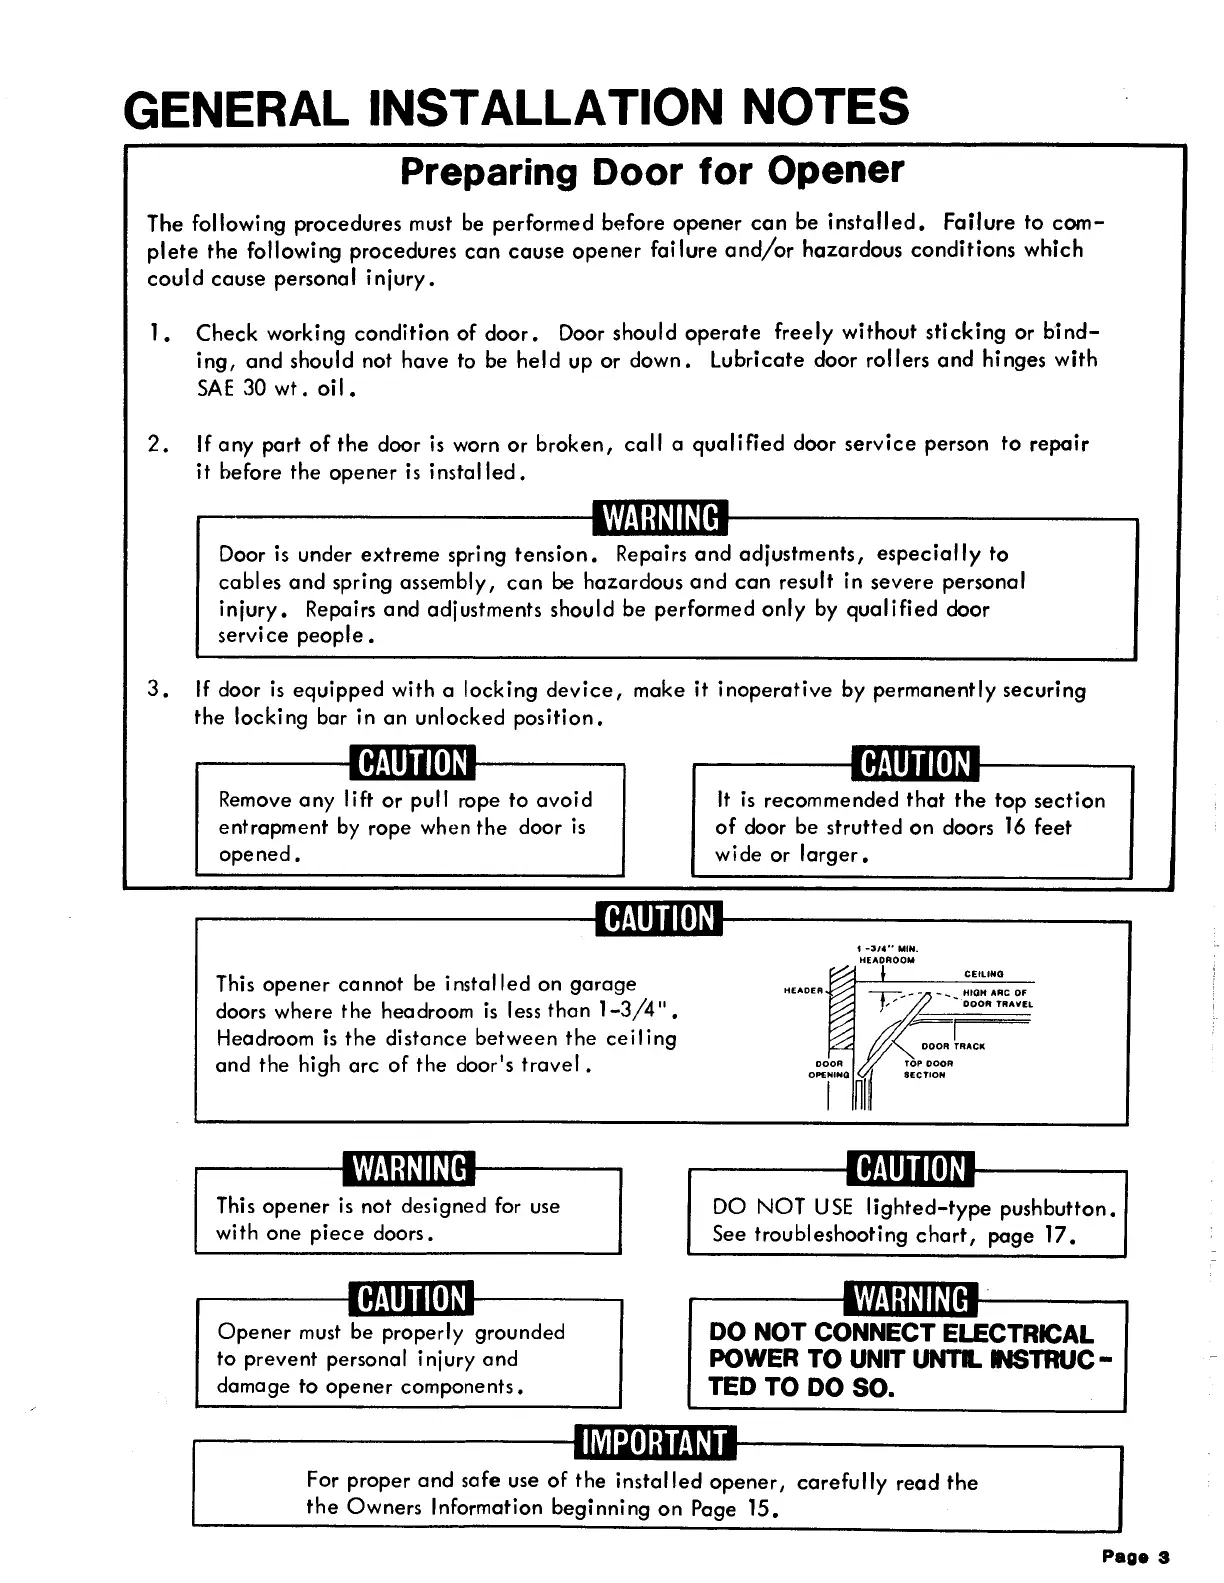
GENERAL INSTALLATION NOTES
Preparing
Door
for
Opener
The following
procedures
must be
performed
before
opener
can
be
installed.
Failure
to
com-
plete
the
following
procedures
can
cause
opener
failure
and/or
hazardous
conditions
which
could
cause
personal
injury.
1.
Check
working
condition
of
door.
Door should
operate
freely
without
sticking
or
bind-
ing,
and
should not
have
to be
held
up or
down.
Lubricate
door rollers
and
hinges
with
SAE
30
wt • o i I •
2.
If
any
part
of
the
door
is
worn
or
broken,
call
a
qualified
door
service
person
to
repair
it
before
the
opener
is
installed.
WARNING
Door is under
extreme
spring
tension.
Repairs
and
adjustments,
especially
to
cables
and
spring assembly,
can
be
hazardous
and
can
result in
severe
personal
injury.
Repairs
and
adjustments should
be
performed
only
by
qualified
door
service
people.
3.
If door
is
equipped
with a locking
device,
make
it
inoperative
by
permanently
securing
the
locking bar in
an
unlocked
position.
CAUTION
CAUTION
Remove
any
lift
or
pull rope
to
avoid
entrapment
by rope when
the
door
is
opened.
It
is
recommended
that
the
top
section
of
door be
strutted
on
doors
16
feet
wide
or
larger.
CAUTION
This
opener
cannot
be
installed
on
garage
doors where
the
headroom
is
less
than
1-3/4".
Headroom
is
the
distance
between
the
ceiling
and
the
high
arc
of
the
door's
travel.
WARNING
This
opener
is not designed for use
with
one
piece
doors.
CAUTION
Opener
must be properly grounded
to
prevent personal injury
and
damage
to
opener
components.
HEADE
A
t
-314"
MIN.
HEADROOM
CEILING
...
- HIGH ARC
Of
...
DOOR
TRAVEL
CAUTION
DO
NOT
USE
lighted-type
pushbutton.
See
troubleshooting
chart,
page
17.
WARNING
DO NOT CONNECT ELECTRICAL
POWER TO UNIT UNTI.. INSTRUC-
TED TO DO SO.
IMPORTANT
For proper
and
safe use
of
the
installed
opener,
carefully
read
the
the
Owners
Information
beginning
on
Page
15.
Page
3