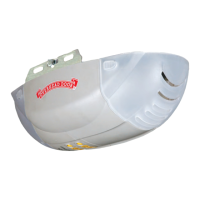
Do you have a question about the Overhead door Legacy 800 2026 and is the answer not in the manual?
| Drive System | Chain Drive |
|---|---|
| Horsepower | 1/2 HP |
| Voltage | 120V |
| Drive Type | Chain |
| Keyless Entry | Optional |
| Battery Backup | No |
| Warranty | Lifetime motor warranty, 5-year parts warranty |
| Motor Type | DC |
| Speed | 7.0 inches per second |
| Remote Controls | 2 Remote Controls Included |
Provides contact information for support and website.
Explains safety alert symbols, signal words (DANGER, WARNING, CAUTION), and NOTE.
Crucial safety instructions to read and follow for safe operation.
Electronic access code system with changing codes for enhanced security.
Lists key safety features like Safe-T-Beam, Safe-T-Reverse, Safe-T-Stop, and Watch Dog system.
Compatible with car's built-in remote systems like Homelink and Car2U.
Key considerations for self-installation, including checking ceiling, wall, and door structure.
Critical warning to only use the opener with sectional doors to prevent injury or damage.
Guides mounting the header bracket to the garage wall or framing.
Covers the installation of the Safe-T-Beam sensors for safety.
Details attaching the door bracket and connecting the opener arms.
Brochures providing safety and maintenance information.
Label to warn about potential entrapment hazards.
Instructions and contact number for missing parts.
Instructions for assembling the opener, including rail assembly.
Instructions for attaching the rail assembly to the power head.
Guide for adjusting chain tension for proper operation.
Guide for adjusting belt tension for proper operation.
Instructions on how to disable the garage door lock mechanism.
Steps to determine the correct location for the header bracket.
Crucial warning about high spring tension and not moving them.
Step-by-step instructions for physically mounting the header bracket.
Initial steps for positioning the assembled rail and opener.
Attaching the rail to the header bracket and securing the power head.
Important safety reminder not to power the opener until instructed.
Warning about bracing specific door types to prevent damage.
Steps to determine the correct placement for the door bracket.
Steps for attaching and connecting the door opener arms.
Crucial safety step to ensure power is off before installing wall control.
Guidelines for selecting an appropriate and safe location for the wall control.
Instructions for connecting the wall control if wires are already present.
Instructions for wiring the wall control when new wiring is needed.
Steps for routing and connecting wall control wires to the power head.
Safety reminder to delay installing the rear cover.
Final steps to mount the wall control unit to the wall.
Crucial safety step to ensure power is off before installing Safe-T-Beam wires.
Steps to mount the brackets for the Safe-T-Beam sensors.
Instructions for mounting the red (source) and green (sensor) LED modules.
Steps for wiring the Safe-T-Beam sensors if pre-wiring is not available.
Details on splicing pre-wired connections to sensor wires.
Advice on using staples carefully to avoid damaging Safe-T-Beam wires.
Connecting the Safe-T-Beam wires to the power head terminals.
Critical safety warning about electrical shock and grounding.
Advice to check local codes regarding permanent wiring.
Instructions for connecting the opener using a grounded plug.
Instructions for electricians connecting permanent wiring.
Warnings against using extension cords or portable generators.
Explains how the infrared beam functions during door operation.
Critical warning about the danger of setting the closing force too high.
Guide to adjusting and testing the door's open and close travel limits.
Steps to engage the chain or belt connector to the carriage assembly.
Instructions for setting the door's fully closed position.
Instructions for setting the door's fully open position.
Guide to increasing or decreasing the force for closing the door.
Guide to increasing or decreasing the force for opening the door.
Steps to test the door's automatic reverse function with a 2x4.
How to adjust force settings if the reverse function fails.
Safety precautions during remote control programming.
Step-by-step guide to program a single-button remote.
Guide to programming multi-button remotes for different doors.
Steps to clear memory and reprogram remotes if one is lost or stolen.
Compliance information regarding FCC and Industry Canada regulations.
Guide to replacing the battery in the remote control.
Instructions for attaching the visor clip to the remote control.
Safety instruction to unplug the opener before changing light bulbs.
Recommendations for selecting the correct type of light bulb.
Steps to install the lens covers onto the power head.
Warning to keep children from operating or playing with controls.
Critical safety rule: never go under a stopped or partially open door.
Instruction to test the opener monthly for proper function.
Emphasizes the importance of a balanced garage door for safety.
Warning about extreme tension in garage door hardware.
Steps for performing regular monthly maintenance tasks.
Steps for performing the contact reverse test for safety.
Procedure to check the alignment and status of the Safe-T-Beam system.
Warning about electric shock hazard when opening the unit cover.
Diagram showing power cord connections to the terminal block.
Steps to diagnose why the opener isn't operating from the wall control.
Steps to diagnose why the door isn't moving when the opener runs.
Troubleshooting steps when the remote control is not working.
Diagnosing issues where the door stops and reverses during closing.
Diagnosing why the door stops before reaching the closed position.
Diagnosing why the door stops before reaching the fully open position.
Steps to troubleshoot unexpected opener operation.
Identifying causes and solutions for noisy opener operation.
Possible problems and solutions when the power head LED is off.
Possible problems and solutions when the power head LED is continuously on.
Possible problems and solutions for a 1-blink LED pattern.
Possible problems and solutions for a 2-blink LED pattern.
Possible problems and solutions for a 3-blink LED pattern.
Possible problems and solutions for a 4-blink LED pattern.
Possible problems and solutions for a 5-blink LED pattern.
Warranty coverage period for the motor.
Warranty coverage period for all other parts and components.
Details the seller's obligation and limitations for warranty claims.
Excludes responsibility for special, indirect, or consequential damages.
Possible problems and solutions when the red LED is off.
Possible problems and solutions when the red LED is continuously on.
Possible problems and solutions for a 1-blink green LED pattern.
Possible problems and solutions for a 2-blink green LED pattern.
Possible problems and solutions for a 3-blink green LED pattern.
Possible problems and solutions for a 4-blink green LED pattern.
Possible problems and solutions for a 5-blink green LED pattern.
Steps to diagnose why the opener isn't operating from the wall control.
Steps to diagnose why the door isn't moving when the opener runs.
Troubleshooting steps when the remote control is not working.
Diagnosing issues where the door stops and reverses during closing.
Diagnosing why the door stops before reaching the closed position.
Diagnosing why the door stops before reaching the fully open position.
Steps to troubleshoot unexpected opener operation.
Identifying causes and solutions for noisy opener operation.
Emphasizes reading and following all provided instructions.
Warning to keep children from operating or playing with controls.
Critical safety rule: never go under a stopped or partially open door.
Emphasizes the importance of a balanced garage door for safety.
Procedure to check the balance of the garage door.
Steps for performing the contact reverse test for safety.
Procedure to check the alignment and status of the Safe-T-Beam system.
Guide to replacing the battery in the remote control.
Instructions for attaching the visor clip to the remote control.
Recommendations for selecting the correct type of light bulb.
Steps to install the lens covers onto the power head.
Warning to keep people away from the moving door opening.
Step-by-step guide to program a single-button remote.
Guide to programming multi-button remotes for different doors.
Steps to clear memory and reprogram remotes if one is lost or stolen.
Compliance information regarding FCC and Industry Canada regulations.
Guide to increasing or decreasing the force for closing the door.
Guide to increasing or decreasing the force for opening the door.
Steps to test the door's automatic reverse function with a 2x4.
How to adjust force settings if the reverse function fails.
Critical warning about the danger of setting the closing force too high.
Guide to adjusting and testing the door's open and close travel limits.
Steps to engage the chain or belt connector to the carriage assembly.
Warning about potential damage if the carriage connector is not engaged.
Critical safety warning about electrical shock and grounding.
Advice to check local codes regarding permanent wiring.
Instructions for connecting the opener using a grounded plug.
Instructions for electricians connecting permanent wiring.
Warnings against using extension cords or portable generators.
How to check and adjust the alignment of the Safe-T-Beam sensors.
Steps for routing Safe-T-Beam wires to the control box.
Advice on securing wires using insulated staples.
Details on splicing pre-wired connections to sensor wires.
Advice on using staples carefully to avoid damaging Safe-T-Beam wires.
Connecting the Safe-T-Beam wires to the control box terminals.
Crucial safety step to ensure power is off before installing Safe-T-Beam wires.
Explains that the door won't close automatically without the Safe-T-Beam system.
Steps to mount the brackets for the Safe-T-Beam sensors.
Instructions for mounting the red (source) and green (sensor) LED modules.
Advice on securing wires using insulated staples.
Instruction to remove the rear cover for wire access.
Steps for connecting wires to the control box terminal block.
Safety reminder to delay installing the rear cover.
Final steps to mount the wall control unit to the wall.
Guidance on attaching the entrapment warning label for safety.
Crucial safety step to ensure power is off before installing wall control.
Advice on using staples carefully to avoid damaging wall control wires.
Guidelines for selecting an appropriate and safe location for the wall control.
Instructions for connecting the wall control if wires are already present.
Instructions for wiring the wall control when new wiring is needed.
Warning about bracing specific door types to prevent damage.
Steps to determine the correct placement for the door bracket.
Steps for attaching and connecting the door opener arms.
Initial steps for positioning the assembled rail and opener.
Attaching the rail to the header bracket and securing the power head.
Important safety reminder not to power the opener until instructed.
Warning to secure the header bracket only to garage framing, not drywall.
Steps to determine the correct location for the header bracket.
Crucial warning about high spring tension and not moving them.
Warning about the chain potentially sliding out of the rail.
Instructions for attaching the rail assembly to the power head.
Guide for adjusting chain tension for proper operation.
Warning to remove door locks and cables before proceeding.
Guide for adjusting belt tension for proper operation.
Instructions on how to disable the garage door lock mechanism.
Instructions for mounting the opener rail on a clean, flat surface.
Critical warning to only use the opener with sectional doors.
Safety reminder not to operate the opener until it is fully assembled.
Instructions for unpacking and organizing the contents by box number.
Instructions and contact number for missing parts.
Details required information when contacting support for missing parts.
Part identification for the header bracket.
Part identification for the Safe-T-Beam source unit.
Part identification for the Safe-T-Beam sensor unit.
Part identification for the wall control unit.
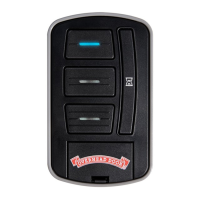
Part identification for the remote control.
Part identification for the door arm.
Shows the electrical cord connection to the grounded outlet.
Shows the location of the Safe-T-Beam sensors on the door.
Critical warning to only use the opener with sectional doors.
Key considerations for self-installation, including checking ceiling, wall, and door structure.
Instructions to check the ceiling for proper mounting of the power head.
Instructions to check the wall above the door for secure header bracket mounting.
Guidance on checking door material and adding bracing if necessary.
Warnings against using extension cords or portable generators.
Check that the door is properly balanced and moves smoothly.
Warning about door hardware tension and balance issues.
Electronic access code system with changing codes for enhanced security.
Operates the door opener from inside the garage.
Compatible with car's built-in remote systems like Homelink and Car2U.
Invisible beam system that stops and reverses the door if obstructed.
Automatically stops and reverses a closing door upon contact with an object.
Provides up to 120 watts of light for safer evening exits and entries.
Allows manual release of the door from the opener.
Explains safety alert symbols, signal words (DANGER, WARNING, CAUTION), and NOTE.
Crucial safety instructions to read and follow for safe operation.




 Loading...