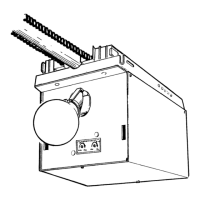
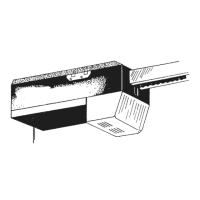
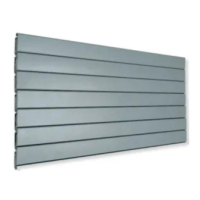
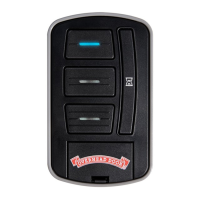
FIG. A
Forquestionsortroubleshooting,
contactOverheadDoorbyphone
at1-800-929-3667forassistance.
ScantheQRcodeforinstructions,
video,oradditionalinformation
andlinks.
Openbatterycoverandremovebattery
tabbeforeprogramming.
LEDSignals:
-LEDBlueblinkindicatesNORMALstatus
-LEDRedblinkindicatesLOWBATTERY
-LEDswillvaryduringprogramming
It is recommended to complete programming before mounting wall console.
NOTE: During programming, the garage door opener will operate. Ensure that the
garage door opening is clear of personnel or any obstructions.
Chart A
Overhead Door and CodeDodger are registered trademarks of Overhead Door Corporation. All other listed names
and trademarks are the property of their respective owners.
*ForinstructionsontheseDipSwitchspecications,visit:
www.overheaddoor.com/documents/alt-programming-UWWC.pdf
THINGS TO KNOW BEFORE STARTING:
•ForuseonlywithgaragedooroperatorscomplyingwithUL325,manufacturedafter1993with
workingphotoeyesinstalled.
•Duringprogramming,thegaragedooropenermayoperate.Ensurethatthegaragedoor
openingisclearofpersonneloranyobstructions.
•DonotpresstheLEARNbuttonforlongerthanthenoted2-3secondsasitcouldcausethe
existing,operationalremotesandkeypadstonolongerwork.
•AllDOORbuttonsarefactorysettoOverheadDoor®CodeDodger®1.
DIPswitchmodelsarenotedwithanasterisk*-pleasevisitourwebsiteforinstructionsonthese
modelsandforadditionalalternateprogramminginstructions:
www.overheaddoor.com/documents/alt-programming-UWWC.pdf
Belowarethebrandsandspecicationsthatthisconsoleiscompatiblewith.FindtheID#inChart
Abelowthatreferencesyourspecicopenerspecication.Youwillneedthisnumberduring
programming.RefertoSTEP1tondthetypeand/orLEARN/PROGRAMbutton.
STEP 1 - FIND SPECIFICATIONS & LEARN BUTTON
1.Locatethebrandandopener/receiverspecicationsforyourdevicebyconsultingthelabelon
theopener/receiver,theinstructionmanual,thecurrentremotecontrolsfortheopener,orthe
originalmanufactureroftheopener/receiver.
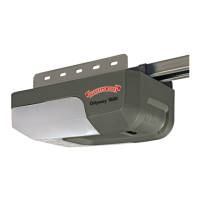
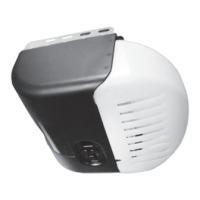
2.FindtheLEARN/PROGbuttononyourdevice-shape,colorornameofthisbuttoncouldvary
bybrand.Forgaragedooropeners,besuretocheckunderthelightcovers.Forcommercialor
gateopeners,thisbuttonmaybeonthecircuitboardoftheopener.Insomecases,thisbutton
couldalsobeonanexternalreceiverthatismountedonornearbytheproduct.Consultthe
devicesmanualifneeded.
EXAMPLES:
*ForMarantec®openers,referenceoperatormanualtoprogramremotestotheoperatorhead.
STEP 2 - PROGRAMMING THE UNIVERSAL WIRELESS WALL CONSOLE
IMPORTANT:ForID#4Chamberlain®/LiftMaster®/Craftsman®YellowLearnButton-move
immediatelytothepropersectionbelow.ForallotherID#s,proceedtoLEARNMETHODsection.
IMPORTANT:Pleasevisitwww.overheaddoor.com/documents/alt-programming-UWWC.pdf
tondadditionalinstructionsandprogrammingmethodssuchashowtoprogramdipswitch
technologyandhowtochangeblinkratepatterns.
FCC Part 15.21 Statement:
Changes or modications not expressly approved by the party responsible for compliance could void the user’s authority to operate
the equipment.
FCC / IC Statement:
This device complies with FCC Part 15 and Industry Canada licence-exempt RSS standard(s). Operation is subject to the following two
conditions: (1) this device may not cause harmful interference, and (2) this device must accept any interference received, including
interference that may cause undesired operation of the device.
ForPatentInformation:www.overheaddoor.com/patents,©2021,OverheadDoorCorp.
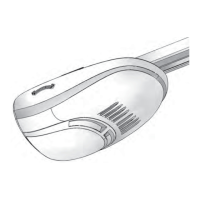
Rear
Screw Slot
Delay
Button
Door
Buttons
MOVING DOOR CAN CAUSE SERIOUS INJURY OR DEATH.
• DO NOTinstallwallcounselunlessthedooroperator’ssafety
devicesworkasrequiredbythedooroperator’smanual.
• WallConsolemustbemountedinsightofdoor,atleast5feet
aboveoorandclearofmovingdoorparts.
• Keep Door in Sightatalltimeswhendoorismoving.
• DO NOTallowchildrentoplaywiththeoperatorcontrols.
If safety reverse does not work properly:
• Close door then disconnect openerusingthemanualrelease
handle.
• DO NOTusetransmitterorcontrolsfordooroperator.
• RefertoDoorandDoorOpenerOwner’sManualsbefore
attemptinganyrepairs.
LEARN METHOD (RECOMMENDED PROGRAMMING)
ReviewChartAtondyourspecicationsandavailableprogrammingoptions.Eachbuttoncan
beprogrammedindividuallytooperateupto3dierentbrandsofgaragedooropenersandgate
receivers.
1. Removeactivationtabfrominsidebatterycompartment.
2. Findandremembertherequirednumberofbuttonpresses(ID#)intheLEARNMETHOD
columnnexttoyourbrands/specicationinChartA.
REMEMBER:For ID#4 Chamberlain®/LiftMaster®/Craftsman® Yellow Learn Button ONLY - move
immediately to instructions below. For all other ID#s, proceed to step 3.
3. PressandholddowntheDELAYbuttonuntilALL3BLUELEDsstartblinkingandthenrelease
(@5sec.)
4. PresstheDOORbuttonofyourchoicetherequirednumberoftimesfromStep1(ChartA).
TIP:Youmayprogramall3DOORbuttonsatonetimeifpreferred.TheDELAYbuttonpresswillsignal
completionforallbuttons.
5. PresstheDELAYbuttononetimetosignaltheentryiscomplete.
6. Ontheopener,presstheLEARN/PROGRAMbuttonfor2-3secondsthenrelease.
7. PresstheDOORbuttonyoujustprogrammedonceeverytwosecondsuntiltheopener
operates.
8. Whenthedoorstopsmoving,presstheDOORbuttonagaintotest.Programmingis
complete.
WallConsolesshouldbemountedatleast5feetfromoorinaconvenientlocationwithinsight
ofthegaragedoor.
• Removebatterycover,batteryactivationtabandbatteries.
Mounting to garage framing:
1. Markanddrilla3/32”pilotholefortheslottedmountscrew.SeeFig-A.
2. Installincludedscrewintopilothole,leaving1/8”gapbetweenthescrewheadandwall.
3. HooktheslottedmountonbackofWallConsoleoverthescrew.
4. Markanddrilla3/32”pilotholeforthescrewunderbatterydoor.
5. SecureWallConsoletothewall.(Donotover-tighten).
6. Reinstallbatteriesandbatterycover.
Mounting to drywall:
1. Drill3/16”pilotholeforslottedmountdrywallanchor.SeeFig-A.
2. Lightlytapdrywallanchorintoholewithahammeruntilushwithwall.
3. Installincludedscrewintoanchor,leaving1/8”gapbetweenthescrewheadandwall.
4. HooktheslottedmountonbackofWallConsoleoverthescrew.
5. Markpositionofpilotholeforthedrywallanchorunderthebatterydoorandremovewall
console.
6. Drilla3/16”pilotholeforthedrywallanchorunderthebatterydoor.
7. Lightlytapanchorintoholewithahammeruntilushwithwall.
8. SecureWallConsoletothewall.(Donotover-tighten).
9. Reinstallbatteriesandbatterycover.
STEP 3 - MOUNTING THE WALL CONSOLE
Clearing out the wireless wall console:
1. PressandholddownboththetopDOORbuttonandthebottomDOORbuttonatthesame
time.
2. WhenLEDonthemiddleDOORbuttongivestwolongblinksandgoesout-thenreleaseboth
buttons(@5seconds).
To initiate the DELAY feature on any DOOR button:
1.PressandreleasetheDELAYbuttononetimefor10seconds,twotimesfor15seconds,or
threetimesfora20secondDELAY.
2.PressandreleasetheDOORbuttonofyourchoice.Activationwillbedelayedby10,15or20
seconds.
NOTE: With this feature, an open door will delay on close. A closed door will delay on opening. Press
the same DOOR button again to cancel the activation.
STEP 4 - OPERATING THE WALL CONSOLE
NOTE:Safety sensor override operation will not work with this console.
Operating a Door:
1.Pressandreleasethedoorbuttonofyourchoice.Thedoorwillmoveupor
down.
NOTE: This will revert all buttons back to the factory setting of CodeDodger 1. For buttons that have
been programmed to a CodeDodger 1 unit, please refer to the operator instruction manual to clear the
powerhead.
ONLY for ID#4 Chamberlain®/LiftMaster®/Craftsman® Yellow Learn:
1. Removeactivationtabfrominsidebatterycompartment
2. PressandholddowntheDELAYbuttonuntilALL3BLUELEDsstartblinkingandthenrelease
(@5sec.)
3. PresstheDOORbuttonofyourchoicefourtimes.
TIP:Youmayprogramall3DOORbuttonsatonetimeifpreferred.TheDELAYbuttonpresswillsignal
completionforallbuttons.
4. PresstheDELAYbuttononetimetosignaltheentryiscomplete.
5. PressandholddowntheDOORbuttonyoujustchoseuntiltheredLEDinthetopbutton
blinksandgoesout(@5sec.)
6. Ontheopener,presstheLEARN/PROGRAMbuttonfor2-3secondsthenrelease.
7. PressthedoorbuttonyouchoseONEtime.Openerwillclick.
8. Ontheopener,presstheLEARN/PROGRAMbuttonagainfor2-3secondsthenrelease.
9. PressthedoorbuttonyouchoseONEtimeagain.Openerwillclickagain.
10.PresstheDOORbuttonagainandtheopenerwillactivate.
11.Whenthedoorstopsmoving,presstheDOORbuttonagaintotest.Programmingiscomplete.
Le présent appareil est conforme aux CNR d’Industrie Canada applicables aux appareils radio
exempts de licence. L’exploitation est autorisée aux deux conditions suivantes : (1) l’appareil
ne doit pas produire de brouillage, et (2) l’utilisateur de l’appareil doit accepter tout brouillage
radioélectrique subi, même si le brouillage est susceptible d’en compromettre le fonctionnement.
AVAILABLE PROGRAM METHOD
LEARN METHOD ID#
Brand Name Specication Notes
Number of
Button Presses (ID#)
Genie® 315/390MHz,Intellicode®I,1995-current 1
OverheadDoor® 315/390MHz,CodeDodger®I,1995-current 1
Chamberlain®
LiftMaster®
CraftsMan®
PurpleLearnButton,Security+®,2006-2014,315MHz 2
Orange/RedLearnButton,Security+®,1996-2005,390MHz 3
YellowLearnButton,Security+2.0®,2011-current,390MHz 4
GreenLearnButton,BillionCode®,1993-1995,390MHz 5
Genie® 315/390MHz,Intellicode®II,2010-2011 6
OverheadDoor® 315/390MHz,CodeDodger®II,2010-2011 6
Sommer® 310MHz,RollingCode 7
Linear® 318MHz,MegaCode® 8
WayneDalton® 372.5MHz,RollingCode,1999-current 9
Ryobi® 372.5MHz,RollingCode 10
Guardian® 303MHz,FixedLearnCode 11
Xtreme®brand 303MHz,FixedLearnCode 11
Marantec® 315MHz,FixedLearnCode 12
FAAC® 433.92MHz,RollingCode 13
*Chamberlain® 390MHz,9Switch/3PositionDipSwitch
*Stanley® 310MHz,10Switch/2positionDipSwitch
*Genie® 390MHz,9&12Switch/2PositionDipSwitch,1993-1995
*OverheadDoor®
390MHz,9Switch/3PositionDipSwitch,1993-1995
Forthesedipswitch
instructions,visit
www.overheaddoor.com*