06INSTALLATION
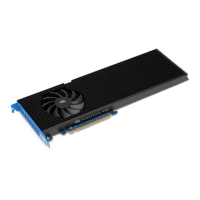
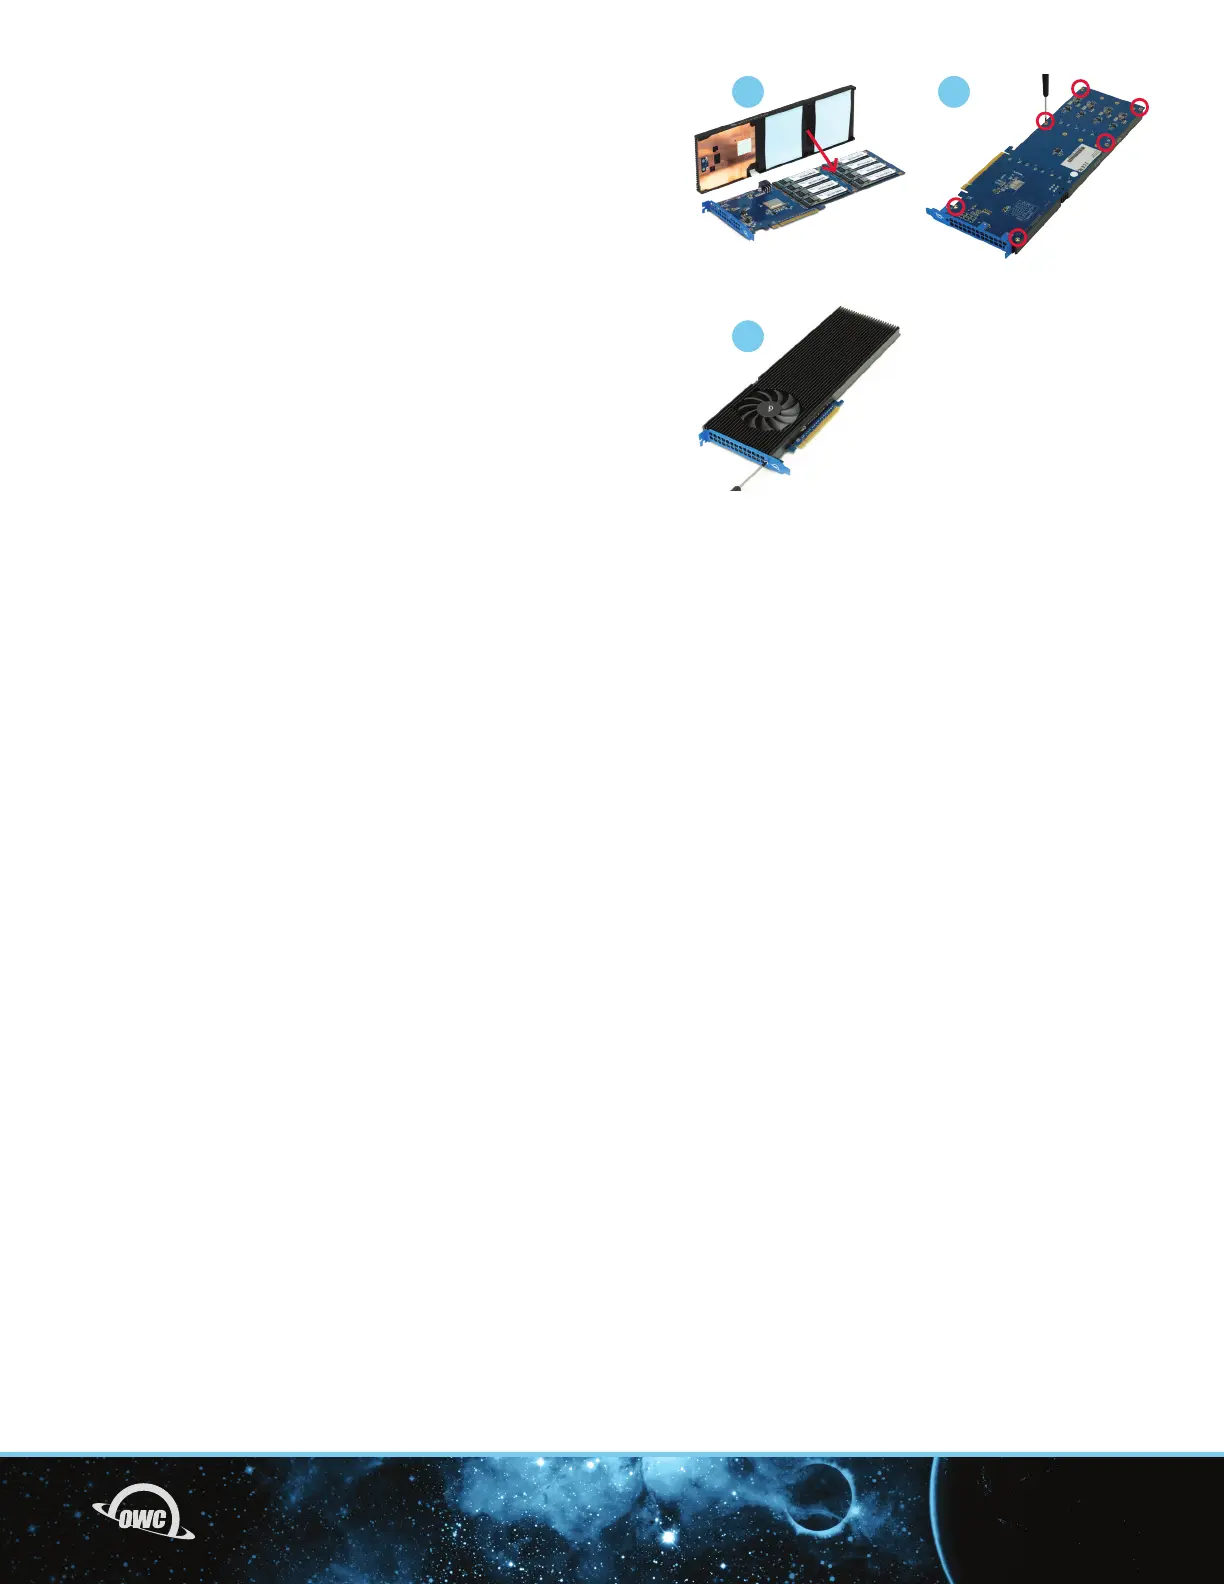
6. Set the PCIe card in front of you oriented as shown. Rotate
the heat sink so that the drives align with the thermal pads.
Next, carefully set the heat sink down on the PCIe card
so that the six screw holes on the heat sink are over the
corresponding holes on the PCIe card. You may need to
press the heat sink down with light pressure to ensure the
unit is flush.
7. Re-affix the two T8 screws that you removed in Step 2,
and affix the other four included T8 screws. If one or more
of the screws does not fasten or does so at a slight angle,
don’t apply extra force; the two components may not
be fully aligned. Remove the screw(s) then re-check the
applicable screw hole(s) on the PCBA PCIe card to make
sure you can see through to the corresponding holes on the
heat sink then try again.
8. Turn the card over with the PCIe bracket facing you and
re-affix the T8 screw that was removed in Step 1. Once
complete the drive is ready to install into the host computer
(see Section 2.2).
6 7
8