05INSTALLATION
INSTALLATION
2.1 ASSEMBLY (0TB CARD ONLY)
This section describes the process of installing drives into the OWC Accelsior 8M2. If you
purchased the OWC Accelsior 8M2 with drives pre-installed, please proceed to section 2.3
Mac & Windows Formatting. The Installation video can be watched by visiting
go.owc.com/accelsior8m2/install or by scanning the Install QR Code.
For maximum performance the recommended conguration is all identical drives installed
and congured as a RAID 0 using SoftRAID (license included with select solutions). The most
current version of SfotRAID cen be found by visiting:
softraid.com/support/download-lastest-version.
3 4
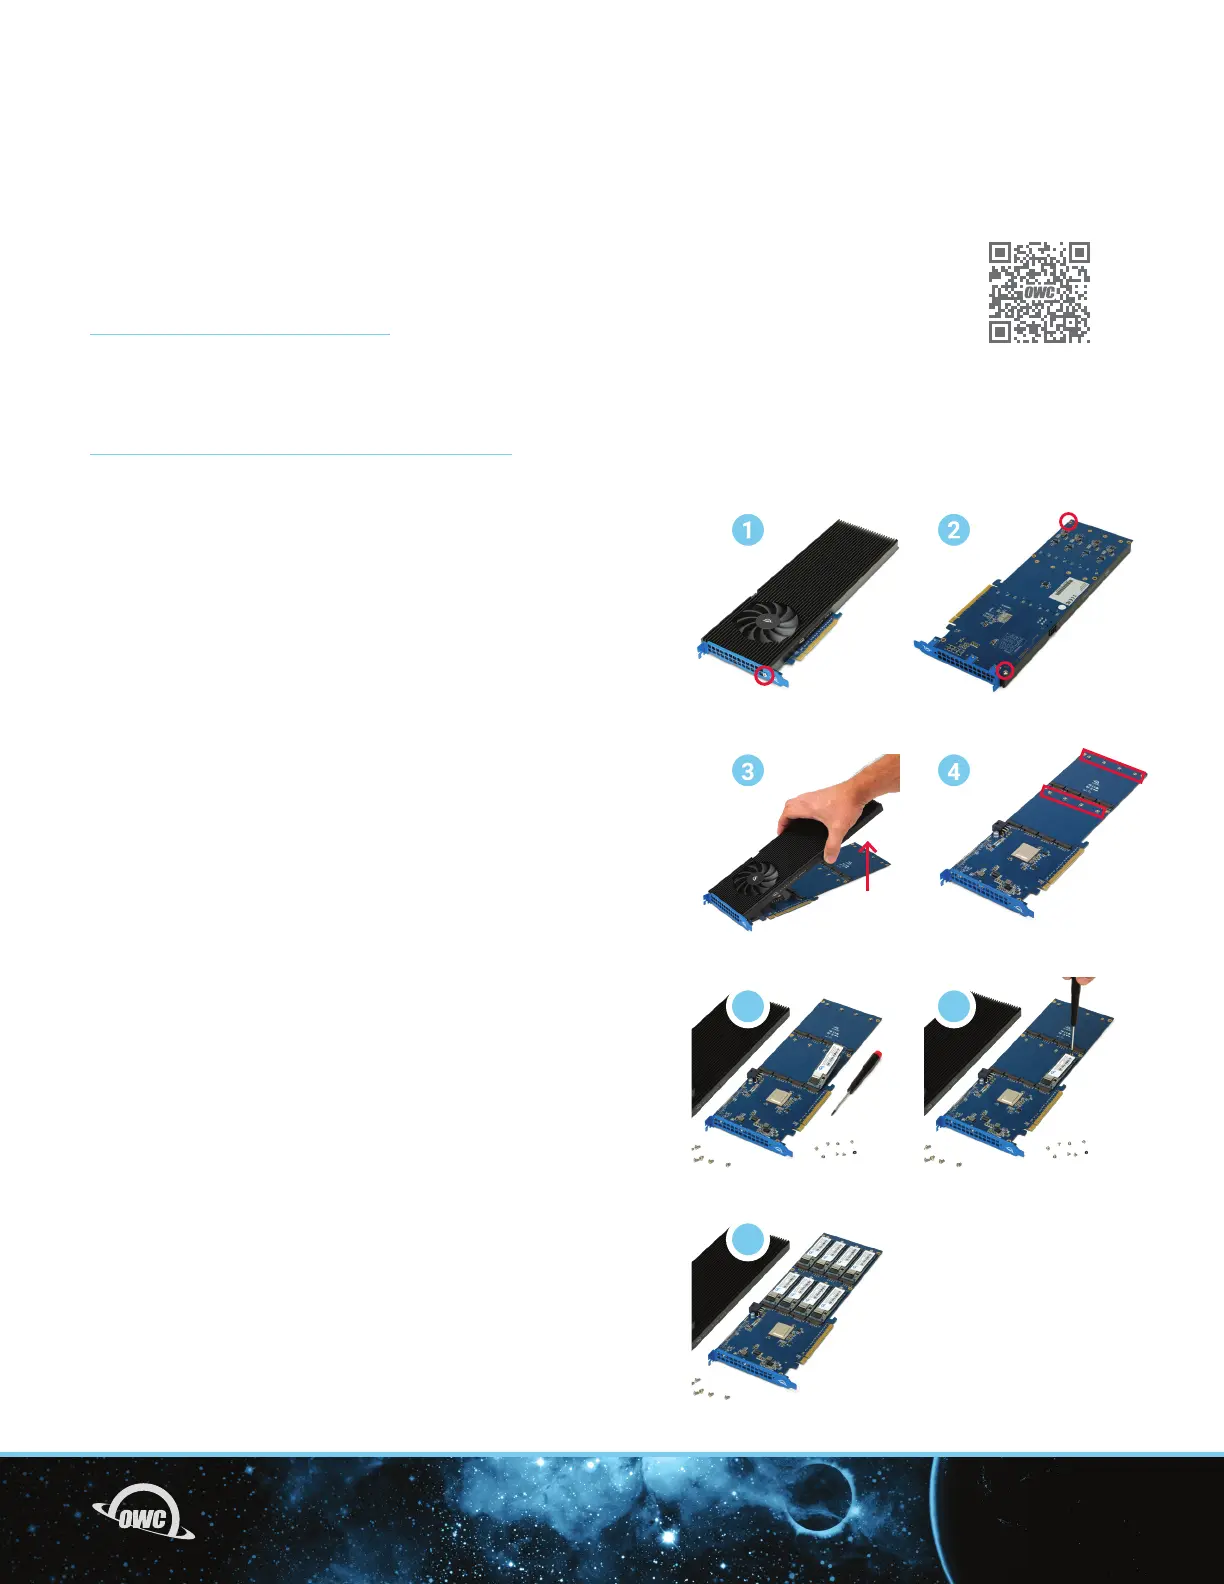
Required Tools: Torx T8 Driver & Phillips 1 Driver
1. Remove the device from its packaging and set
it on a flat work surface with the bracket facing you.
Remove the highlighted screw using a Torx T8 driver.
2. Carefully flip the device over and remove the two highlighted
T8 screws to loosen the connection with the heat sink.
3. Carefully separate the PCIe card from the black heat sink.
If you initially get more resistance than expected, don’t apply
extra force to separate them. Instead you can try to carefully
separate the pieces by opening them like a book.
4. Flip the card over so it is resting on the work surface with
the M.2 connectors facing up. Remove the eight highlighted
screws with a Phillips 1 driver.
5. Carefully align the first M.2 drive at a slight angle into
its connection (5a) and slide it forward until it snaps into
place. Only a modest amount of force is required; do not
force the drive if it does not snap into place. Re-align it
and try again. Once the drive is seated use one of the screws
from Step 4 to secure the drive (5b); you may need to hold
the drive down initially until you thread the screw onto the
post. Repeat this process for each M.2 drive you intend
to install. (5c)
NOTE: When installing M.2 SSDs in the Accelsior 8M2, you
may encounter some misalignment between the mounting
point on the SSD and the mounting post on the Accelsior
8M2. You can still secure the SSD to the Accelsior 8M2,
however the mounting screw may sit slightly higher than the
others after installation. This will not affect performance or
stability of the SSD. If desired, you can also reduce the height
mismatch by pushing the drive toward the drive connector
while installing the mounting screw.
5a
5c
5b