04INSTALLATION
INSTALLATION
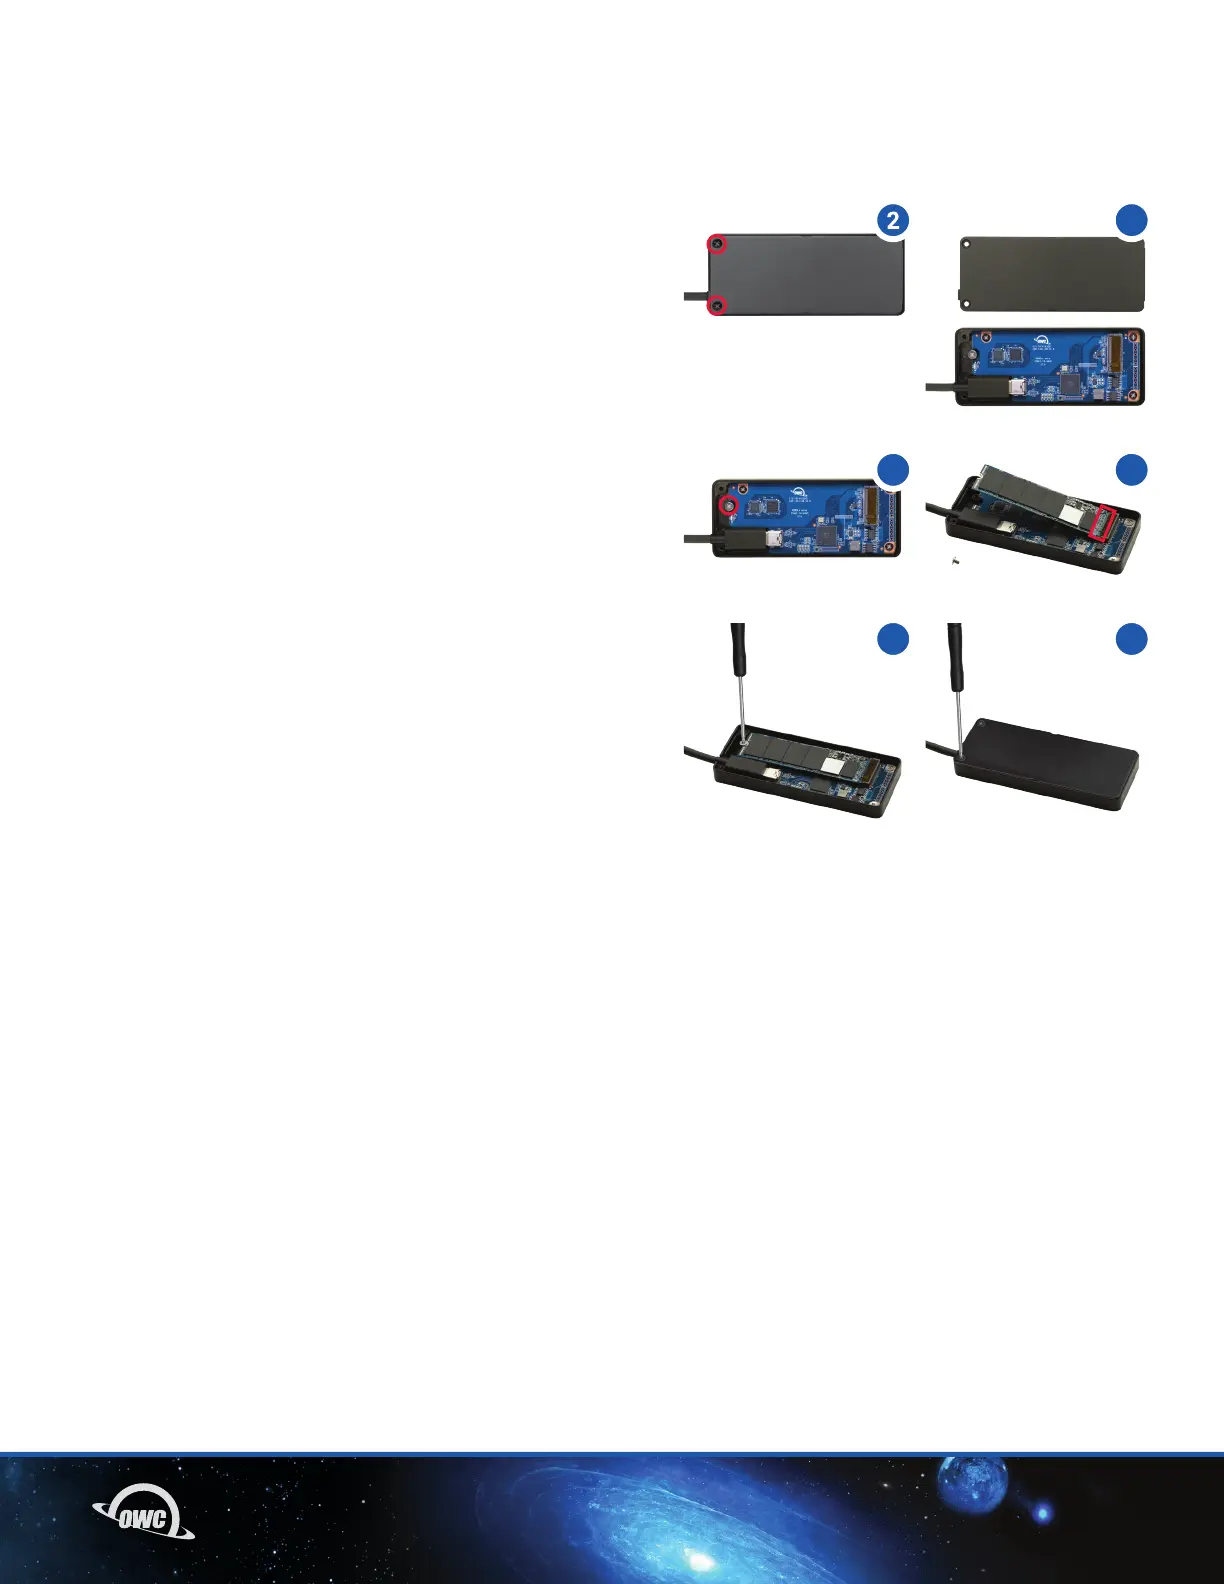
2.1 M.2 DRIVE INSTALLATION
Unlike other M.2 enclosures, the Envoy Express ships in a 0GB
conguration, allowing you to install your preferred NVMe M.2
SSD, for use with your Mac or PC. Follow the steps below to
install the drive into the enclosure.
1. Remove the enclosure from the box and place it top-side
down on static-free surface.
2. Remove the two Phillips screws (highlighted) on each
side of the integrated cable, then set them aside.
3. Lift the bottom cover off the chassis and set it aside.
4. Remove the Phillips drive mount screw at the top
of the PCBA (highlighted).
5. Take the NMVe M.2 SSD, align the M-key contacts with
the M.2 slot on the PCBA (highlighted), then carefully seat
the drive in place. Minimal force is required. If the drive
will not seat, do not apply more force. Remove it, re-align
the contacts and M.2 slot then try again.
6. Hold the opposite side of the M.2 drive down so that the
notch on the top of the drive aligns over the drive post, then
re-affix the screw you removed in Step 4 to hold the drive
in place.
7. Set the bottom cover back on the chassis, aligning the
two screw holes at the top with the corresponding holes
in the chassis, then re-affix the two screws you removed
in Step 2.
7
3
4
5
6