05INSTALLATION
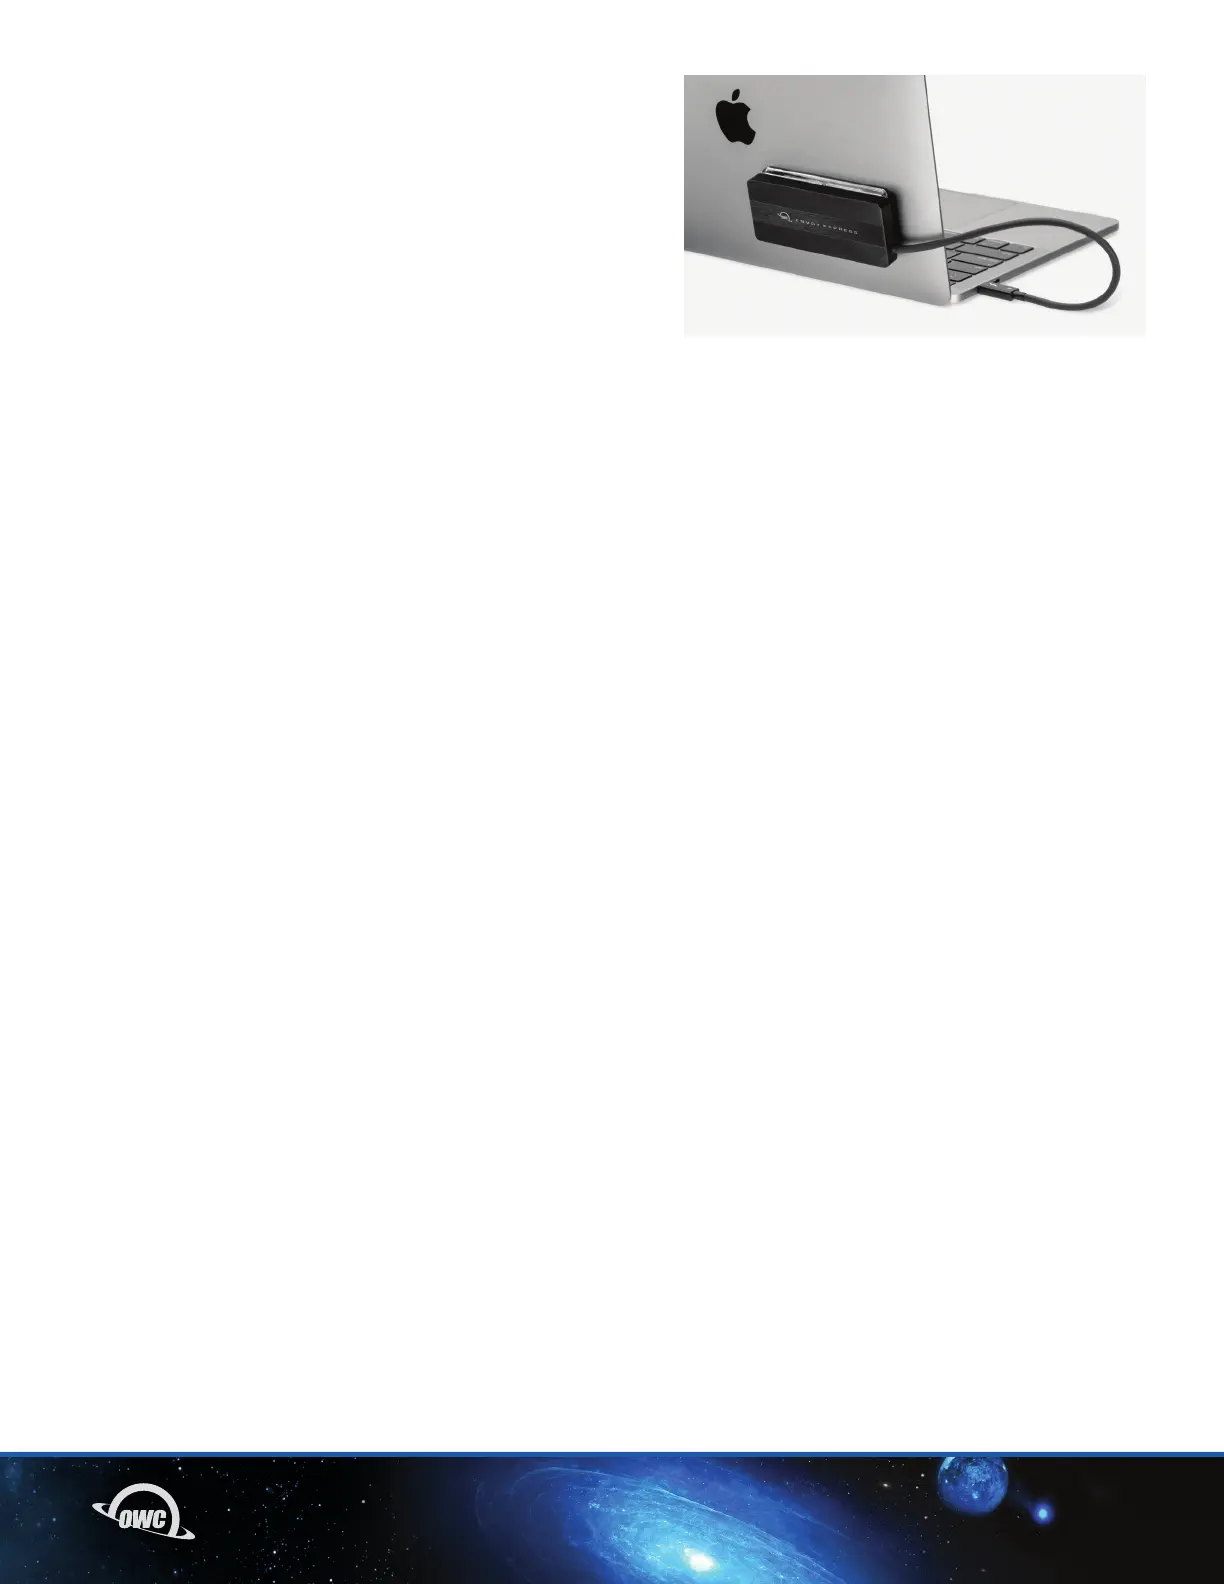
2.2 USING THE ENCLOSURE BRACKET (OPTIONAL)
If you would like to have the Envoy Express attached to the
back of your laptop cover (for example to conserve space
on your desk or while using the device on an airplane), you
can use the included surface-safe removable drive slide
mount to accomplish this.
1. Make sure the area on the laptop cover where you will
attach the drive mount, is clean and dry.
2. Remove the plastic backing from the adhesive strip
on the drive mount.
3. With the laptop cover closed, align the drive mount over
the area you would like it to be, then carefully press it down
against the back of the display. Minimal force is required.
4. Note the bottom of the Envoy Express has beveled edges;
these act as grooves when used with the drive mount. Align
the edge of the enclosure with the inner edges of the drive
mount, and slide the enclosure until it is fully in place.
2.3 USAGE NOTES AND LIMITATIONS
- SATA-based M.2 drives will not work in this enclosure.
- Note that the initial shipping version of this device does not
include a drive activity LED.