EasyManuals Logo

OWC Mercury Elite Pro Dual User Manual

OWC Mercury Elite Pro Dual
16 pages
To Next Page IconTo Next Page
To Previous Page IconTo Previous Page
Page #10 background imageLoading...
Page #10 background image
MERCURY ELITE PRO DUAL
DEVICE SETUP
8
8. Once you have determined the correct
orientation, slide the inner chassis back
into the outer enclosure, as shown to
the left.
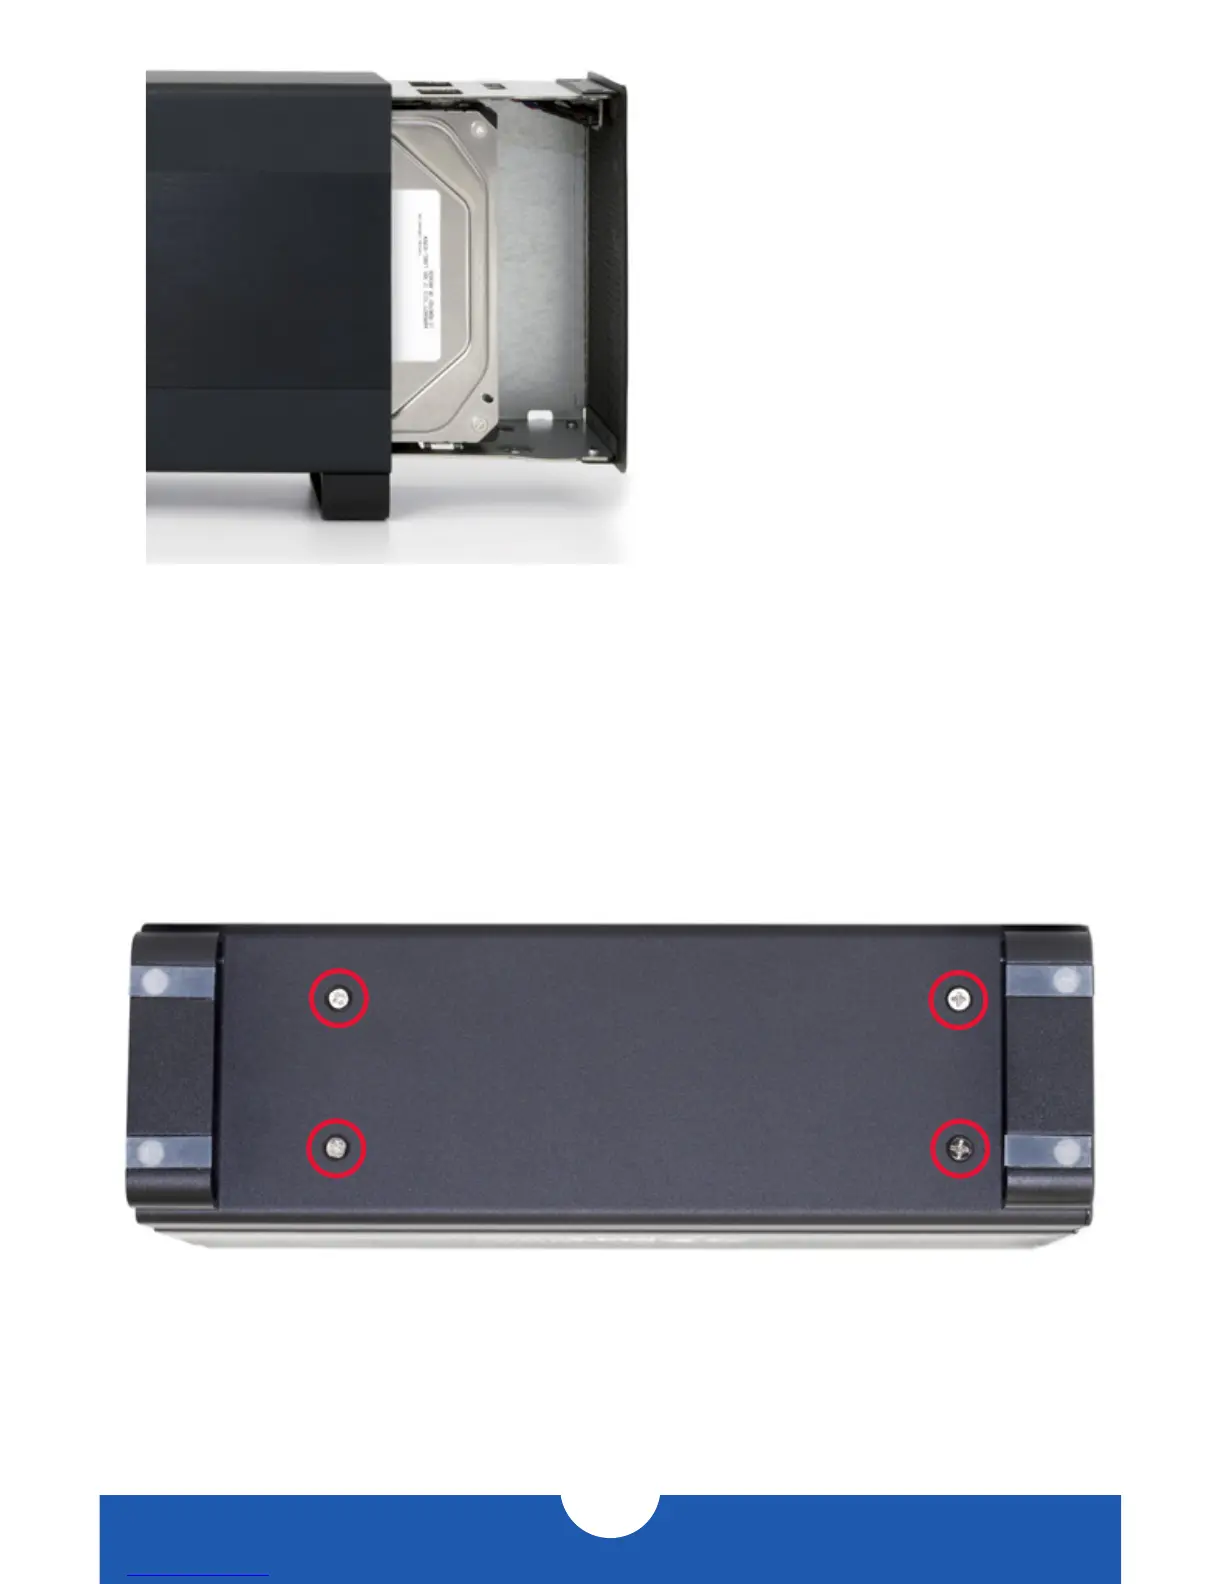
9. Once the front grill of the inner chassis sits flush with the edge of the outer enclosure, turn
the Mercury Elite Pro Dual on its side again to look at the screw holes on the bottom. You
should be able to see that the screw holes in the outer enclosure line up with the screw
holes in the inner chassis. Use the four smaller screws to fasten the inner chassis to the
outer enclosure, as shown below.
The assembly of the Mercury Elite Pro Dual is now complete.

Other manuals for OWC Mercury Elite Pro Dual

Questions and Answers:

Question and Answer IconNeed help?

Do you have a question about the OWC Mercury Elite Pro Dual and is the answer not in the manual?

OWC Mercury Elite Pro Dual Specifications

General IconGeneral
Hot-swapYes
RAID levels0, 1
Storage drive size3.5 \
Total storage capacity8000 GB
Number of storage drives supported2
InterfaceThunderbolt
Product colorAluminum
Storage temperature (T-T)-40 - 65 °C
Operating temperature (T-T)5 - 42 °C
Storage relative humidity (H-H)5 - 95 %
Operating relative humidity (H-H)8 - 90 %
Cache internal128 MB
Weight and Dimensions IconWeight and Dimensions
Depth228.6 mm
Width71.2 mm
Height133.4 mm

Related product manuals