Device Setup
4
5
6
7
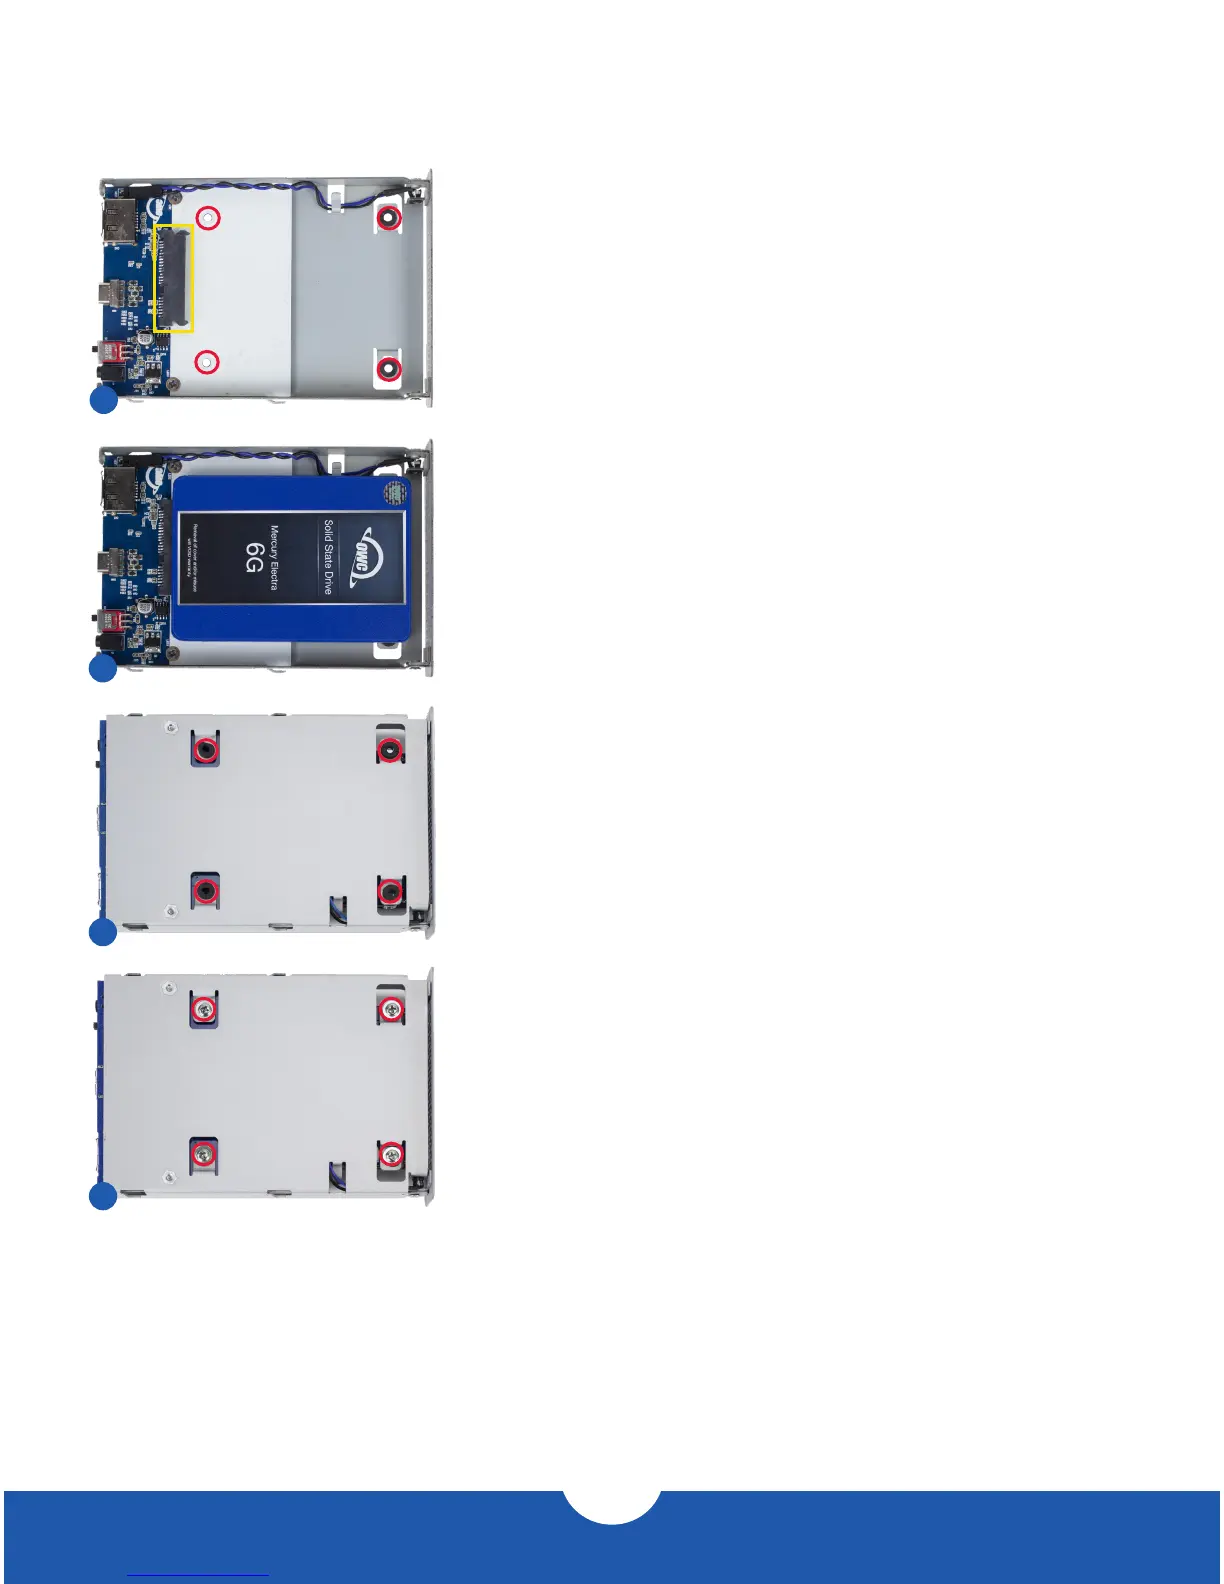
4. Note the SATA connector on the inner chassis (highlighted in
yellow). There are also four screw holes circled in red — two
through the metal chassis on the right and two through the
circuit board and chassis on the left.
5. Place the drive in the inner chassis as shown, then slide the
drive into the SATA connector on the circuit board. Make sure
the drive is fully seated before proceeding.
6. Use one hand to hold the drive in place, then turn over
the inner chassis. Note the four screw holes with rubber
grommets, circled in red.
7. To ax the drive to the inner chassis, insert the four screws
(included) into the screw holes, then fasten them using a
Phillips driver. When this is done, turn over the inner chassis.

 Loading...