OWC MERCURY ELITE PRO
INTRODUCTION
2
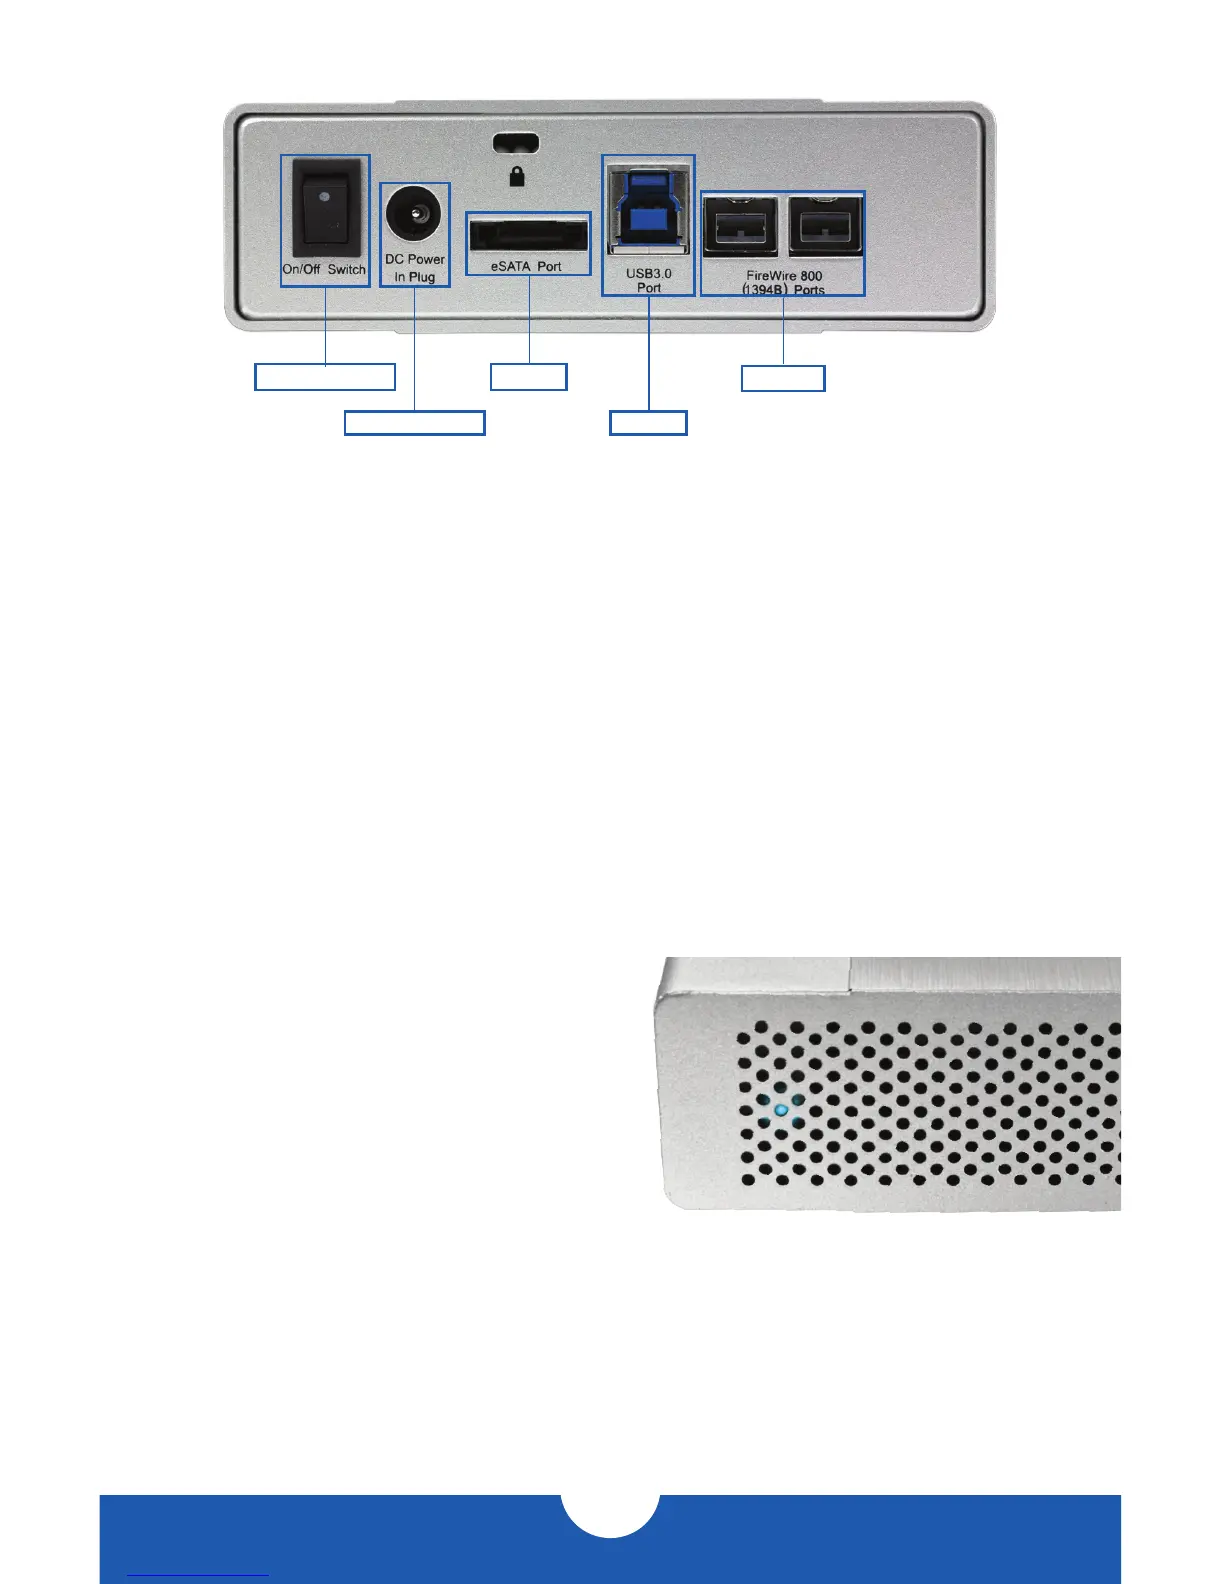
1.4 REAR VIEW
1.4.1 Connection
1. Plug the power supply into a power outlet and into the OWC Mercury Elite Pro.
2. Connect the FireWire 800, USB 3.0, or eSATA cable – appropriate for the interface that
your computer supports – into the drive and computer.
NOTE:
•Only one interface (FireWire 800, USB 3.0, or eSATA) at a time can be used.
•For the safe removal of your drive and to assure that no data is lost, always unmount the
drive from your operating system before powering off.
•In order for the computer to access volumes larger than 2TB, the operating system
needs to support large volumes (e.g., Windows Vista or Mac OS X 10.4 and above).
1.5 LED INDICATOR
The OWC Mercury Elite Pro has a blue LED at the
front of the enclosure. The LED emits a solid blue
light when the unit is powered on, and it flashes
during hard drive activity.
1.6 PRECONFIGURED
To help get things up and running quickly, the hard drive in your OWC Mercury Elite Pro has
already been formatted. For formatting information, including how to format your OWC
Mercury Elite Pro for Mac or Windows, go to: h t t p:// www.macsales.com/format
Power Input
eSATA
USB 3.0
FW800
On/O Switch

 Loading...


